
Yaesu FT-817ND HF / VHF / UHF All Mode Transceiver
I was looking for ways to be more active in ham radio when I read an article on some of the newer digital modes like JT-9 and JT-65 and it sounded like just the ticket. So I decided it was time for an old tube guy to get a modern, digital transceiver. I did some research online and settled on the Yaesu FT-817ND as perfect for my needs. To save some money I searched for used equipment and found a nice FT-817ND from Universal Radio at a good savings over a new unit. And it had been fully checked by a technician, came with a 60-day warranty and was packed in the original box with all accessories included.
|
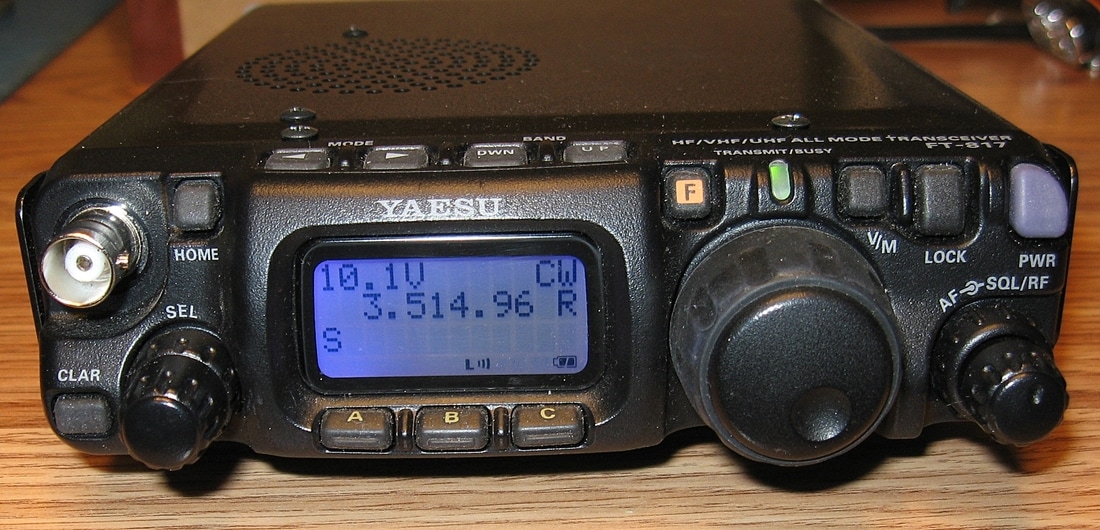
My new to me FT-817ND. It's in close to new shape with just some minor scuffs on the bottom because no one had added the rubber feet to the bottom front. I took care of that.
|
|
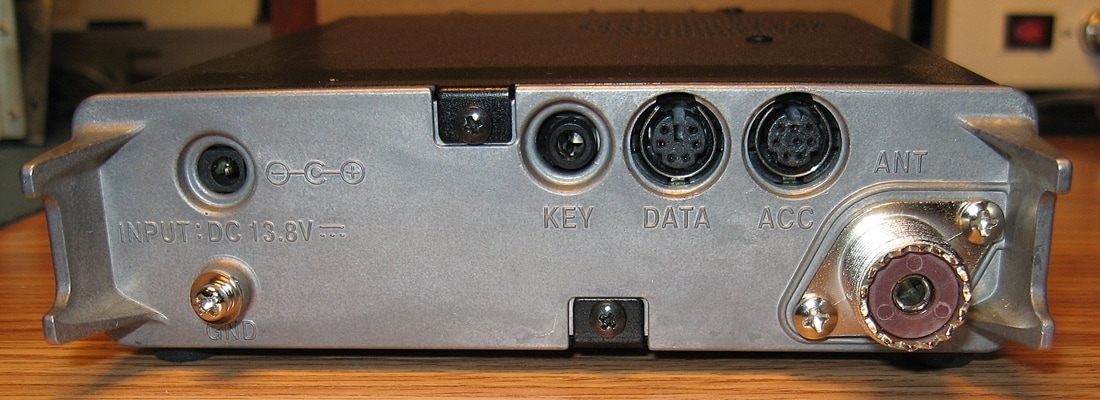
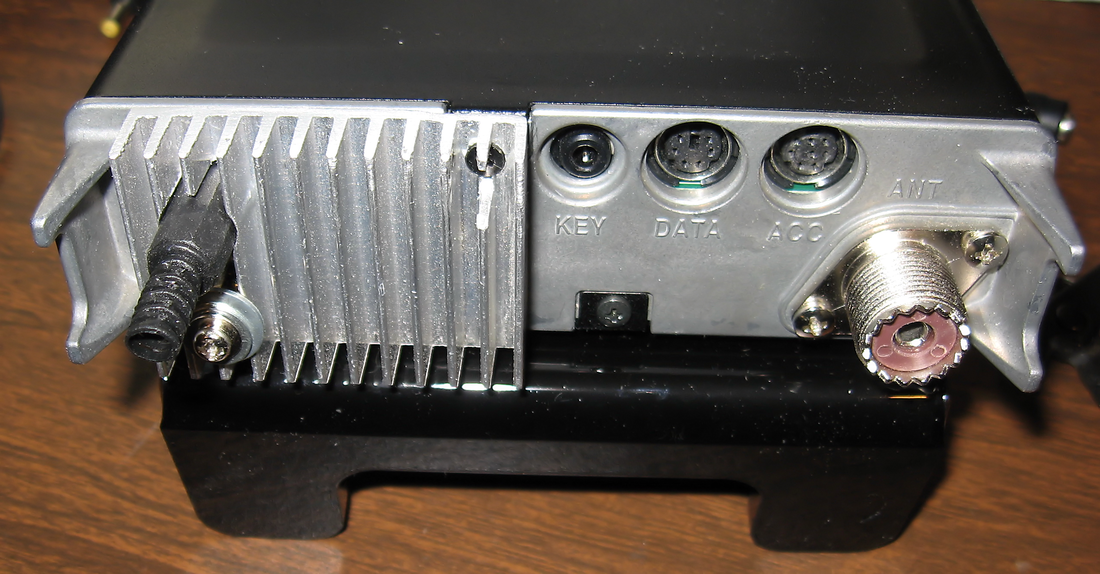
The rear of the transceiver. The SO-239 is by default the HF antenna connection point and the VHF/UHF antenna connects to the BNC on the front, but both can be changed in the radio options.
|
|
|
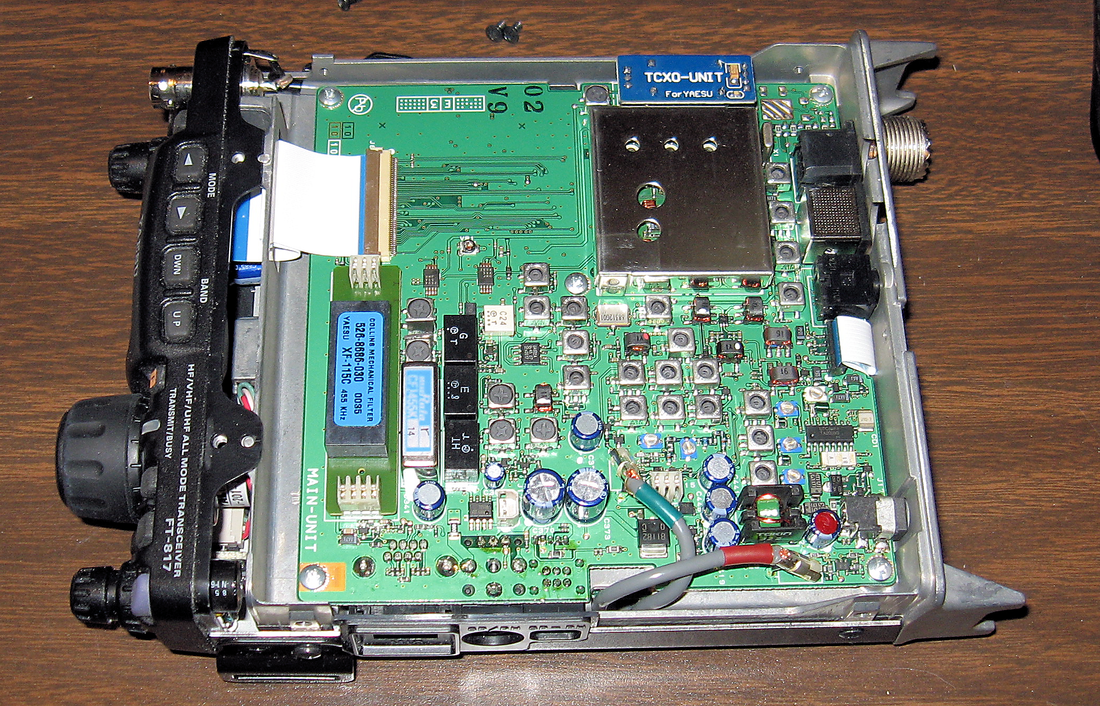
The FT-817 comes standard with a 2.7 KHz Murata ceramic filter installed. But there is also space to add either an SSB or CW mechanical filter. You can only add one and I chose a CW filter. I installed a 500 Hz filter that I picked up for about half price online. To me the CW filter seemed the best compromise since the radio can still use the 2.7 KHz ceramic filter for SSB. The ceramic filter doesn't have skirts as steep as a mechanical filter but it will have to do.
|
When Was This Thing Made?
Since this is a used radio I was trying to decipher the manufacture date. There's lot of advice online on how to read the date code in the serial number, but some of it is contradictory and apparently just plain wrong. The first 4 characters of my radio's serial number are 6I69, that's 6"eye"69. The first digit is the year and the second is the character for the month (I=July).
As best as I could determine the basic serial number format is YMLLUUUU where:
- Y is the last digit of the year
- M is a letter for the month (starts with C for January)
- LL is the lot number
- UUUU is the unit ID from that lot
I found a lot of contradictions online such as one person claiming the lot number and unit ID were each three digits, but I found a lot of radios listed with 4-digit unit ID's, so I ignored this one. Another site claims the lot numbers are contiguous and don't reset with the year, which doesn't jive with other sites where owners list their serial numbers, some with later years and lower lot numbers than others with older units and higher lot numbers.
And because only the last digit of the year is listed, and the FT-817 has been manufactured for over a decade, it's sometimes ambiguous in which decade the radio was made. The same site that claimed lot numbers were contiguous also claimed a higher lot number would indicate a later year, but that doesn't match with posted serial numbers or my serial number. So I'm sticking with the basic format of YMLLUUUU.
The year of manufacture can also be estimated by looking at the date codes on the electrolytic capacitors in the radio and also the copyright date on the original user manual. The electrolytics in my radio have codes of 1609 and 1616. And my original manual is copyright 2016.
So this radio was manufactured in July 2016.
Adding a Heatsink For Digital Use
The 817 Power Amp is not designed for 100% duty cycle, but some digital modes run the amp continuously for several minutes at a time, potentially generating a lot of heat. I saw a video on YouTube from another ham explaining some of the heat issues and showing his simple solution: clip a heatsink temporarily to a rear fin of the 817. I wanted a more permanent solution and set about seeing how I could add a heatsink directly to the rear of the radio where the power transistors are located. The real challenge was how to make this a permanent mod without actually modifying the transceiver itself in any way.
|
A bottom view of the Transceiver. While it would be possible to drill and tap mounting holes in the rear panel for a heatsink, I did not want to permanently modify the transceiver and potentially lower its resale value. And drilling holes in a nice clean rig seems like a good way to do that.
|
|
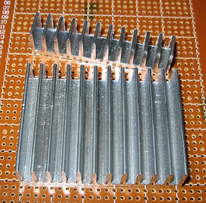
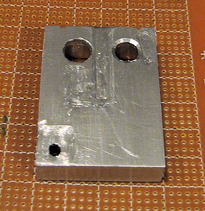
I found a heatsink online and cut it down to fit the rear of the 817. The dimensions I used are 2"W x 1.5"H x 1/2"T.
|
|
|
After trimming the heatsink I measured and marked the locations of the power plug, ground screw and back top lid mounting screw onto it.
|
|
|
I drilled the holes so the heatsink would fit over the ground screw protrusion and sit flush on the back of the radio, while still allowing access to the power connector. I also drilled a hole that matches up with the top rear cover screw. The fins around this hole were trimmed back with a dremel so the screw head would slide in.
|
|
|
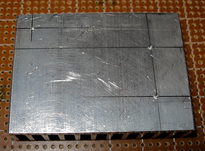
The only issue with fitting the heatsink flush with the back is the raised lettering on the rear of the radio. I'll have to cut recesses into the heatsink to match where the lettering protrudes so it will sit flush on the back.
|
|
|
I don't have a mill so I had to use a dremel tool and jewelers files to carve out the back of the heatsink where the lettering is located. I ended up with some crude-looking milling but fortunately it won't be seen once the heatsink is mounted.
I also recessed around the top lid mounting tab area to make sure the lid tab would still slide in behind the heatsink. |
|
|
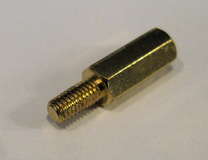
The next problem to solve was how to mount the heatsink without drilling any new holes. A small standoff with the same metric thread as the ground screw was the solution. I cut down the standoff so when screwed into the ground screw hole on the radio it stands higher than the heatsink fins by slightly less than a flat washer thickness. This is so I could place a flat washer around the standoff and apply pressure to the washer, and thus the heatsink, by tightening down the ground screw.
|
|
|
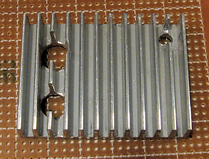
After applying heatsink grease to the back, the original ground screw with its washer, plus the flat washer that fits around the standoff, is used to secure the heatsink on the lower left. This still leaves the ground screw usable for its intended purpose.
The top lid rear mounting screw secures the upper right side of the heatsink. The original lid screw was too short so I scrounged up a longer metric screw. The original screw was bagged and stowed away in the radio's packing box. |
With the new heatsink in place the transceiver better dissipates excess heat. And, as an added bonus, the heatsink also helps protect the power connector from strain and stress. If I ever get time I'll graph temperature changes over time as the radio operates in digital modes.
|
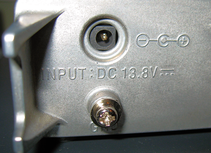
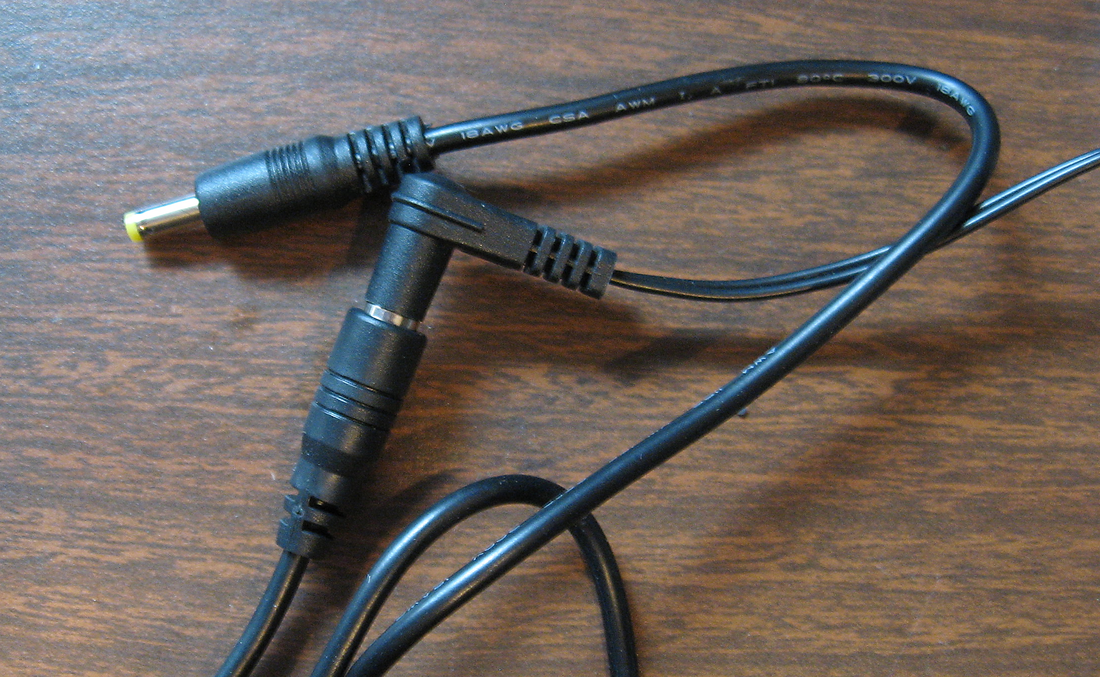
One final issue is the right-angle power plug on the Yaesu power adapter will no longer fit into the back of the radio. It's not much of a problem since I'm building an adapter cable to add a fuse to the DC line and it will use a straight plug. The Yaesu plug is a 4.0x1.7mm coaxial connector.
Another option is this extension cable with a straight plug that's available ready-made online for just a few bucks. |
|
Page created 4/29/2017
Last update 5/18/2022
Last update 5/18/2022
