
MSO Observatory

A July sunset. The latest panorama of observatory construction.
|
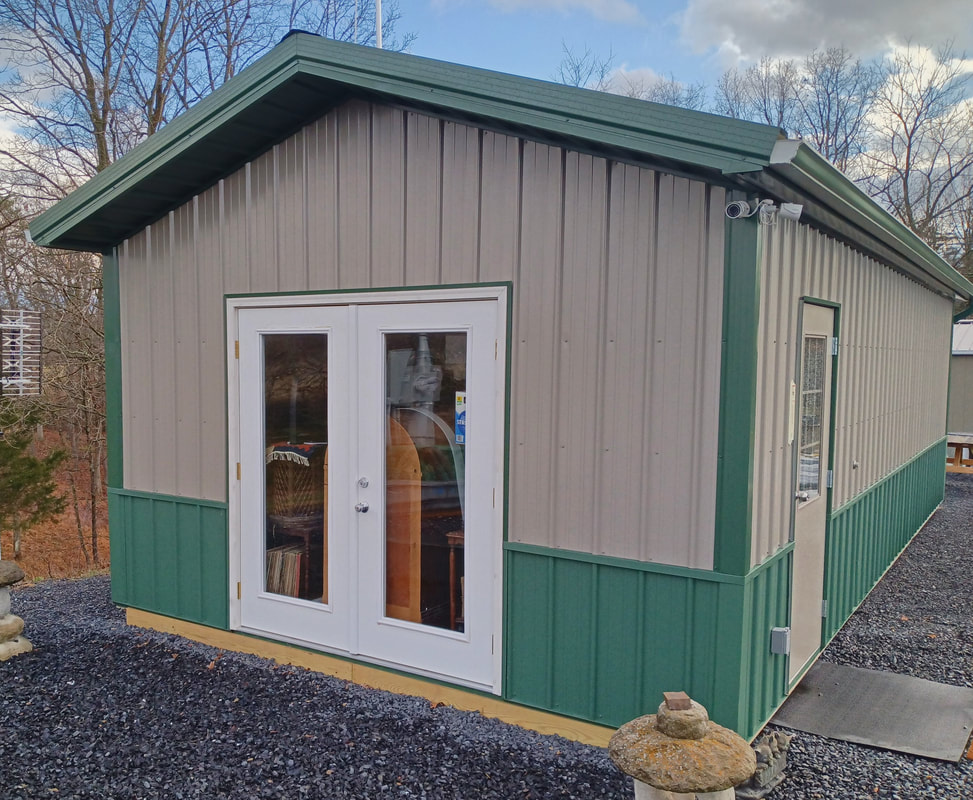
The first step in building the observatory was finishing out the interior of my 14x30 metal building on site. It houses my electronics lab, plus all my other hobbies, and will serve as the warm room for the observatory control and image processing computers. I installed a gigabit network from the fiber Internet connection in the house, and also added a line to a gigabit switch in the garage, where the underground conduit from the observatory about 250 feet away terminates.
The network server and workstations are up and running and most of the astronomy-related software is installed. I've started integrating the equipment and configuring the control software for the mount, cameras, focuser, and filter wheel in the comfort of the lab during my spare time. |
I am basically working alone, so it's going to take some time for me to finish the dome. Plus I can only go as fast as funds will allow.
|
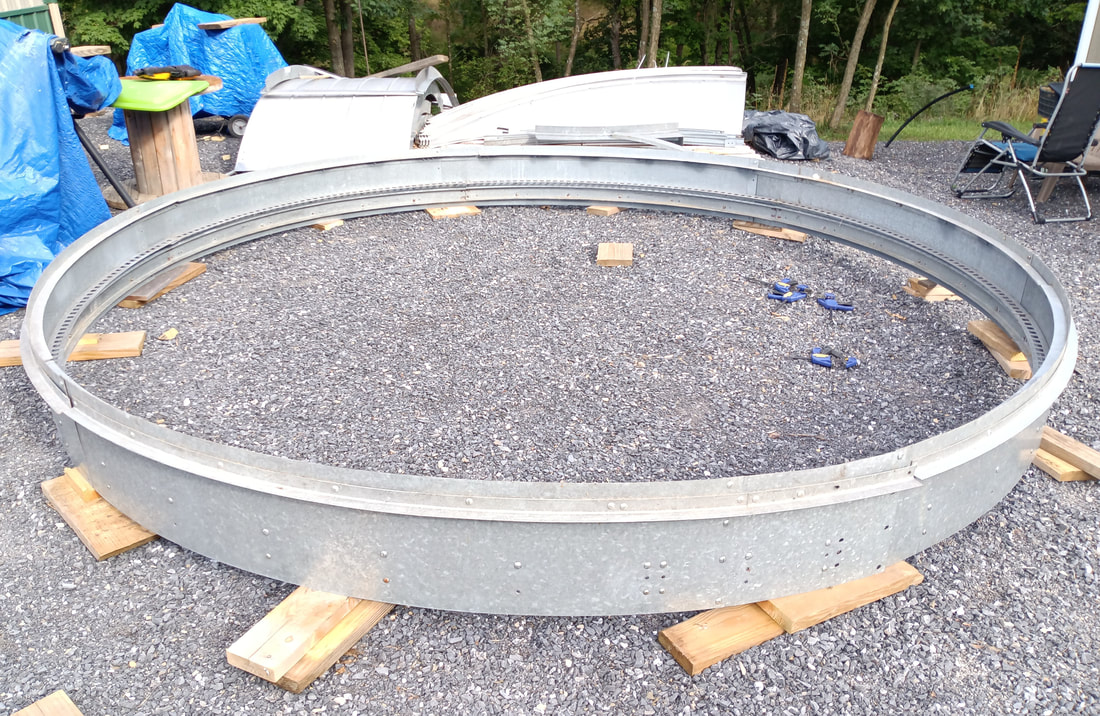
The Lancaster Dome is still waiting to be assembled. I've decided to build it directly on the observatory building to save time and money. I don't have detailed drawings or an actual assembly manual from Lancaster, so the base ring was assembled to confirm accurate dimensions for drawing up the building and wheel base. This dome appears to be based on an Ash dome, and I do have a copy of an Ash dome manual for reference.
|
Building the dome in place on top of the obs walls, instead of on the ground, will probably make the work of cutting the aperture and fitting the panels harder, but if it was built on the ground a crane would be needed to place it on the building, or it would have to be disassembled and then reassembled again to get it up there.
|
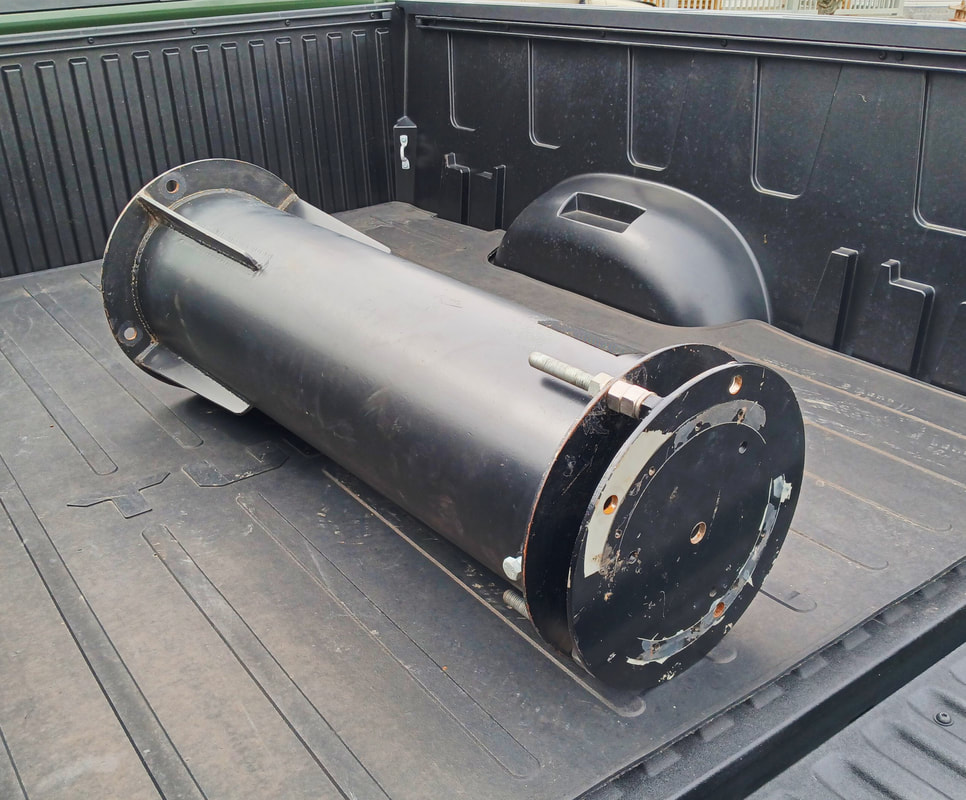
I found a used steel pier listed on AstroMart that was about an hour-and-a-half from my house. It's 10" in diameter, a minimum 39" tall, but is adjustable, and has a 13" diameter top plate. The tube is 3/8" thick and the top, bottom and adapter plates, and the ribs, are all 1/4".
Speaking of AstroMart, I no longer use their site to buy equipment after my account was deleted without explanation a few months back. I tried contacting the admins but they would not answer my emails. I have also read others people's tales of similar things happening to them. Over the years I've purchased a lot of astro gear on their site, but I'm done with them and if I need something in the future I'll just go to Cloudy Nights Classifieds instead. |
|
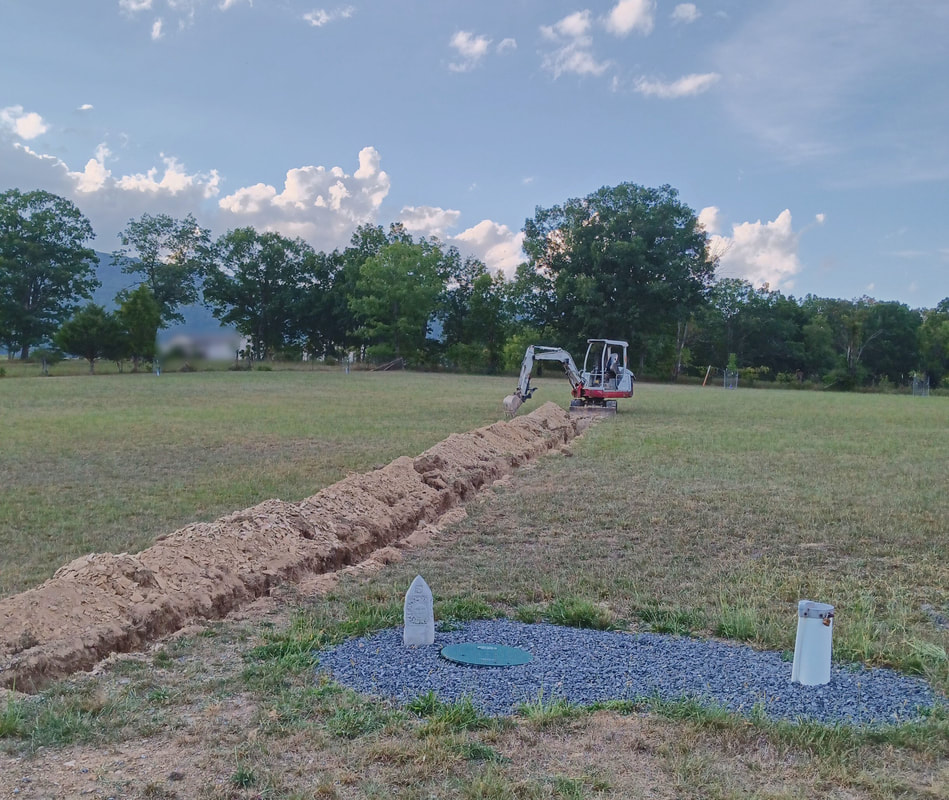
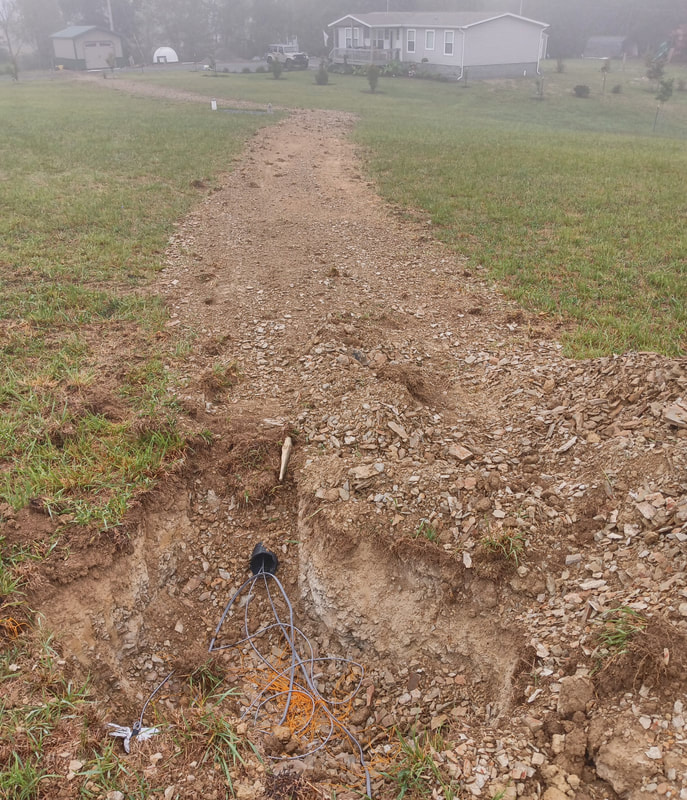
Summer is almost over but finally there's some progress on the new obs building. Power and Internet cables were run out to the field in conjunction with running a new water line from our well to the garden beside the new garage.
Power and a CAT5e cable were also trenched in from the lab building to the new garage where an Ethernet switch will connect the observatory into the network. |
|
|
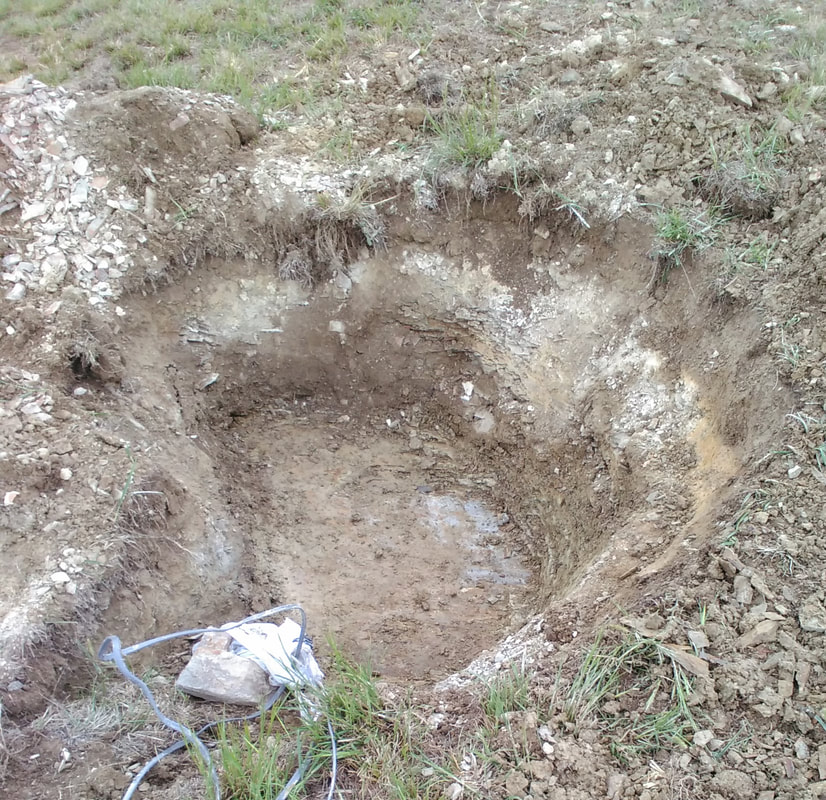
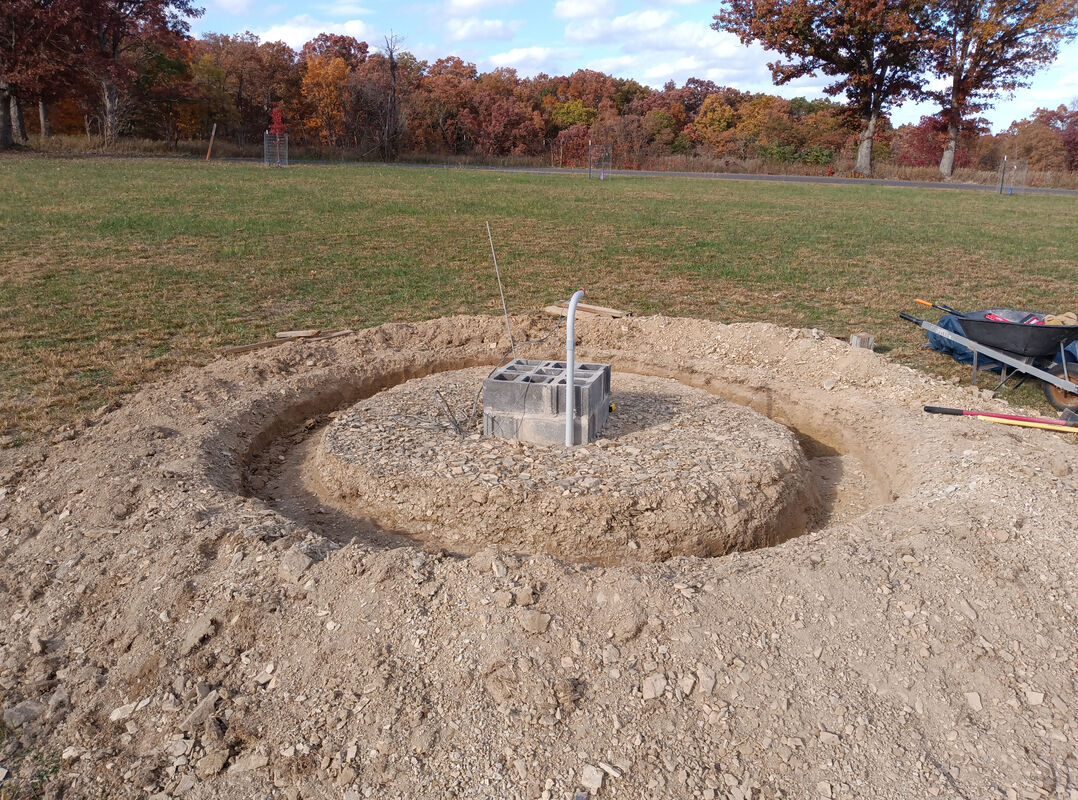
The beginning of a hole for the pier was also dug by the backhoe and cleaning it out to pour a concrete pier base is next.
The ground on this site is a thin covering of soil and clay over layers of shale rock. The soil and clay are about a foot to a foot-and-a-half thick and then transitions to the bedrock layers of shale. The pier hole was dug down into the shale with the backhoe, so the bottom in the photo is on a horizontal layer of shale at around 2-1/2 feet deep.
The ground on this site is a thin covering of soil and clay over layers of shale rock. The soil and clay are about a foot to a foot-and-a-half thick and then transitions to the bedrock layers of shale. The pier hole was dug down into the shale with the backhoe, so the bottom in the photo is on a horizontal layer of shale at around 2-1/2 feet deep.
|
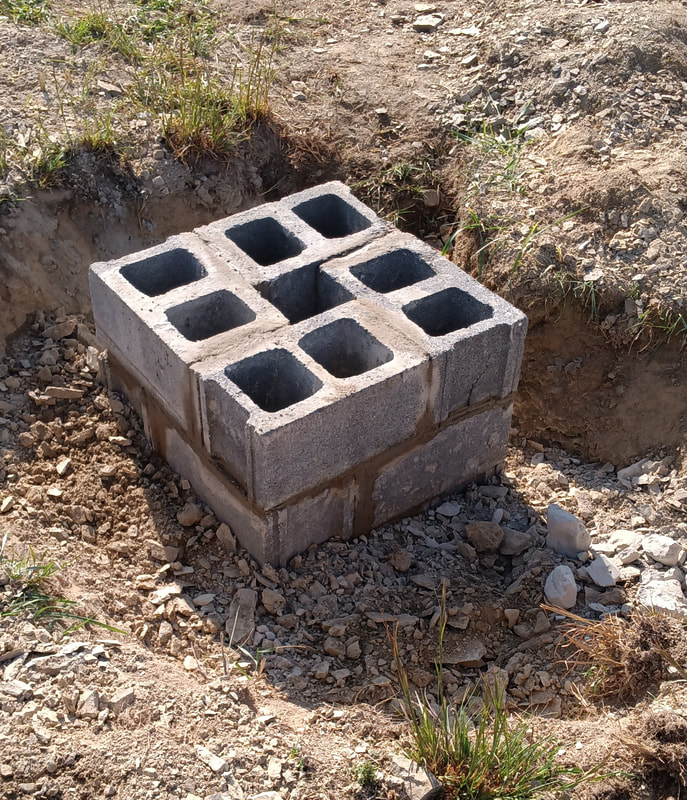
A reinforced concrete pad was poured on top of the shale, and concrete block forms the 26" square pier base. These are 10" concrete block and in the end will be filled with cement to make a solid base. A concrete cap will be poured on top and the steel pier will mount on four J-bolts set into it.
|
|
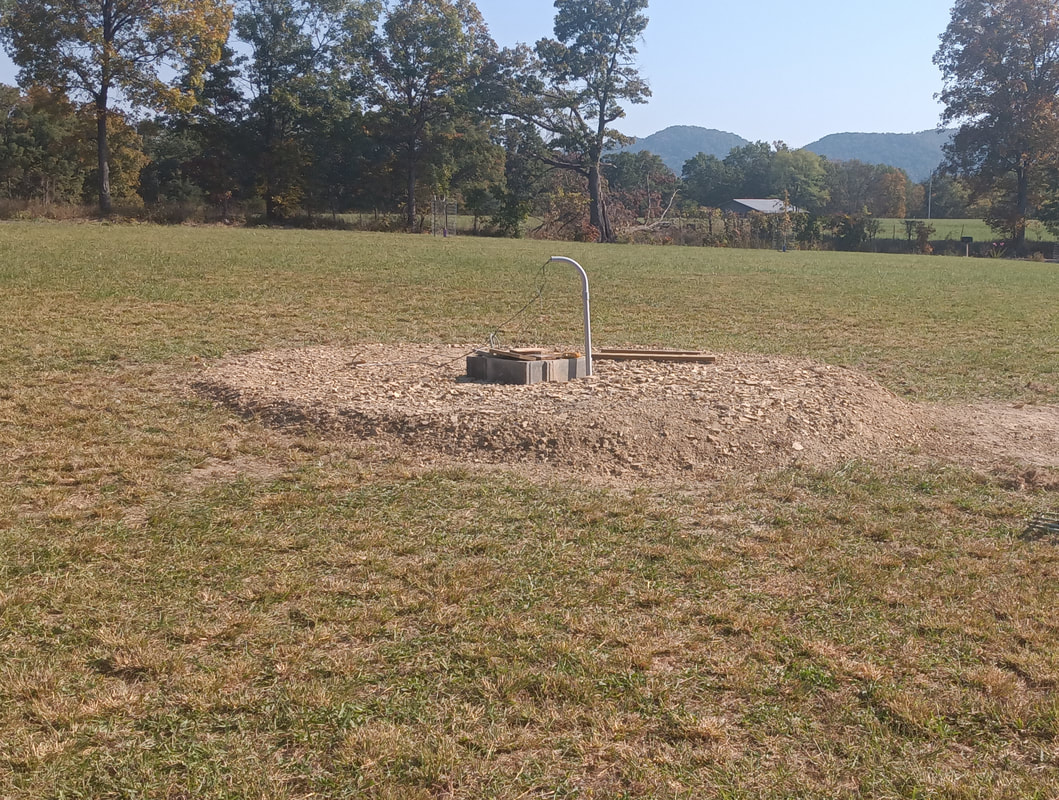
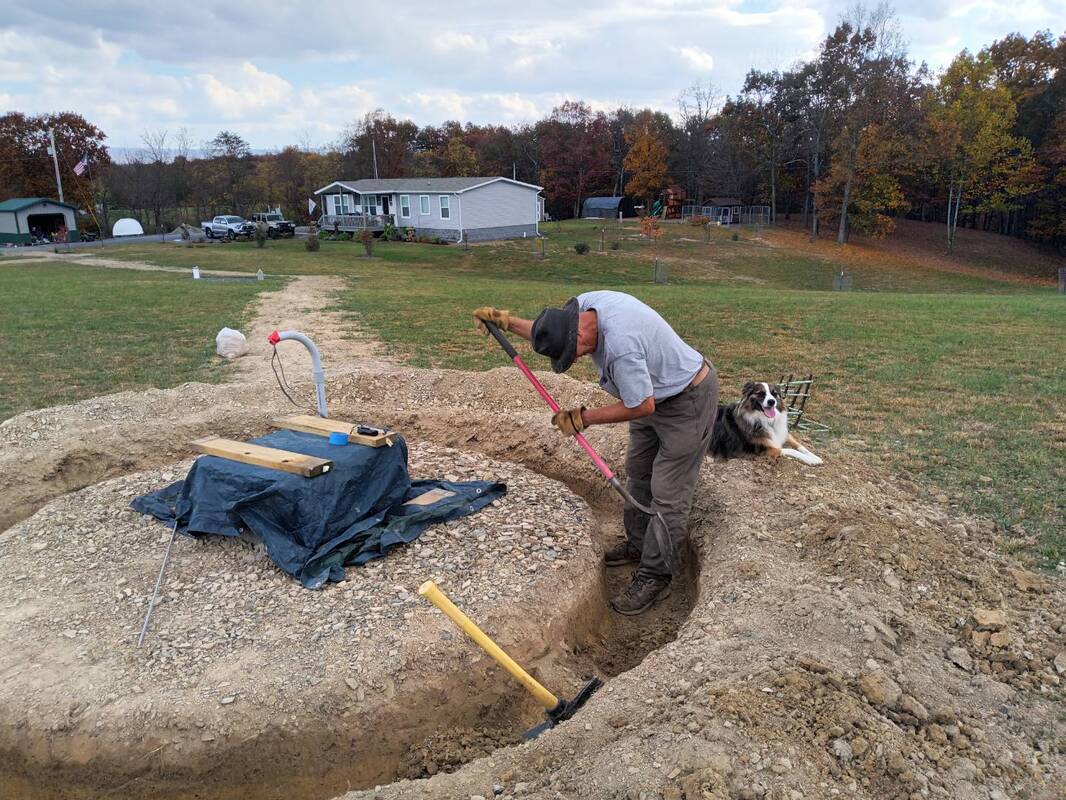
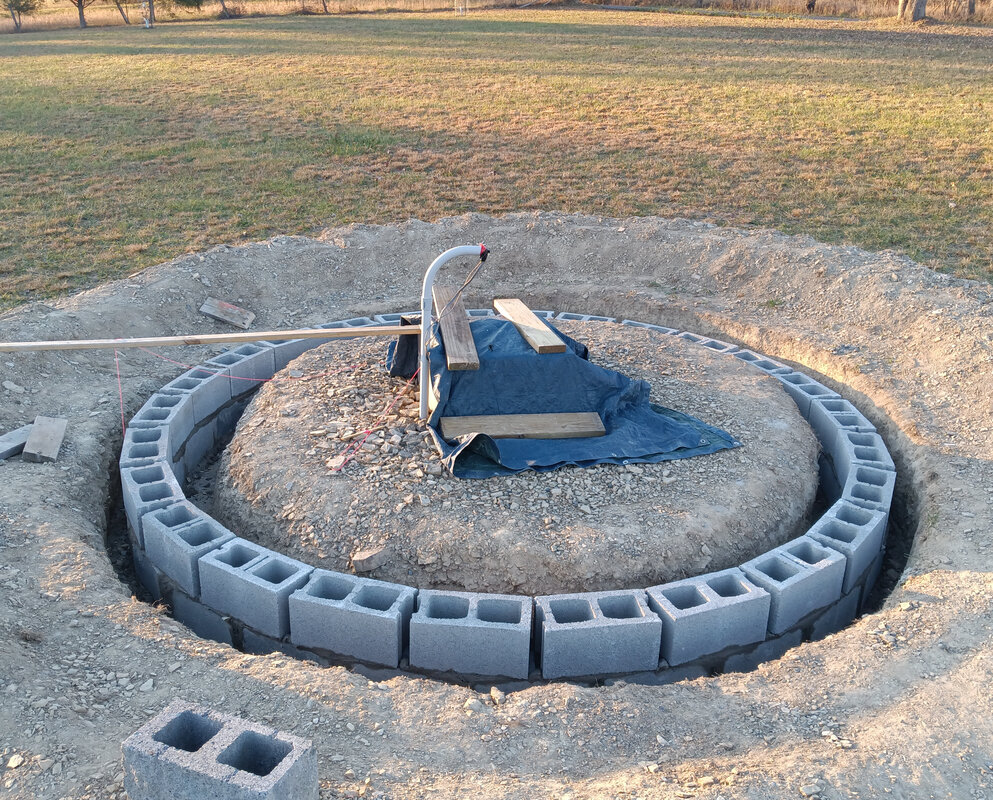
The area around the pier was leveled with excess shale and dirt in preparation for digging a circular foundation trench for the concrete footer.
One more row of block still needs to be added onto the pier base to bring it up to where the final floor level of the building will be. |
The evening when I was finishing up around the pier base, I just happened to look up towards the western sky in time to see a long train of what I presume are Starlink satellites marching across the sky from west to east. I lost count but there had to be at least 16 visible during the time I was watching. I even had time to walk back to the house and get my wife to come out and see the parade.
|
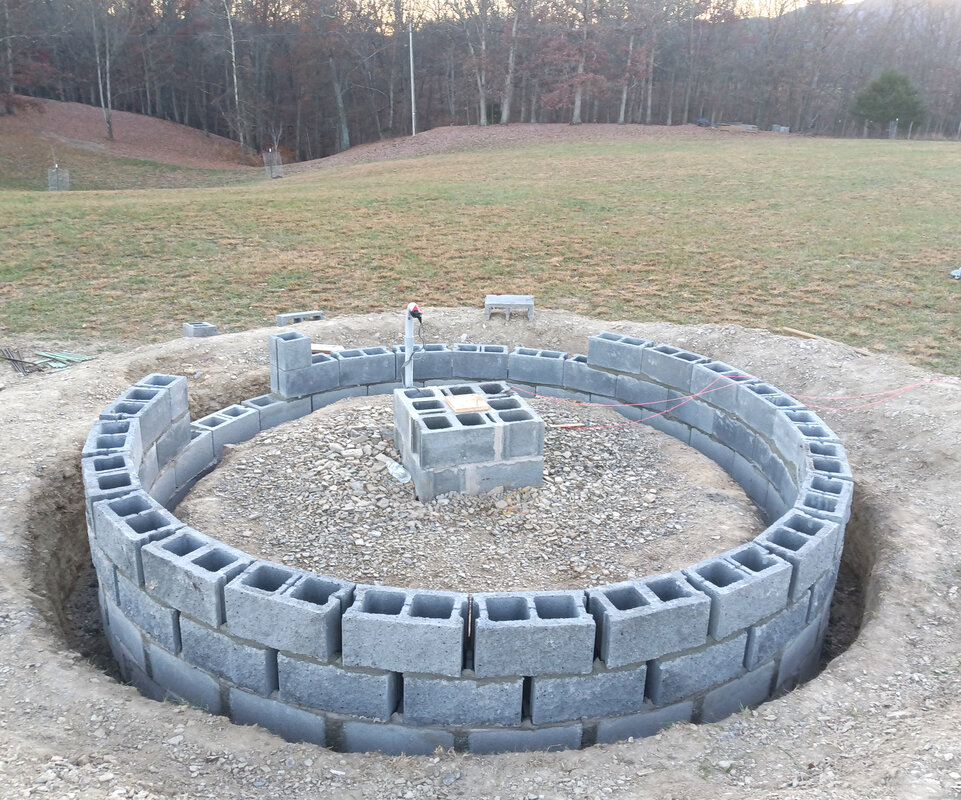
After letting the dirt settle a few weeks we've started digging the footers. This is all being dug by hand because it would not be cost effective to bring back the backhoe for this one small job, and there's no money in the budget for it anyway. My wife even came out and helped dig some. This is the first day's work. Also, the last row of block has been added to the pier.
|
|

|
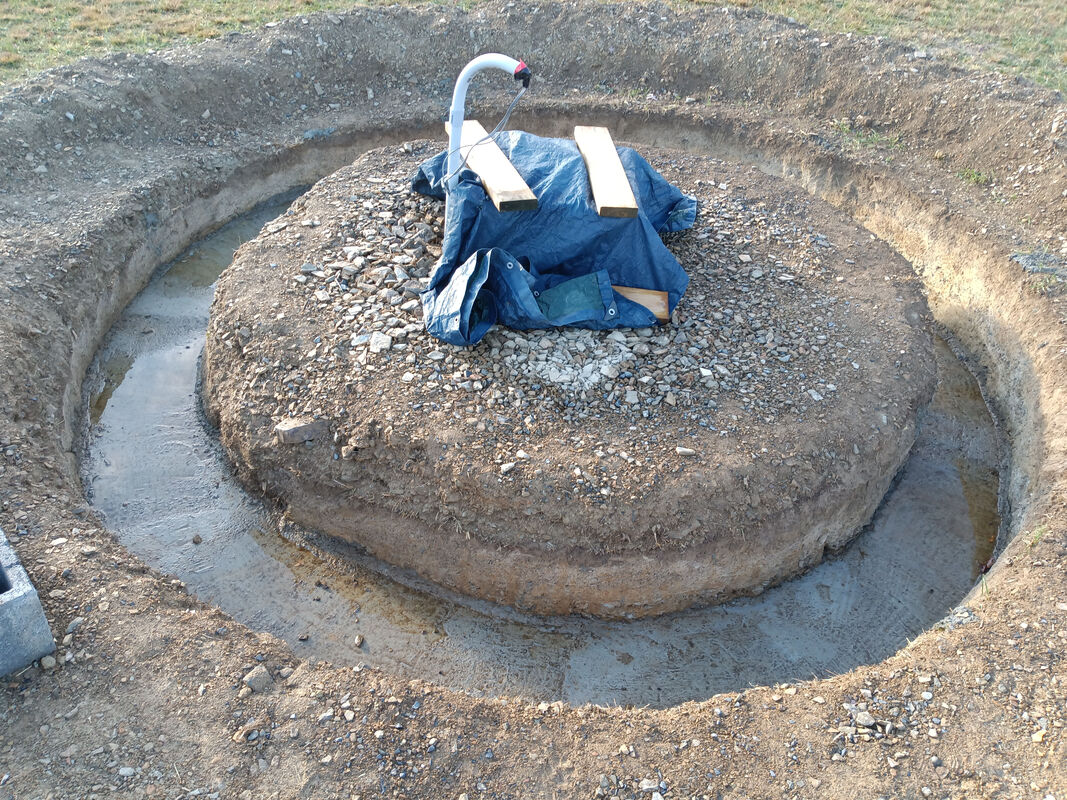
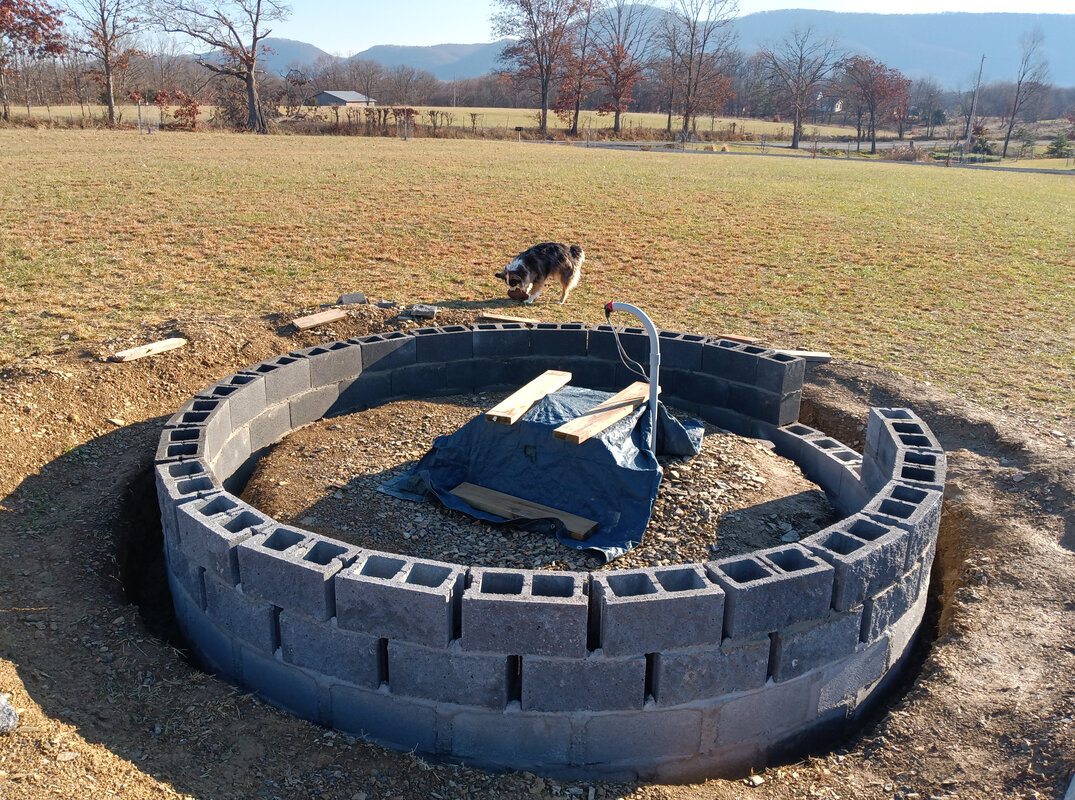
Digging the footer deep enough in the shale by hand turned out to be a lot more work than I bargained for. It's tough digging up layers of shale by hand and it made me wish I could've called that backhoe back again.
All together it took 5 days digging, spread over about a week-and-a-half to give my aching muscles and back a break, to get ready for pouring the footer. Leftover cutoffs of cattle panels from another job are being laid down as rebar for the cement footer.
All together it took 5 days digging, spread over about a week-and-a-half to give my aching muscles and back a break, to get ready for pouring the footer. Leftover cutoffs of cattle panels from another job are being laid down as rebar for the cement footer.
|
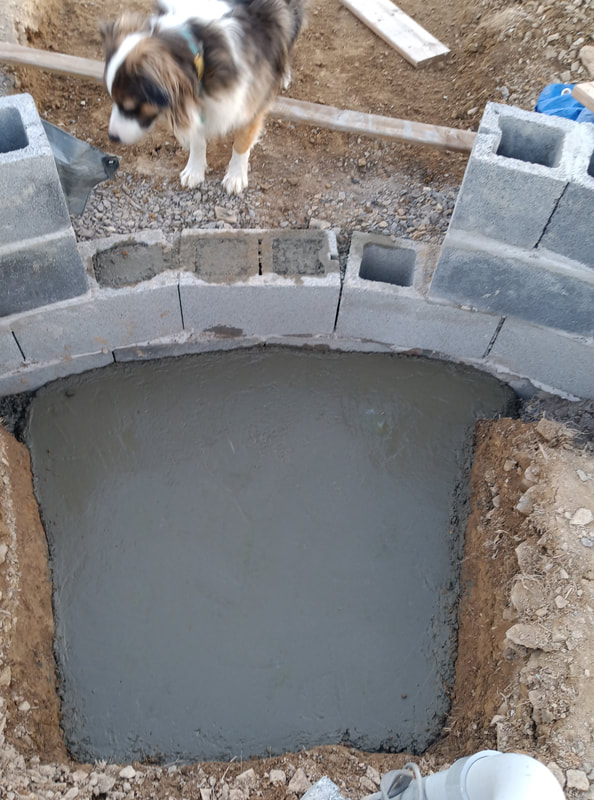
The footer is done and took 26 80lb bags of ready mix concrete totaling 2080 lbs. No wonder my back hurts. Next is laying the block foundation, something I've never actually done before. Things have slowed down because we've had wet and cold days to contend with, and the little guy brought home the latest illness going around school, so I was down really sick for several days, too. But there are still a few nice warm days in the forecast to hopefully finish the foundation before all the good weather is gone.
|
|
Just beginning to lay the block foundation. The truck with the rest of the block called and rescheduled delivery for the next day, so I took my pickup truck to the store and brought back some of the block to at least get started. There should still be time to finish the foundation to at least ground level before the next rain storm moves in.
|
|
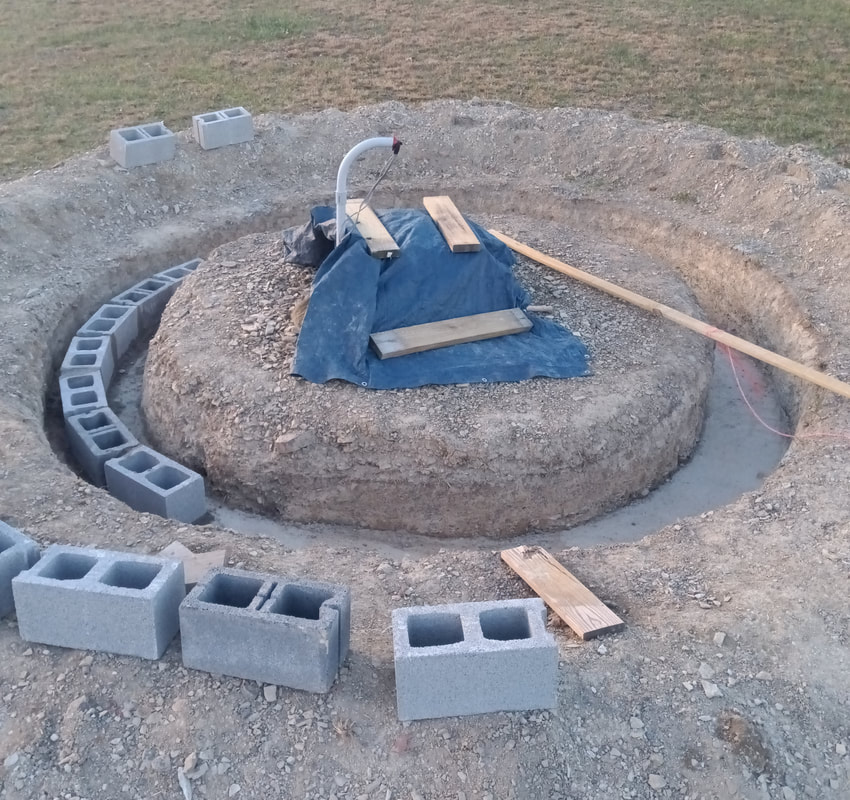
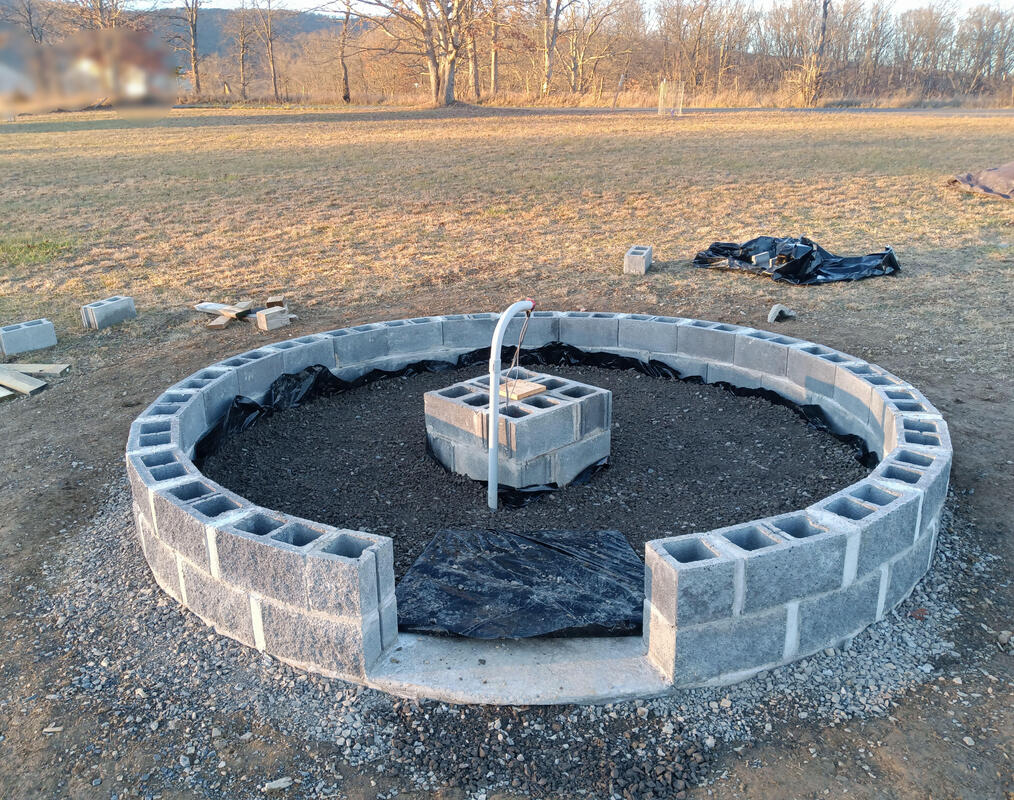
The block arrived and after a couple days work the first two rows of blocks are done, which gets the foundation up to ground level. I just need to go back around and fill the joints between the top row of blocks with cement after the mortar sets up. Then I'll switch to 8" split-face block to lay the top two rows that are above ground. I'll keep at it as long as the weather holds.
The outside diameter of the block foundation is 12-feet 2-inches and it takes exactly 26 concrete blocks per row. The finished foundation will be four rows high. |
|
The rain is gone and there's still one or two decent days left before the next cold spell so I worked all day on a Saturday laying block again and managed to get the final two rows done, except I ran short of blocks. Now I need to drive 3+ hours round trip to the block company to pick up five more spilt-face blocks.
The entrance to the observatory will be on the South side and will be below floor level to allow for a taller door. On the inside will be a couple of steps up to the wooden floor. |
|
Took a few days to get to the block distributor, and another big rain storm came through, but finally got the 5 missing blocks and finished the top row. Other than filling in some more joints I can now work on the entry way and filling in around the foundation with crushed stone.
|
|
The weather was very cold for more than a week and the ground started freezing up, but now we're getting a few warmer days and it's thawing again, so I've been able to fill in around the block with gravel, and dig and pour a footer for the entry. There's still a warm day or two coming with temps above freezing at night, and I hope to finish putting mortar in all the block joints, too.
|
|
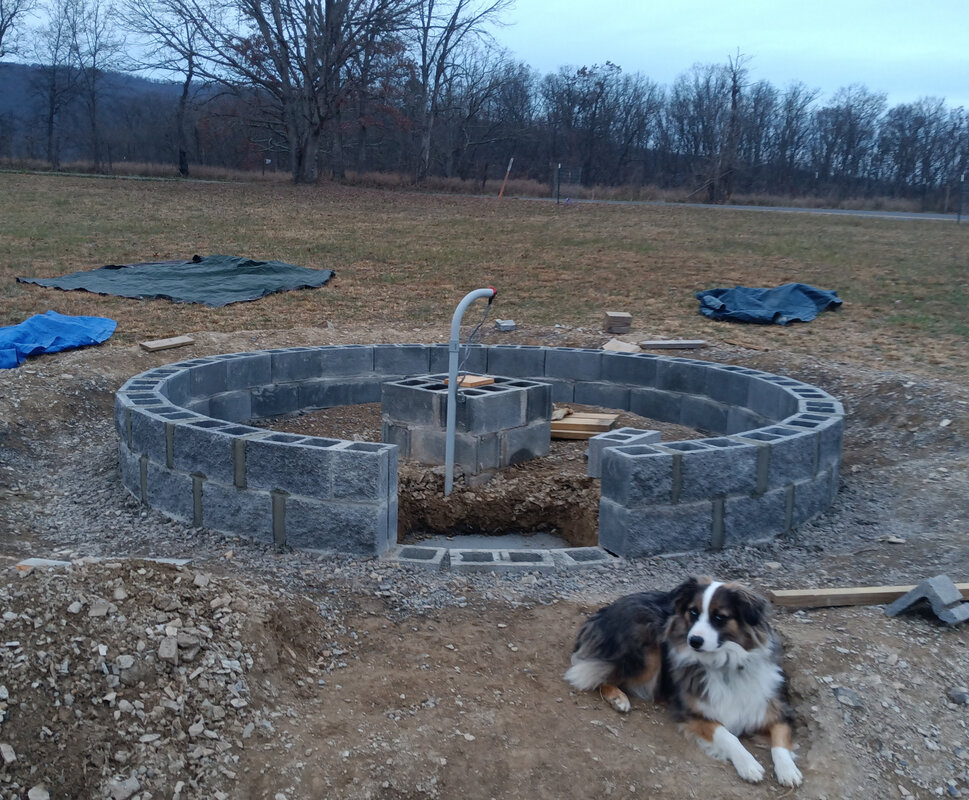
Another nice Saturday and I worked almost all day finishing the mortar joints. It took two and a half 80lb bags of ready mix mortar, but I only had half a bag, so I had to pick up two more bags at the lumber company. I also bought four 2"x8"x8' pressure treated boards to make the sill plate to go on top of the blocks. I got the mortar done and covered before it rained again that night. My Australian shepard thinks he's my supervisor. He doesn't do any work but watches everything I do.
|
|
Fortunately, we've had several more warm days and I was able set the blocks for the entry way, fill the center with gravel, and cut up some more scrap cattle panel to use as rebar. I leveled the wooden form around the blocks and now just need to pour the concrete floor.
And with the help of my little Kubota tractor I removed all the excess dirt from around the foundation and raked it smooth by hand one afternoon. This job alone would have taken me a week of good weather using a shovel and wheel barrow. |
|
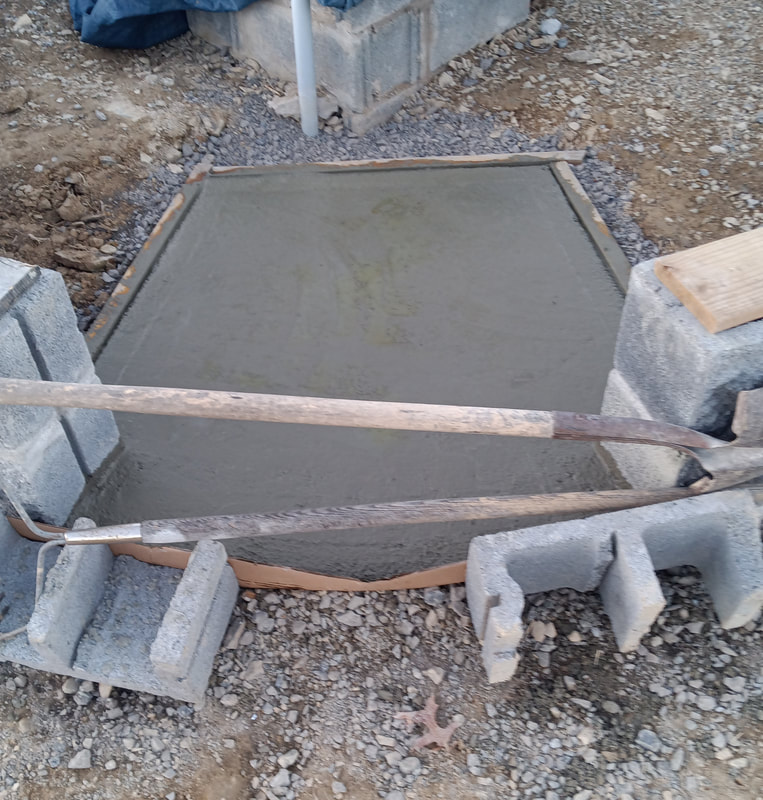
The entry way floor is poured and setting. This may be the last concrete work I get done this year due to the cold weather.
|
|
|
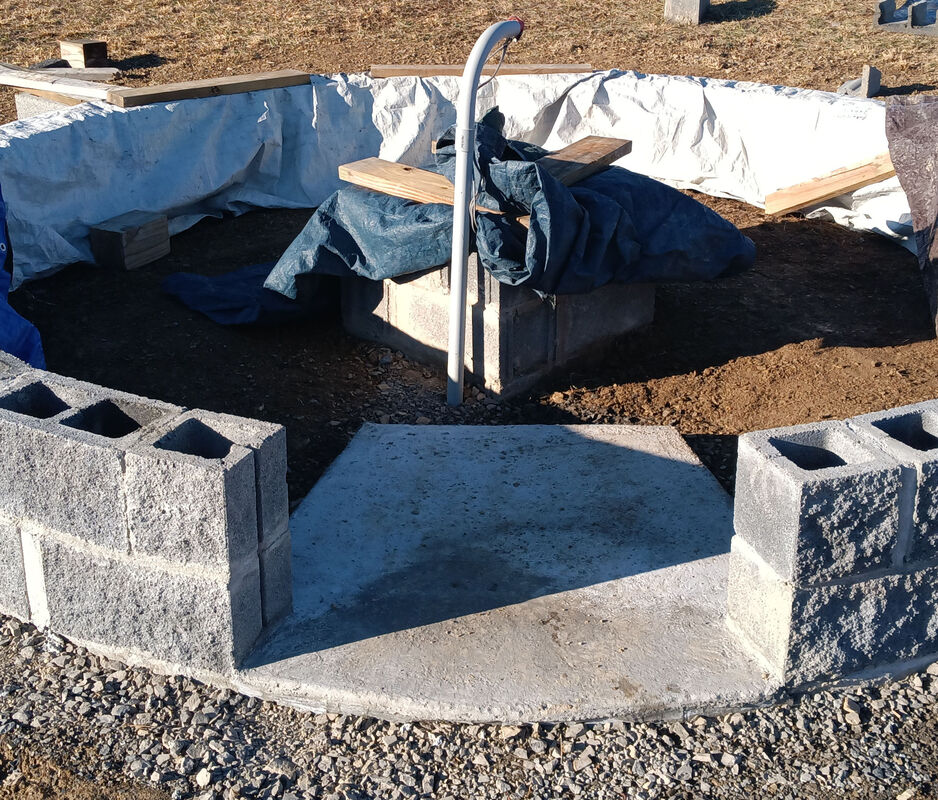
More rain and snow was forecast, but before it arrived five wheel barrow loads of excess dirt and rock were removed inside the foundation. Then after the weather moved on, a vapor barrier and a layer of gravel were put down. The plastic covering the entry way will get trimmed out later.
|
|
I'm trying to get the floor finished, but we've got more rain coming at the end of the week. During the summer heat we were lucky if it rained once a month.
All the pieces of the sill plate and outer band of the floor have been cut. The individual mating sections of band and sill have been screwed together and drilled for j-bolt anchors.
We got a few days and nights of above freezing temperatures with the rain, so the bolts were cemented in place and then everything was tarped over to keep it dry. After the rain passes I'll get back to working on the floor.
|
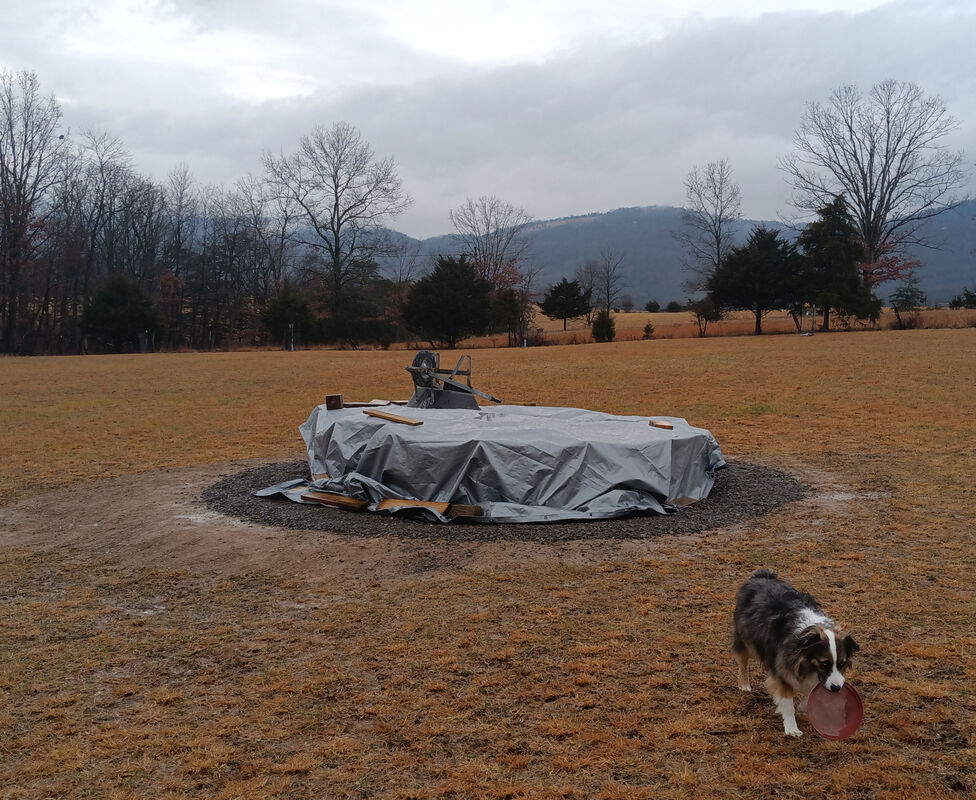
Rain, rain, rain. The ground is now like a sponge full of water. A layer of gravel was added around the outside of the foundation to keep the mud down, but now everything is tarped over and waiting on spring.
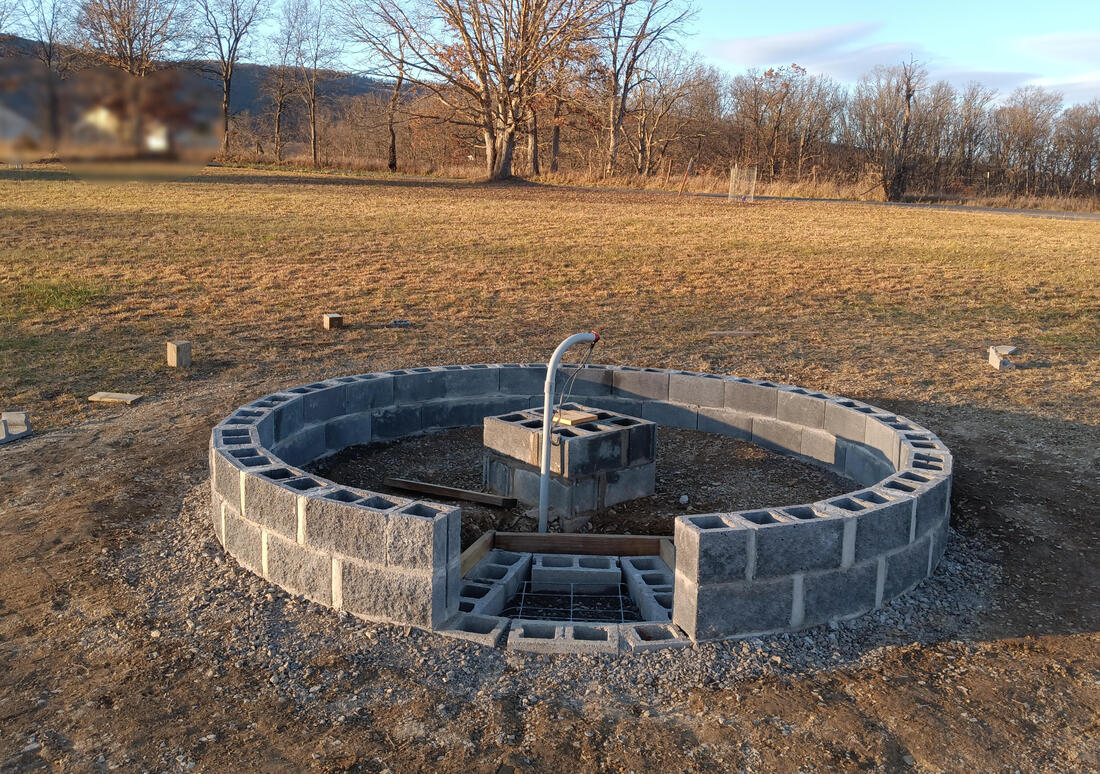
As far as the foundation goes, all of the cement work is done. The top of the concrete pier still needs to be poured, but I need to confirm where the horizon line will be before I finish it. At some point I will also pour a small slab in front of the entry door, but that can wait for Spring, too. At least now I'll have time to play frisby with the supervisor. |
|
The rain finally let up and the occasional partly sunny day with temps in the 40's gave me a chance to work on the floor some more, but now it's snowing so all work is at a standstill. If we get some more nice days once the snow is gone, the floor might still get finished before spring.
|

|
It's spring again and time to get back to work on the observatory, but not before a a slight detour. The pond was getting pretty unsightly and overgrown with cattails and weeds, so we had a backhoe brought in to clean things up. That left me with a lot of raking, cleaning and strawing to do after the backhoe was done. As a matter of fact, there's still one section left to landscape on the far side, but it has to dry out a little first.
|

|
I guess I took a wrong turn in that detour. More gotta do stuff. Three years ago I set up a 10'x20' Shelter Logic tent for temporary storage when we moved. This past winter the top ripped open from end to end during a snow storm. It was so UV-rotted on top from the Sun I could just stick my finger right through the fabric.
I ordered 10mil reinforced greenhouse plastic and made a new cover by installing brass grommets around the ends and sides to tie it down to the frame. OK, maybe now I can get back to the observatory. |

|
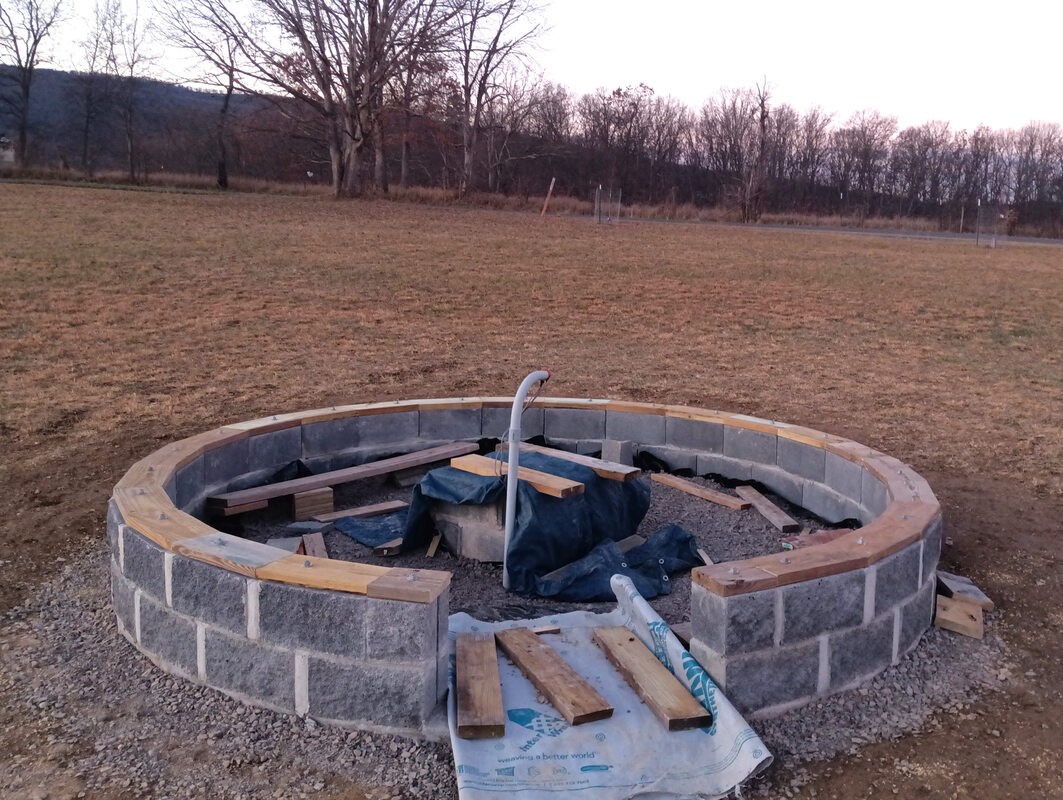
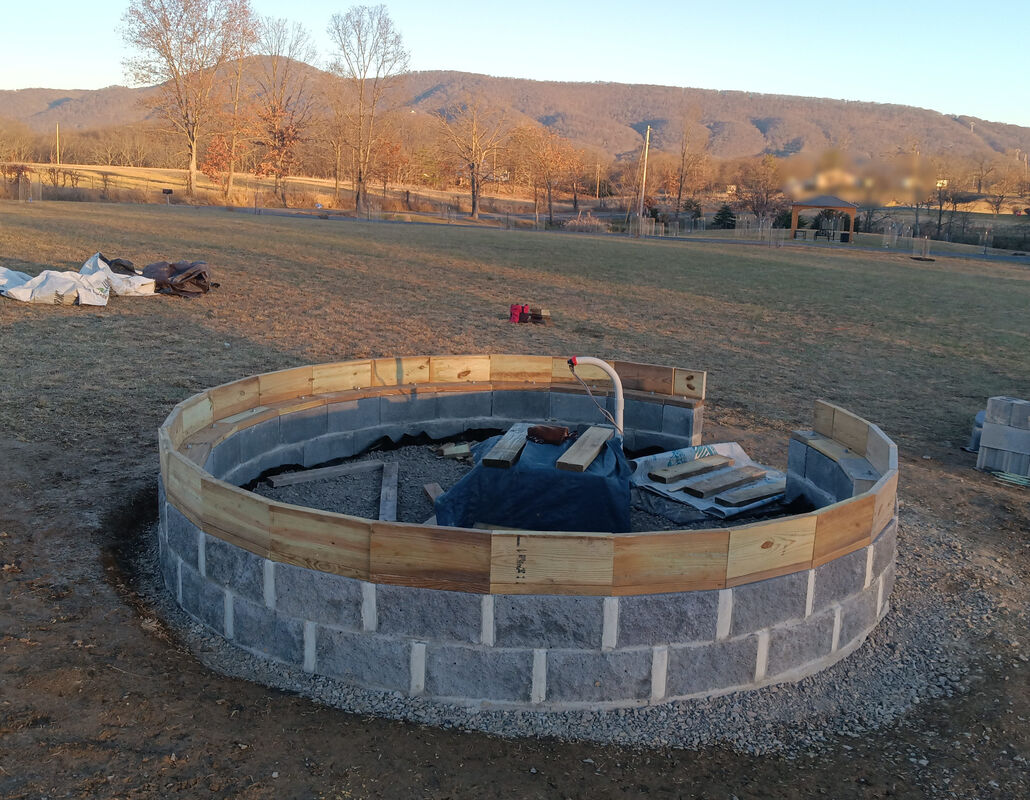
I'm finally back on the observatory finishing up the floor. I also added one more row of block to the pier base, which brings it up to about and inch under the floor. Now I need to find something to use as a 24" round form for the concrete pier base above the floor. With the floor finished the base plate for the walls is going down and the walls will start going up soon.
|

|
I decided to make the steps out of concrete-filled blocks, since I already have some on-hand, so I poured a concrete extension to the entry floor for the blocks to sit on.
|

|
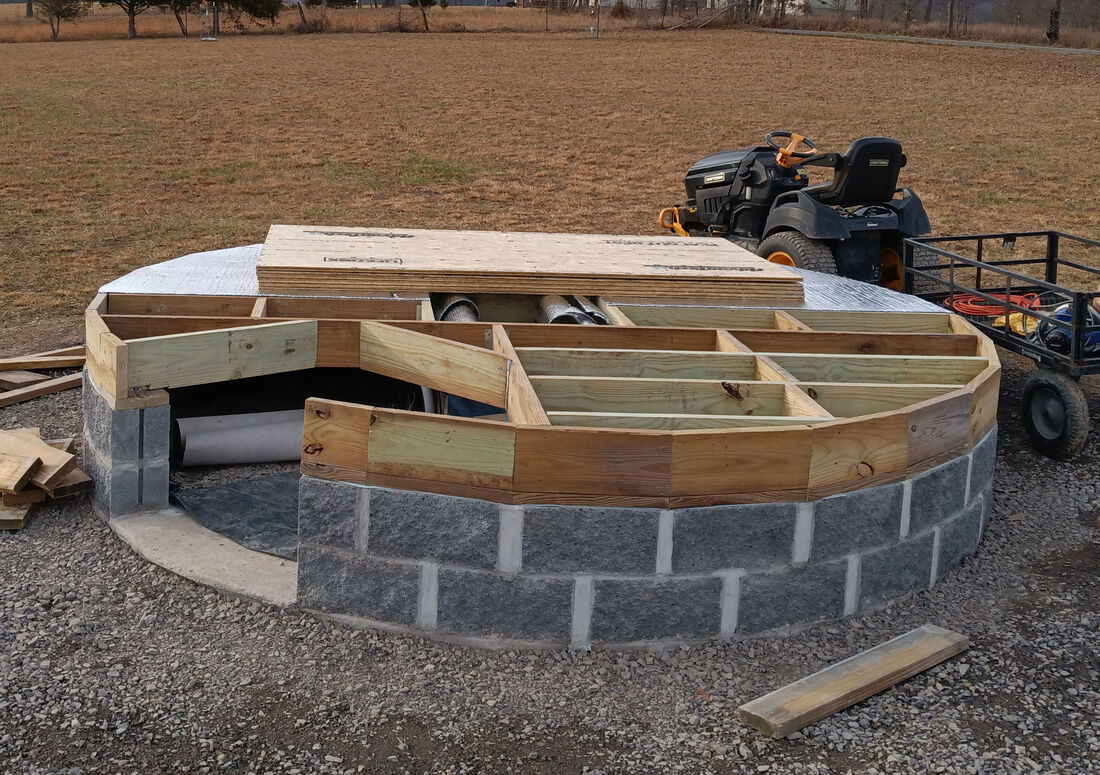
It has been so hot since about mid-June that I've gotten very little done outside. It's been 90°+ nearly every day here, with the heat index hitting 106° to 108°, and I'm getting too old to fry out there in that heat all day. But we finally got a day under 90° (only 89°), with some clouds for shade, so I got the wall studs up and the doorway framed. The walls are 48-1/2" tall, and the initial framing of the door is 70-1/2" high, but the final framing and door may be a couple of inches shorter because of the dome skirt overhang. I'm 77" tall so I'll still have to duck, but at least I won't have to crawl through a hatch.
|

|
Working in the evenings, when the sweltering temps have cooled down a little, I finished adding the spacers at the top and center of the studs. Next I'll be adding a plywood top plate for the rollers to mount on, and cladding the sides with plywood and aluminum siding.
|

The top plate for mounting the rollers is done. It's cut in segments from sheets of 3/4" plywood. It's 1-1/2" thick and made of two layers glued and screwed together. I painted it black to help waterproof it in case it gets rained on while assembling the dome.
While installing the ring I had to readjust some of the studs to get the building as circular as possible. That also meant recutting some of the spacer blocks, but it's all done now, and ready for plywood on the exterior. Now I have to make a trip to the "big city" to pick up the 1/4” plywood.
While installing the ring I had to readjust some of the studs to get the building as circular as possible. That also meant recutting some of the spacer blocks, but it's all done now, and ready for plywood on the exterior. Now I have to make a trip to the "big city" to pick up the 1/4” plywood.
more to come...
Page created 7/24/2022
Last edited 7/26/2024
Last edited 7/26/2024
