
LM-21 Heterodyne Frequency Meter
The LM series of frequency meters have been around since the second world war, from the LM-1 to the LM-22. They seem to have all had a similar circuit. This is an LM-21 that I've had so long I can't remember where I found it. I think I've had it for probably 30 years or so, and it most likely came from a hamfest.

|
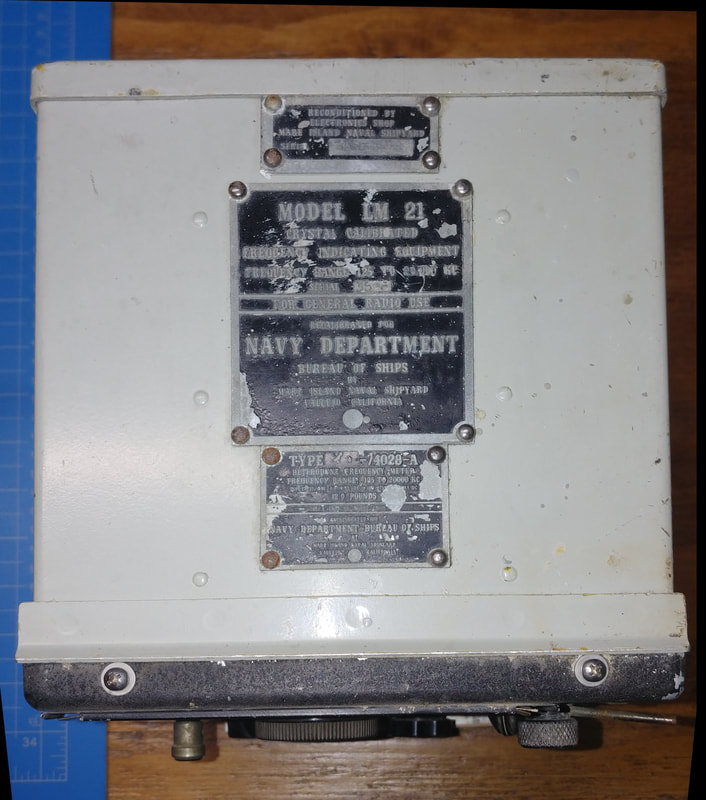
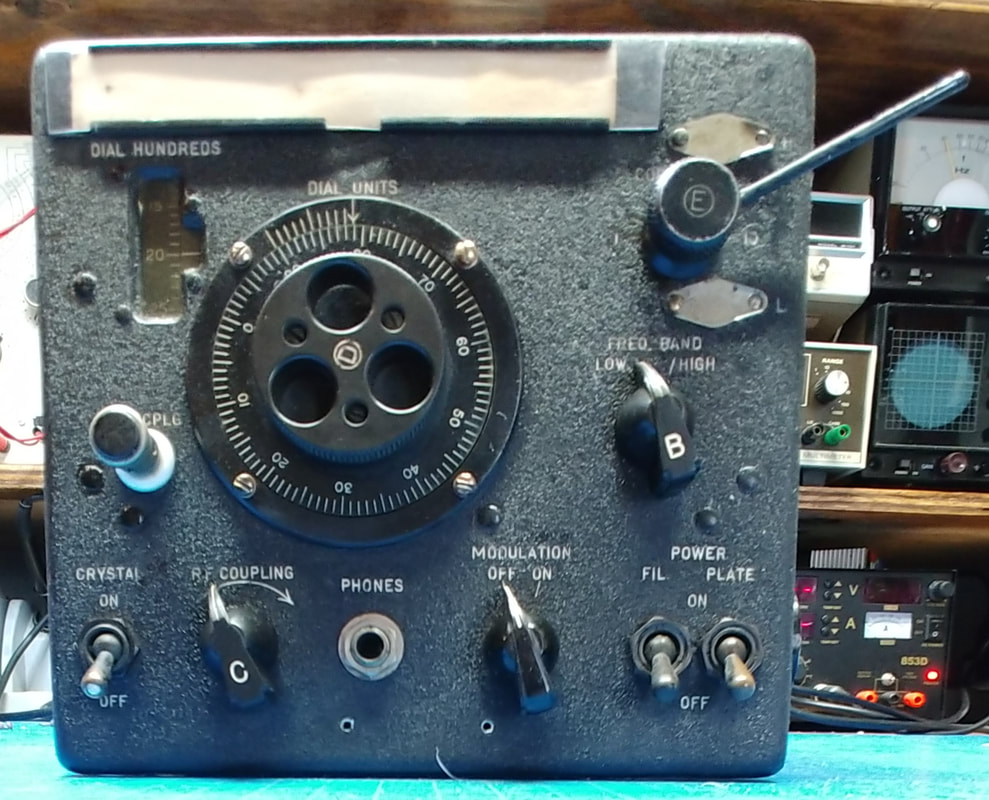
The meter works but the paint is flaking off and someone cut short the post on the knob for zero beating the meter. This unit has a black front panel but the housing has been painted battleship gray. Both are in need of a new paint job.
The unit also needs recapped and the crystal probably should be checked and adjusted after all these years. |
|
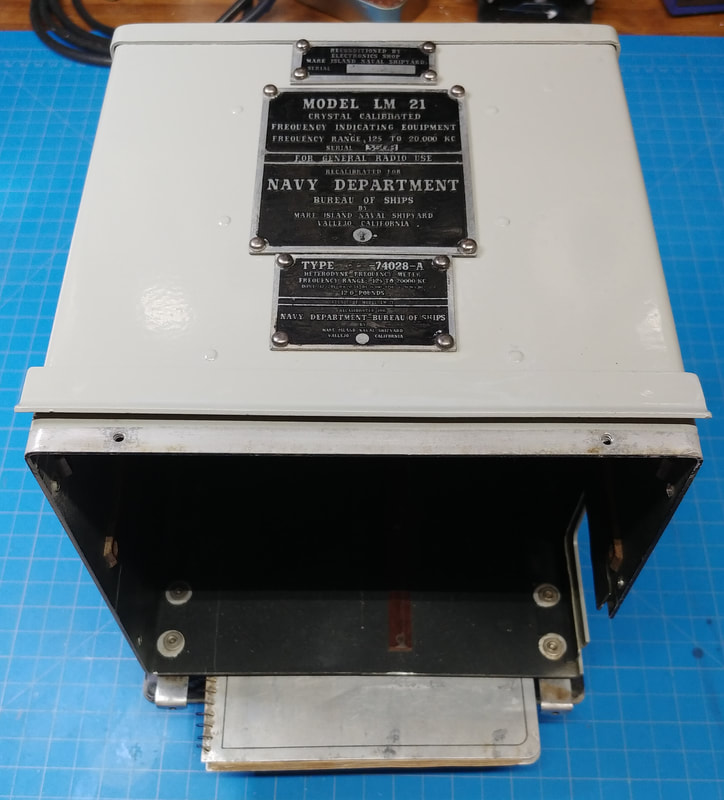
On top are the name plates and serial number. Two plates say it was reconditioned at the Mare Island Naval Shipyard, but don't say when.
|
|
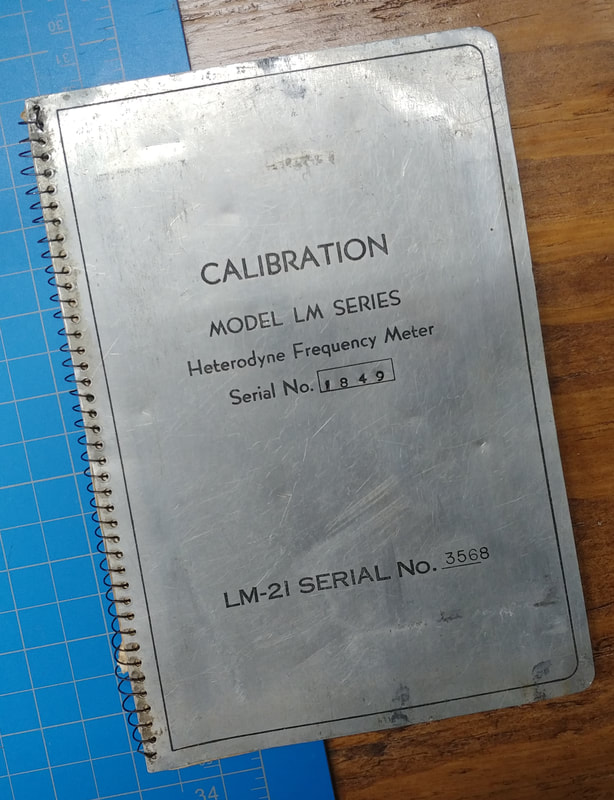
It still has its original calibration book, which is as important to have as the meter itself. These books are serial numbered to match the unit they belong with and are not interchangeable.
|
|
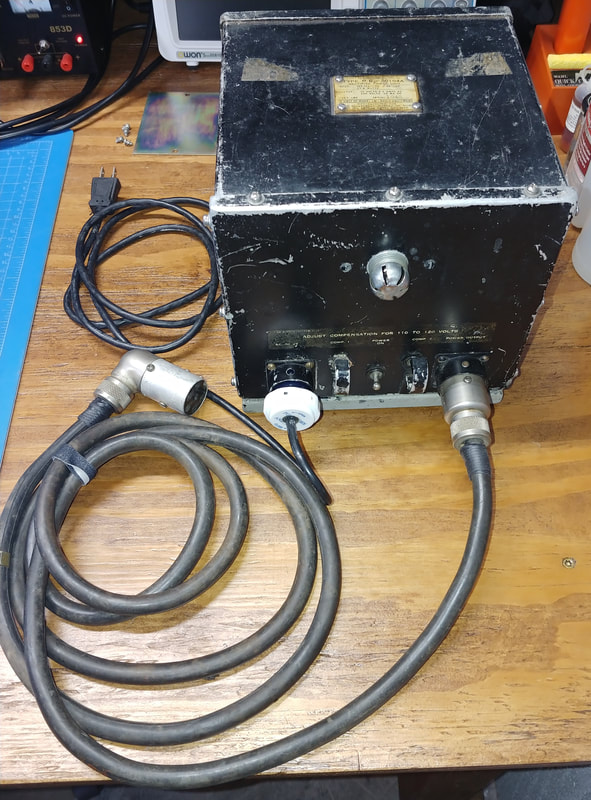
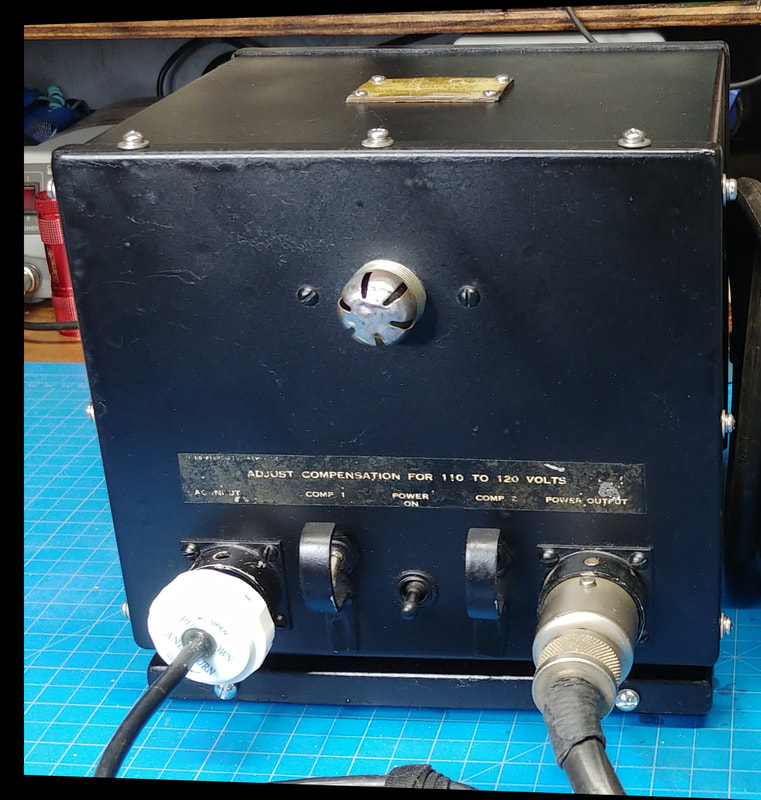
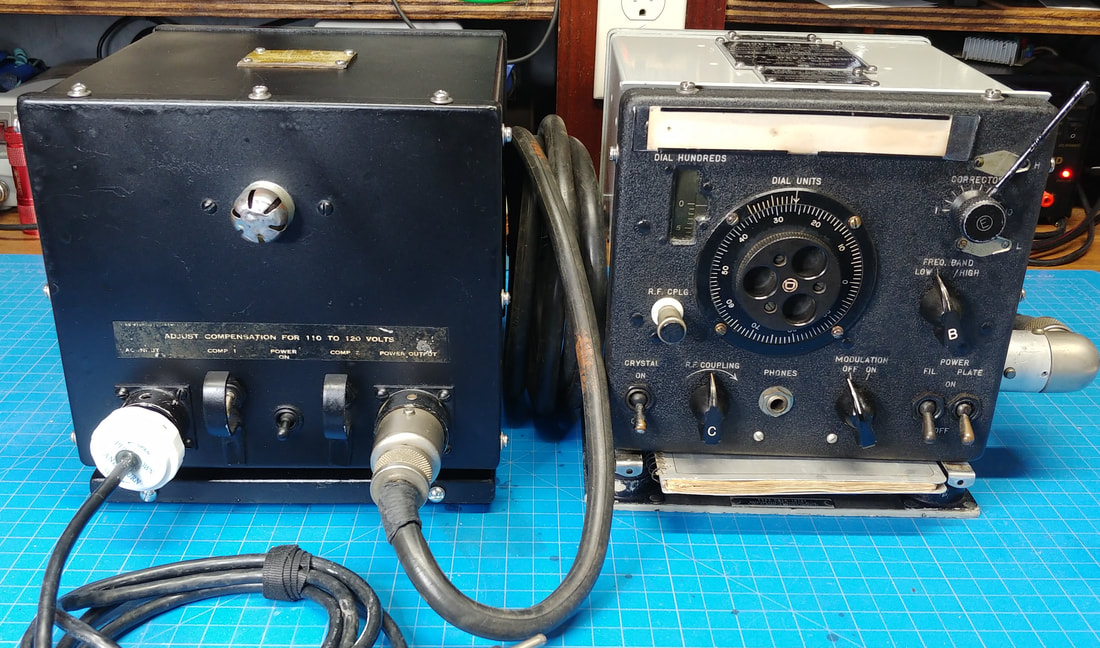
I have an original power supply and the interconnecting power cable. It definitely could use a new paint job, too.
|
|
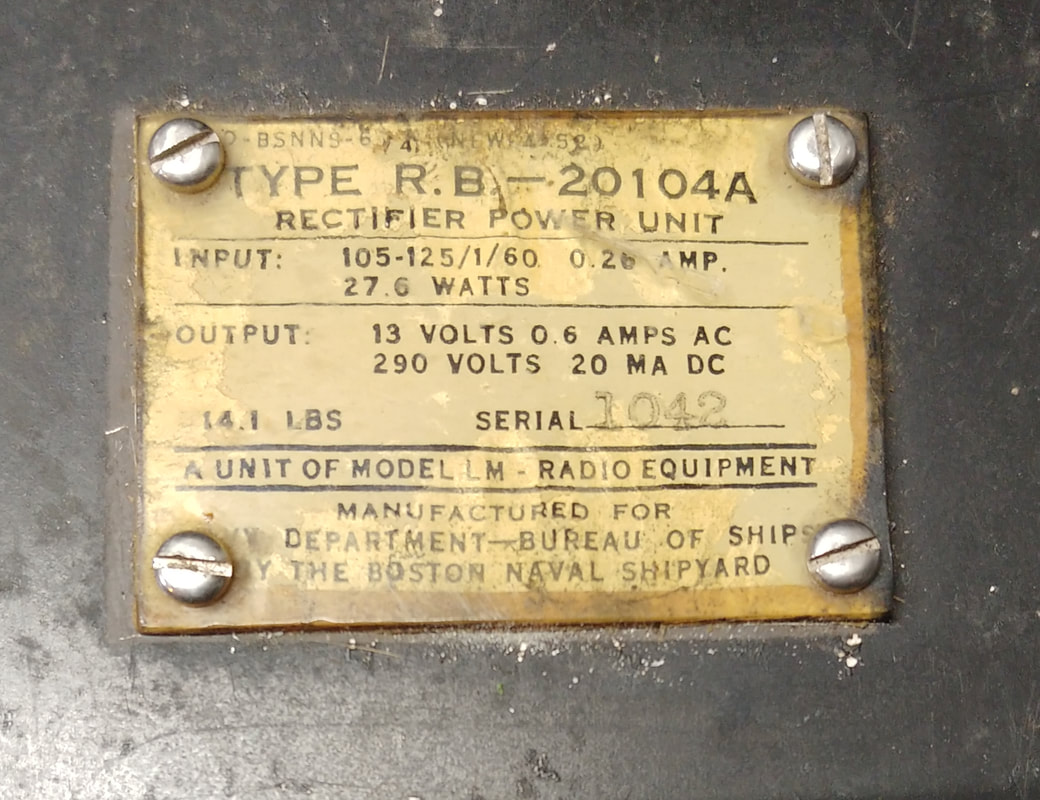
The power supply is listed as a type R.B.-20104A. It's pretty simple inside, a pie filtered high voltage supply providing about 290 volts DC, and a 13-volt AC filament supply.
|
|
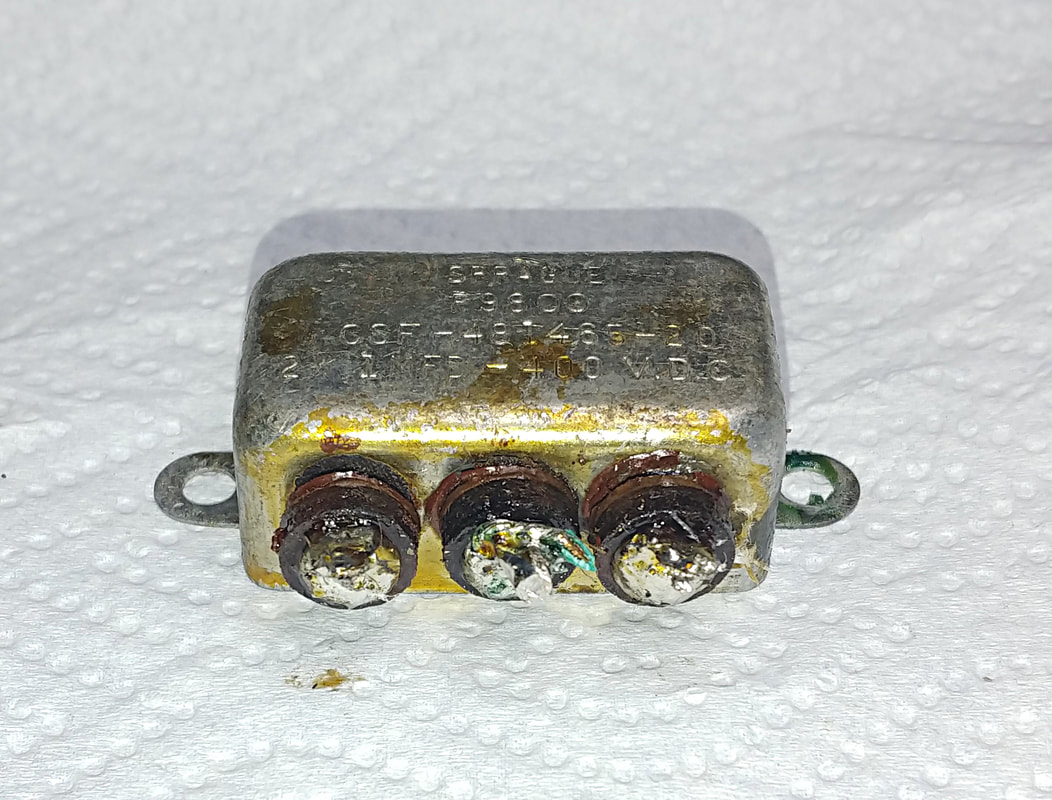
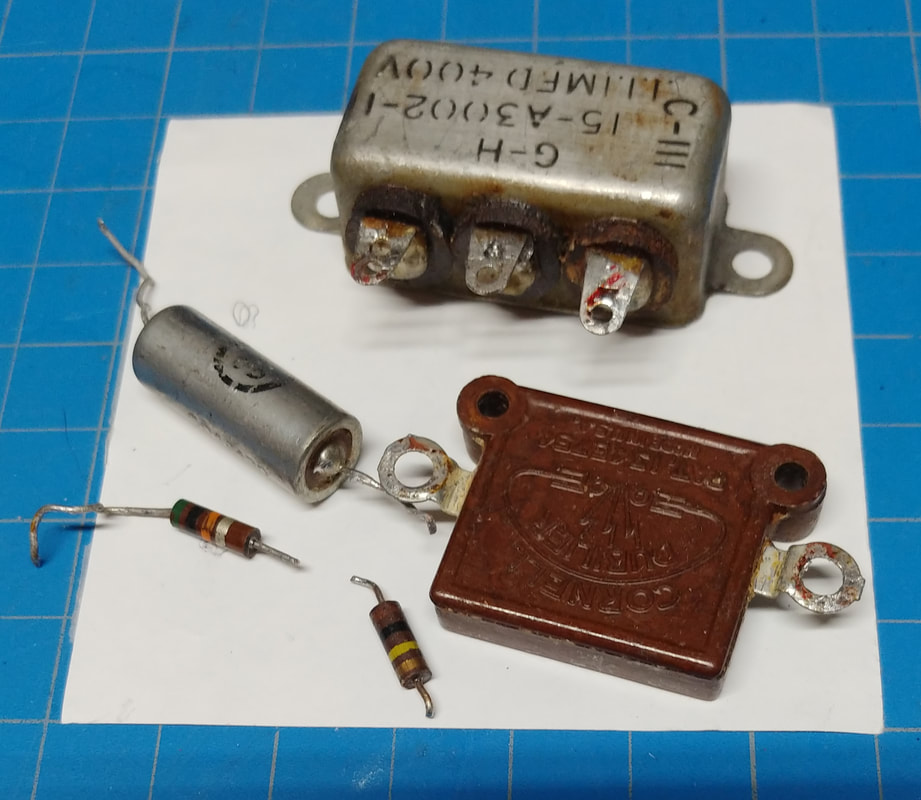
I recently fired up the meter (almost literally) to use while calibrating a signal generator the old fashioned way. Since I've had it for so long I just assumed it had already been recapped at some time in the past. But it turns out I never recapped it. It was still running on 1940's capacitors. After being on for about half-an-hour the power supply blew an AC line fuse. When I pulled the supply, the pictured bathtub capacitor, housing two 0.1uf capacitors that were directly across the AC line, was still spraying hot oil all over the adjacent components. What a mess, especially considering that the oil could very well contain PCBs that you don't want to get on you.
|
Two sets of rubber gloves, about a roll of paper towels, and a lot of degreasing spray cleaner later, I had the mess safely cleaned up. I had to remove the filter cans too, to get the oil that had been sucked in under them. After I was sure it was clean enough to work on, I recapped it. But it's a good example of why those leaky old paper caps have to go. Thankfully there was a fuse that blew before something worse happened.
|
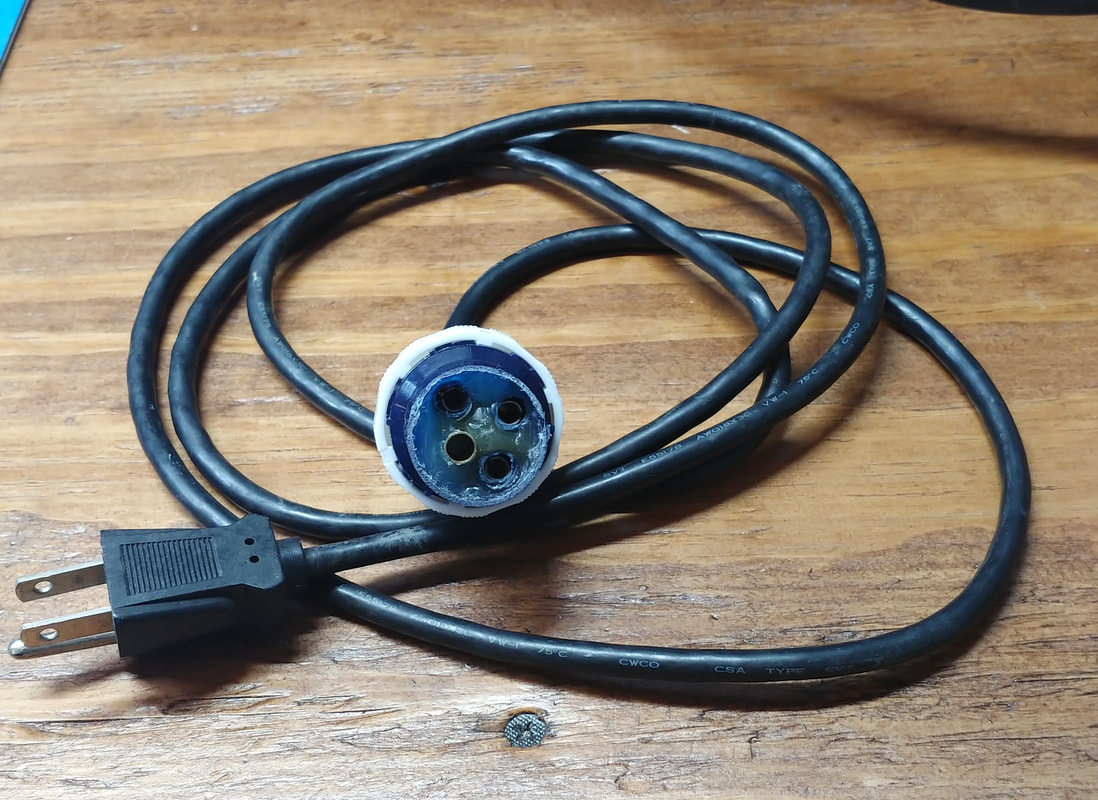
The one item I didn't originally get with the power supply 30 years ago is the AC input connector, so I had just removed the AC socket, tossed it into a junk box, and ran the power cord straight into the unit. After the above mishap I wished I hadn't done that and started digging through junk drawers looking for the original recepticle. And amazingly, I found it. I reinstalled it and then made my own connector plug for the AC connection. It's crude but works just fine, and it keeps the power supply intact and original.
|

|
Prepping the meter's cabinet for a new paint job. The metal label plates are attached with press-in rivets, which can be tapped out from the inside with a hammer and punch. They will be reused after cleaning and polishing them.
The cabinet originally had a black wrinkle finish, but I guess it was the Navy that repainted it gray so I'll leave it that color. |
|
The meter case now has a new coat of paint, and I cleaned up the nomenclature plates, too. Next is touching up the meter's face.
|
|
|
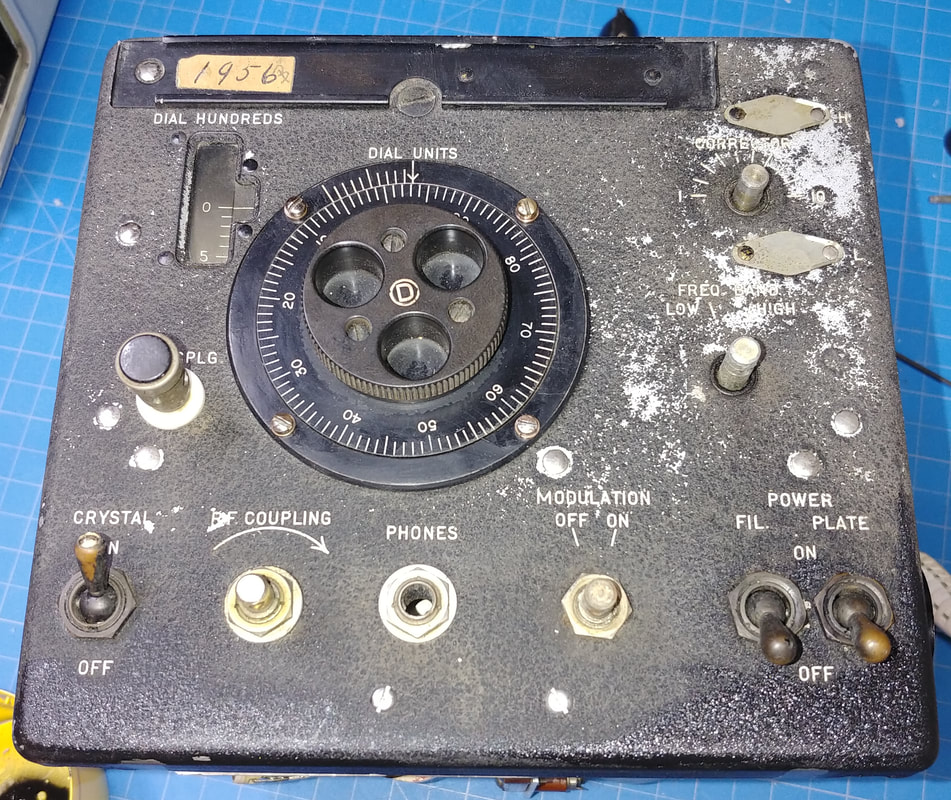
Before and after touching up the front panel. The before photo is worse than the top photo because I cleaned the panel before starting, which caused even more paint to flake off. The whole front panel wrinkle finish was dry brushed; I've just started in the bottom corners of the before photo. I used a very small brush to work around the engraved lettering. It's not perfect but it'll do. And that's not a scratch at the bottom, a scrap of plastic crawled into the frame.
I also fixed the cut off tuning rod on the Corrector knob and replaced the incorrect knob on the Modulation switch with a chicken-head knob.
I also fixed the cut off tuning rod on the Corrector knob and replaced the incorrect knob on the Modulation switch with a chicken-head knob.
|
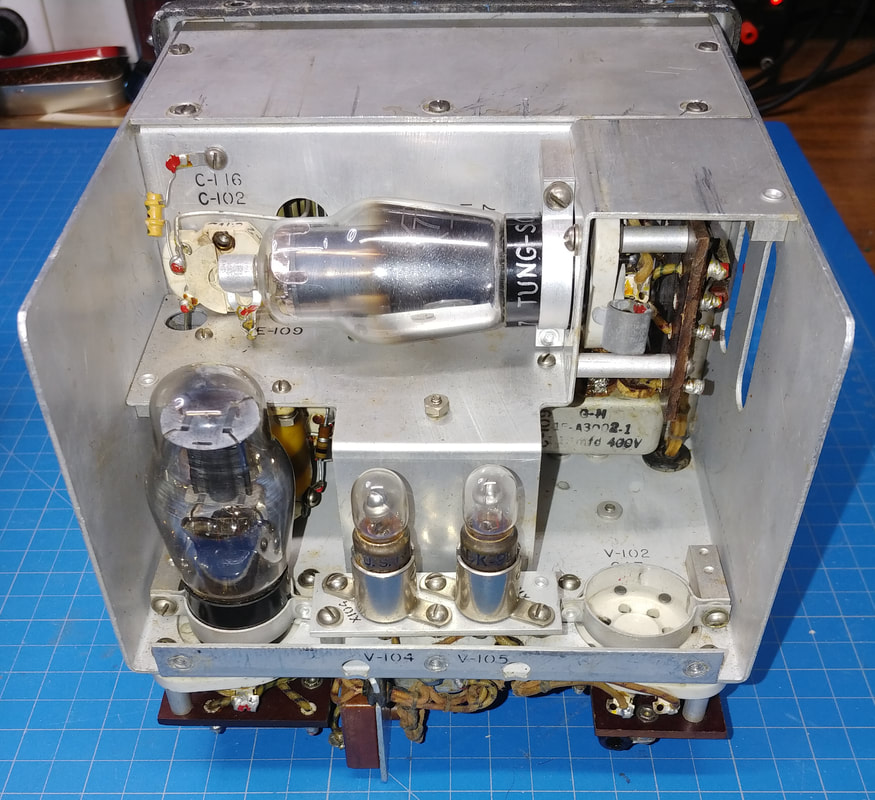
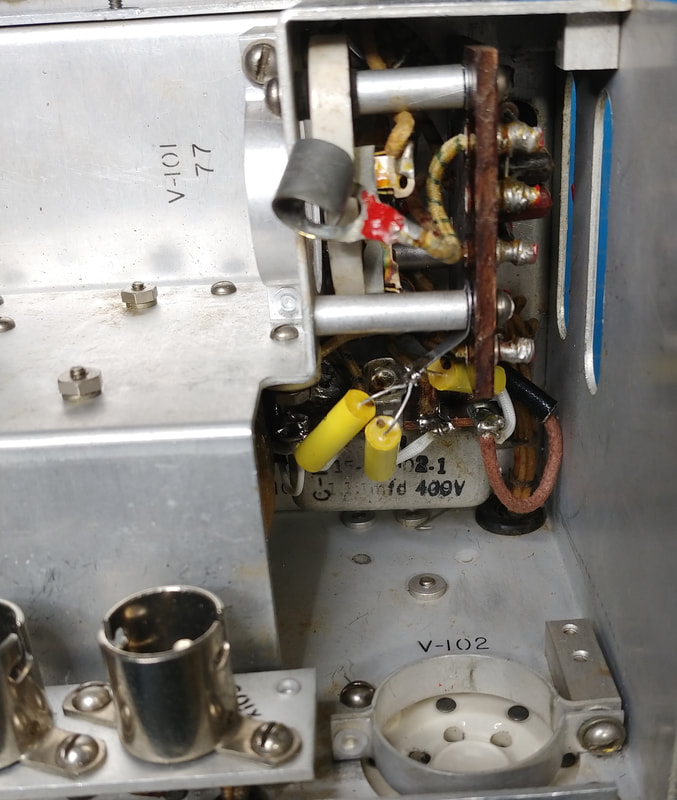
The rear of the unit, with V-102 pulled so the bathtub capacitor hiding up in front can be seen. It has three 0.1uF 400VDC capacitors inside that will need replaced.
|

|
On the bottom there are a couple more capacitors to replace, and someone has replaced the crystal's trimmer capacitor. It's a purely mechanical capacitor and I can't fathom why it would have been necessary to replace it. Other than this trimmer, and the Modulation switch knob, the rest of the meter appears to be all original.
|
|
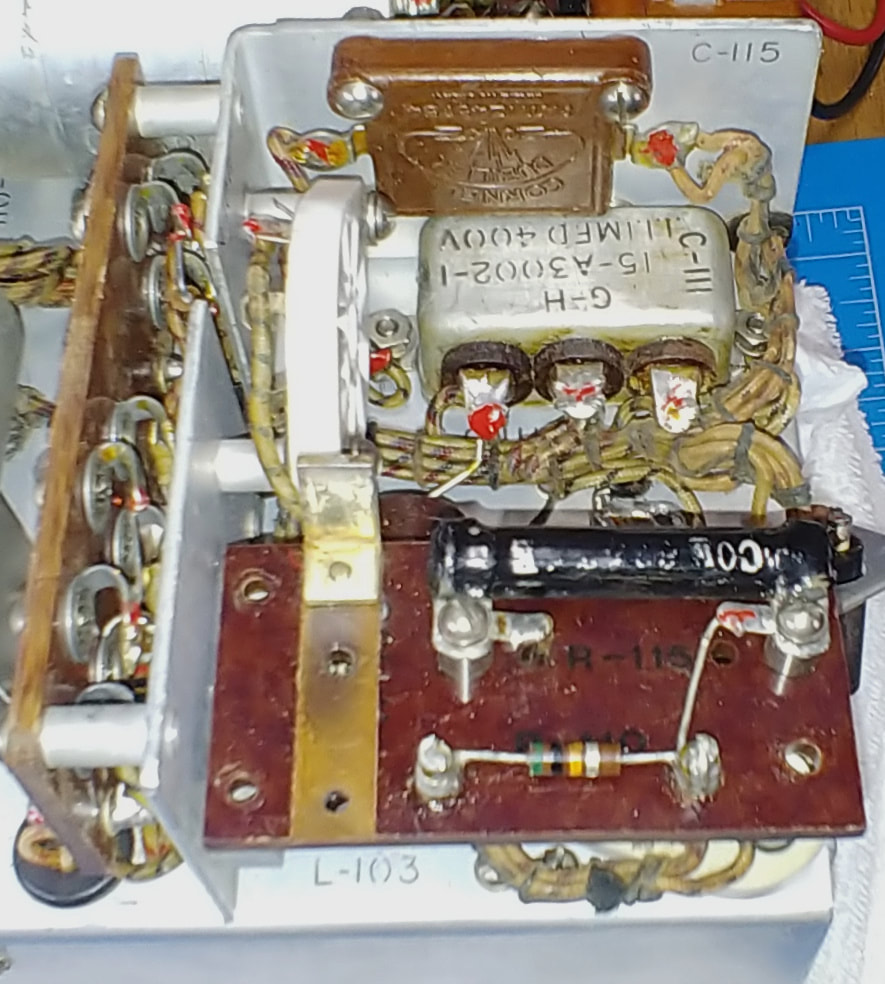
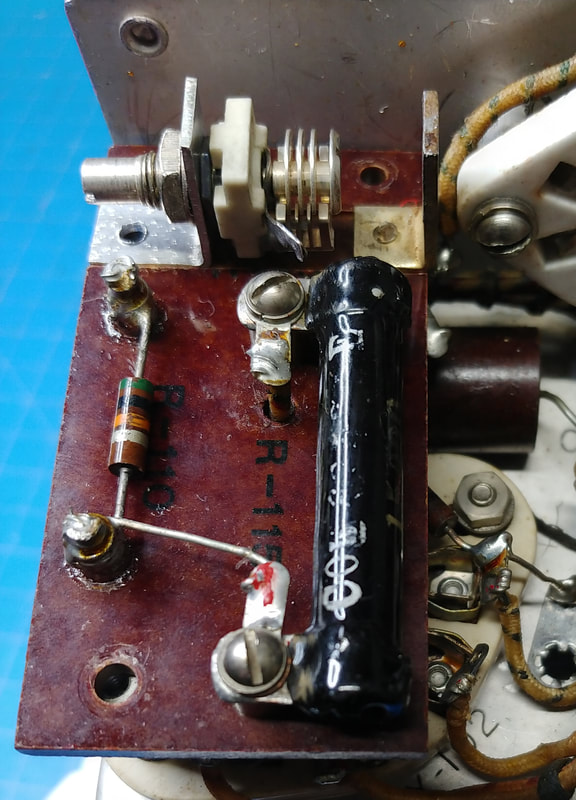
This is a closeup of where the crystal trimmer was, after removing the tacked in replacement. Only the bracket which is the rear plate is left. The other threaded bracket and the plate with the adjustment screw, are missing. Short of physical damage, which I see no signs of, I really can't figure what possessed someone to remove it.
Also in this photo is another bathtub with three 0.1uF capacitors needing replaced. The large brown capacitor still needs checked and the 50KΩ resistor on the phenolic board is out of tolerance and will be replaced. |
|
Here's my planned replacement trimmer, if everything works out right. The original trimmer is listed as 2.2-3.3pF on the schematic. The replacement that was tacked in was 1.5-7pF and measures as set to around 3-4pF (my cheap capacitance meter is not too accurate with readings this low). My trimmer is approx 2-9pF so it should work.
|
|
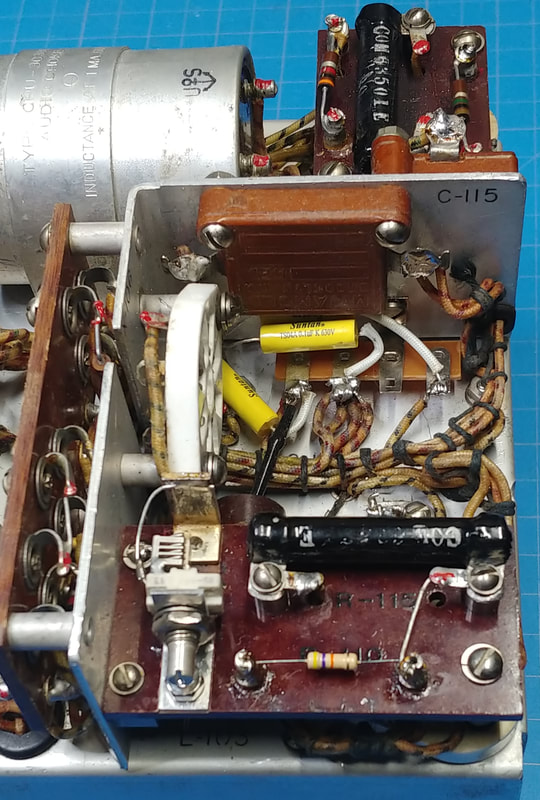
I removed the bathtub containing C-111A, B and C (3 X 0.1uF), because there just isn't enough space to install new capacitors otherwise. It would have looked more original to cut the back open and install the new caps inside it, but it's an oil-filled can and may contain PCBs so I'm not opening it. I installed a terminal strip and another ground lug to mount the new caps.
I also finished installing the replacement crystal trimmer and replaced the out of spec 50KΩ resistor R-110. And I was a little surprised to find that C-115, a Cornell Dublier .001uF mica capacitor, mounted to the sidewall, is also bad. Fortunately I had the NOS replacement shown here, the only difference being the replacement is a Micamold. |
|
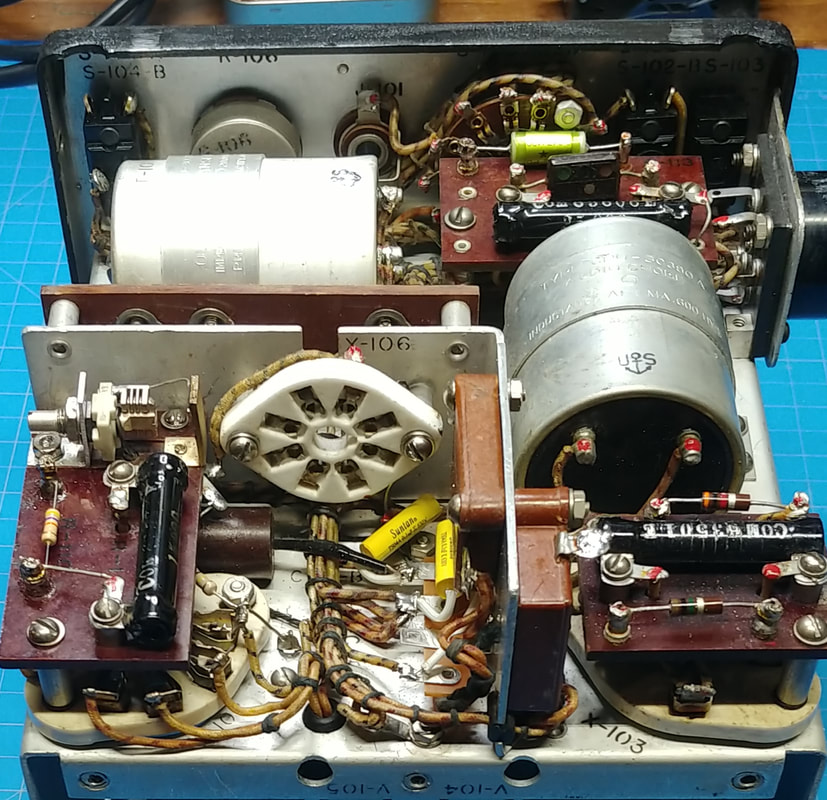
This shot shows a few more components that were replaced. The 0.04uF cap C-113, at the front near the rotary switch, was another oil-filled cap and was so electrically leaky it was basically a short. Rated at 200-volts, it failed completely at only 10-volts on the cap tester.
The 100KΩ resistor R-109 on the crystal oscillator grid had drifted out of tolerance and was replaced, too. Everything else in this section looks OK. |
|
|
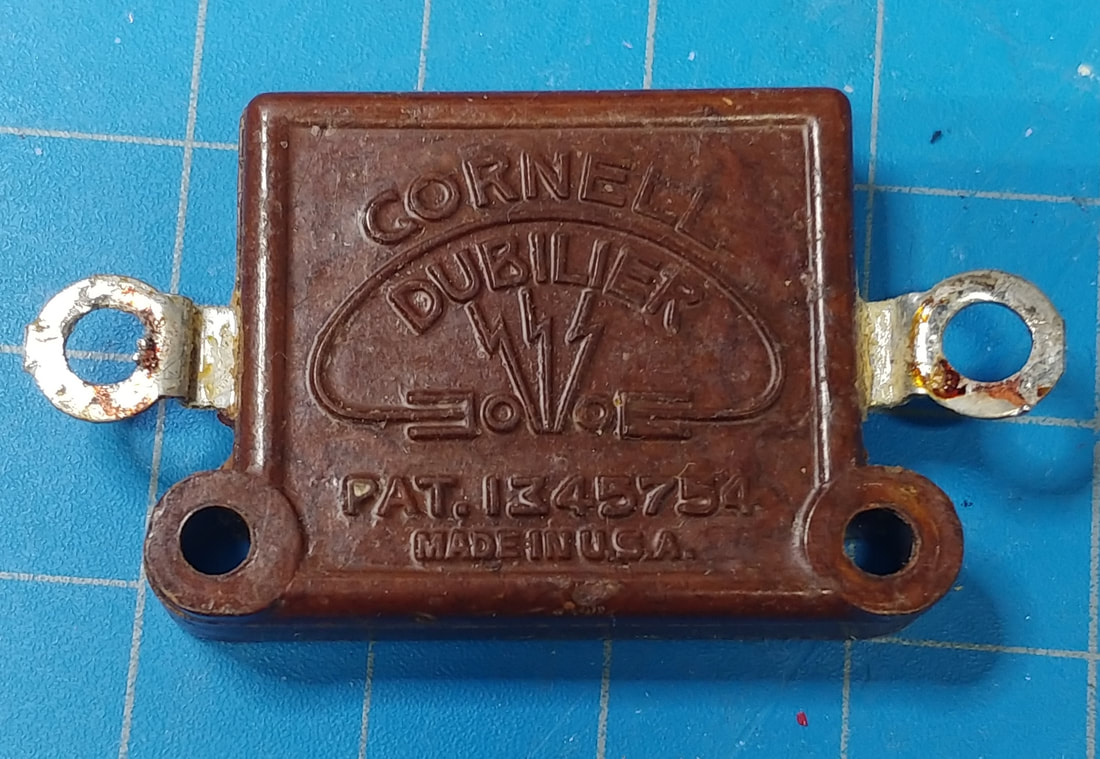
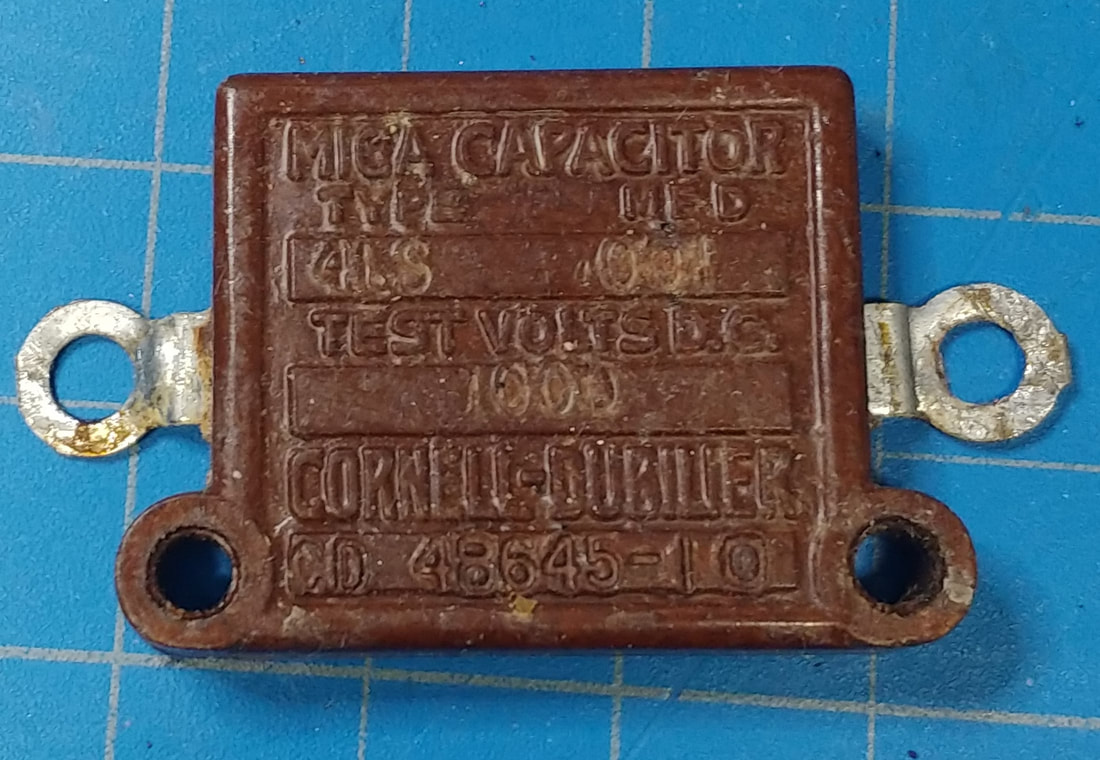
This is C-115, the bad .001uF mica capacitor. I seldom come across a bad mica, but obviously they do need to be checked, too. This one reads around 500MΩ across its terminals using my TS-505D meter, and also fails a leakage test on the cap tester.
|
The last bathtub to replace contains three more 0.1uF capacitors, C-109A, B and C, and is mounted behind V-102. It was a bit of a pain to get at the wiring because it's so recessed, and someone in the distant past did a poor job of unsoldering some of the wires, I guess to try to check them. This is also an oil-filled bathtub, but there is room here to install replacement capacitors, so I just left it in place and added a terminal strip and ground lug for the new caps.
|
|
So far in the meter I've replaced one knob, six 0.1uF capacitors in two bathtubs, one oil-filled axial capacitor, one mica capacitor, two resistors, the crystal trimmer capacitor, plus the 6A7 tube, which was weak.
In the power supply I've replaced two 0.1uF caps in one bathtub, two 4uF oil-filled filter capacitors and one 4uf electrolytic filter capacitor. And of course the blown 1-amp fuse. I left the old filter capacitors installed just for originality. |
|
I replaced the two oil-filled 4uF 600VDC filter caps with 4.7uF 630VDC film capacitors, and the 4uF 600VDC electrolytic was replaced with a 4.7uF 450VDC electrolytic. The 450-volt rating should be no problem, the no-load DC out is less than 400-volts, but the next time I order electrolytics I'll still get a 600-volt electrolytic to install, just to keep it as designed.
In checking out the power supply before applying power, I ohmed out the choke and power transformer connections and discovered this transformer is slightly different from the one in the manual. A couple terminal numbers are swapped from what's on the power supply schematic in the LM-13 manual, and the high voltage winding has a higher resistance than stated in the manual. Otherwise the schematic is good. The no-load DC output at the first filter cap is about 380VDC. The output of the unit while supplying power to the LM-21 is around 315VDC, about 25-volts higher than stated on the label. And that's with the input switches set for 120VAC. But I also have high AC line voltage here that can be as much as 125V, which helps account for the higher output. |
After checking the power supply voltages I powered up the meter, checked its operation, then adjusted the crystal's trimmer while beating the crystal with WWV on 10MHz. The new trimmer worked fine and I was able to zero beat the crystal's frequency with no problem. So that about wraps up this restoration.
Page created 10/15/2020
Last update 2/3/2021
Last update 2/3/2021
