
A Raspberry Pi Allsky Camera
This is a DIY all sky camera project and can be found online at https://thomasjacquin.com/make-your-own-allsky-camera/. Basically, the project is made with a Raspberry Pi, a ZWO or RPiHQ camera, and a waterproof housing with a clear dome. The software to run the AllSky camera is available on the project's GitHub page.
|
I'm using a Raspberry Pi 4b with 8GB of RAM. I think it's the most expensive version of the Pi because it's apparently the most sought after, and the cheaper official sources are all out of stock. The official price at the moment is $75 but I had to pay $139 shipped for this one.
The documentation and a YouTube video by Patriot Astro say AllSky will work on different versions of the Pi and with less RAM, but there are a few caveats. All the versions are apparently capable of capturing images, and even posting images to the local web server, but if you don't have sufficient RAM and processing power you will run into issues creating time lapses, keograms and star trails, so I went with the Pi 4b with 8GB just to keep AllSky as hassle free as possible. |
|
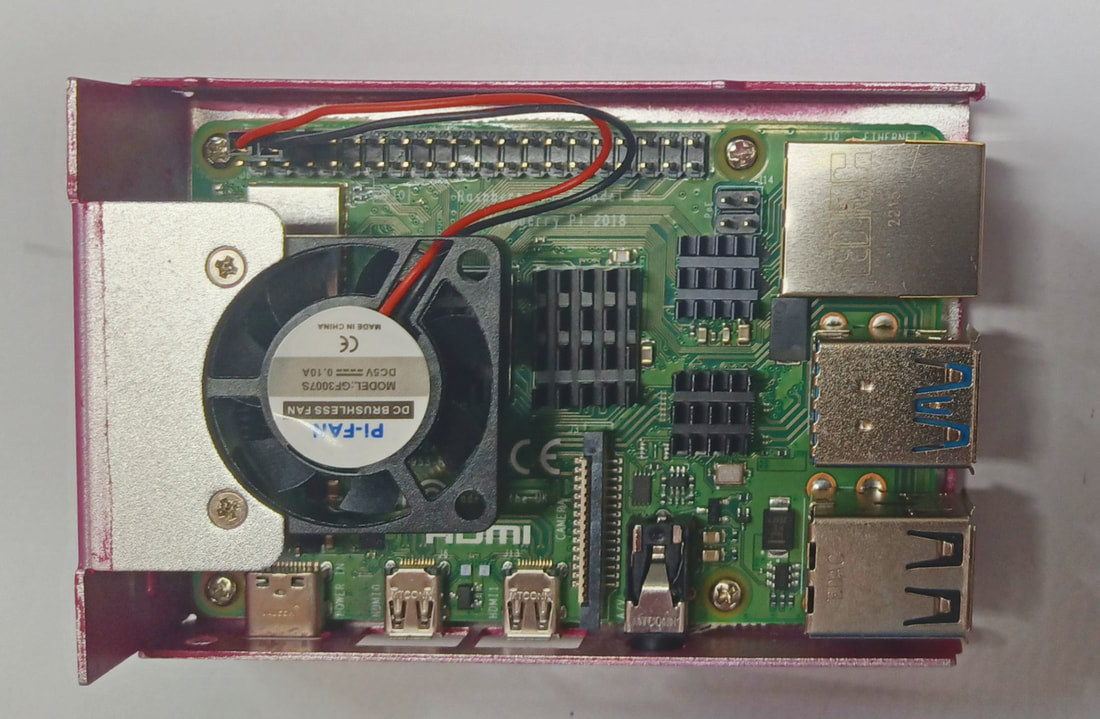
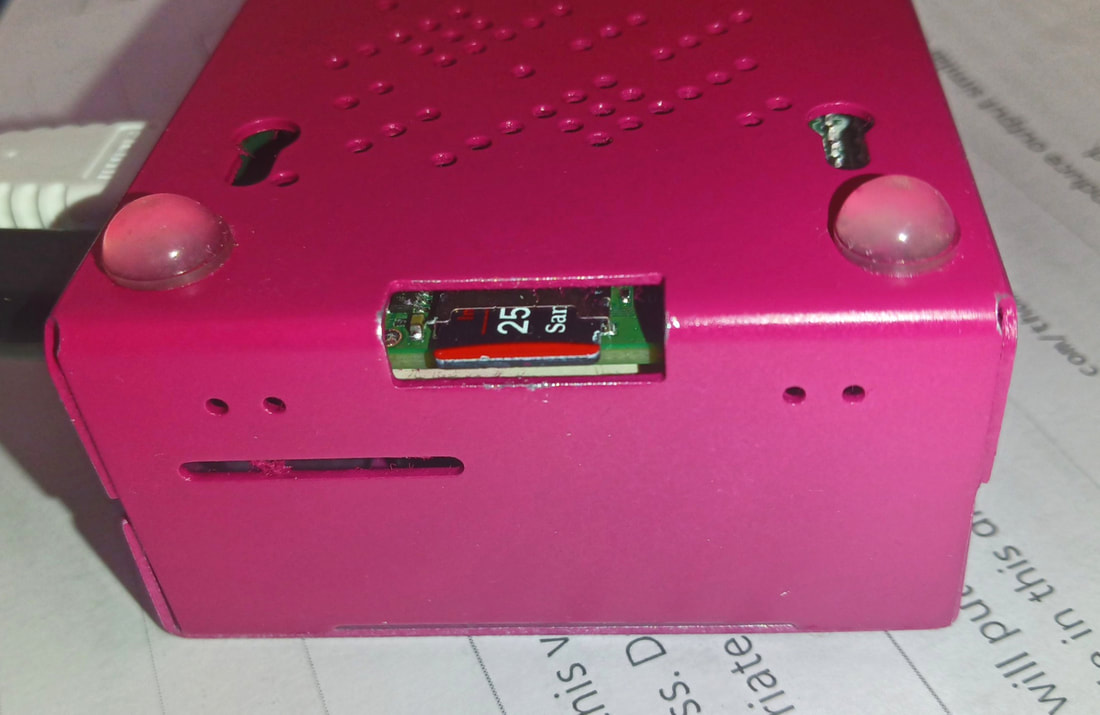
The Pi comes as an uncased board, and the case, power supply and cables are all extra. I ordered one of the numerous accessory kits available online that contains an aluminum case, 4 heatsinks for the Pi chips, a case fan, power supply with cable, and a HDMI cable. And the kit only cost $13.95. Keeping the Pi running as cool as possible is an important consideration.
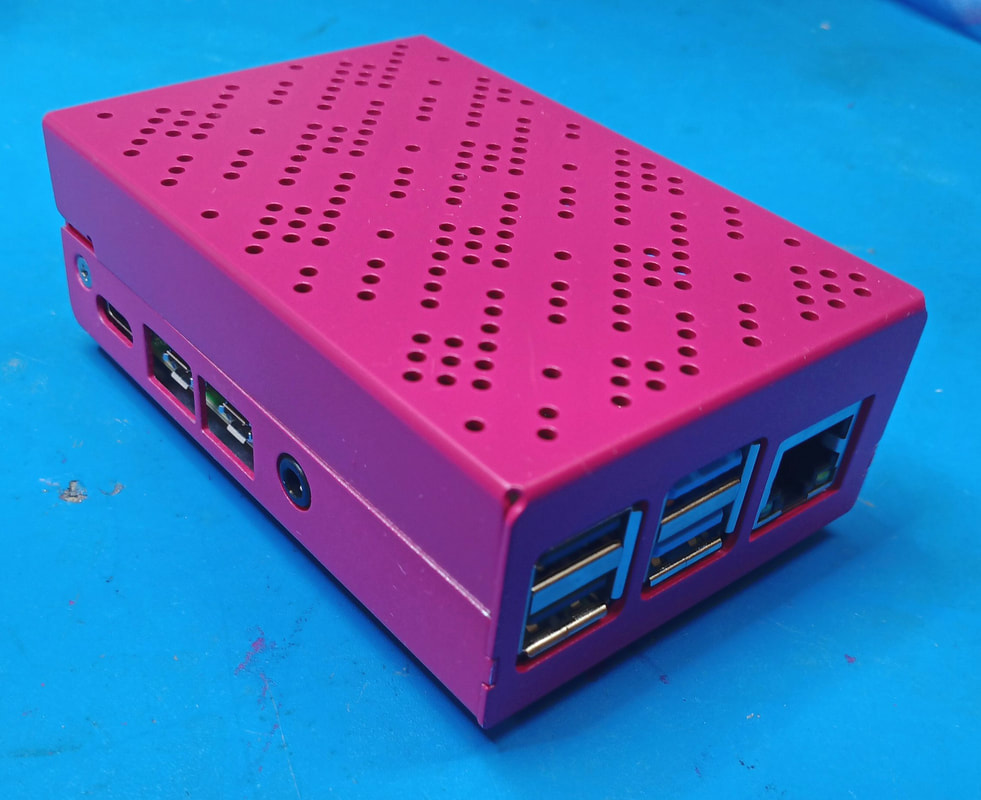
This case was originally just bare aluminium, but I dressed it up with a raspberry paint job. It just seemed like the thing to do. |
|
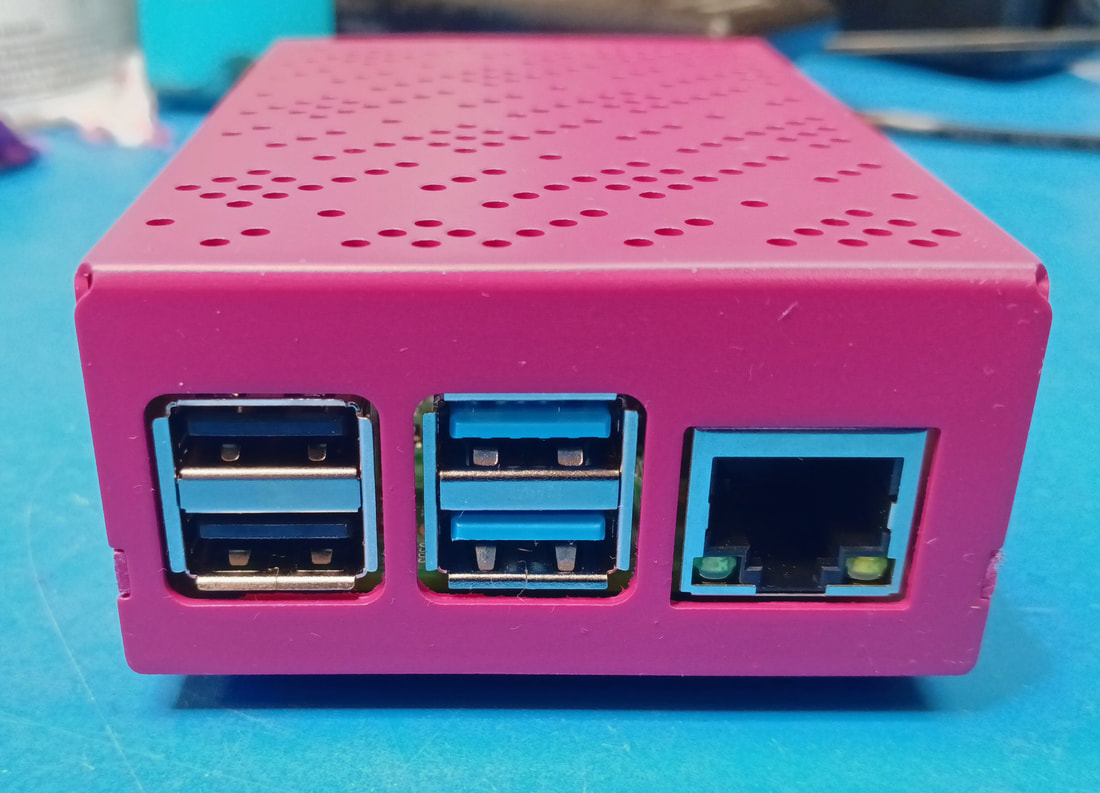
On one end of the Pi are two USB3 and two USB2 ports, plus a gigabit Ethernet port. The Pi 4b has wireless on the PCB and the Pi documentation warns that using a metal case could cause wireless connectivity issues, but I plan to use the Ethernet port.
|
|
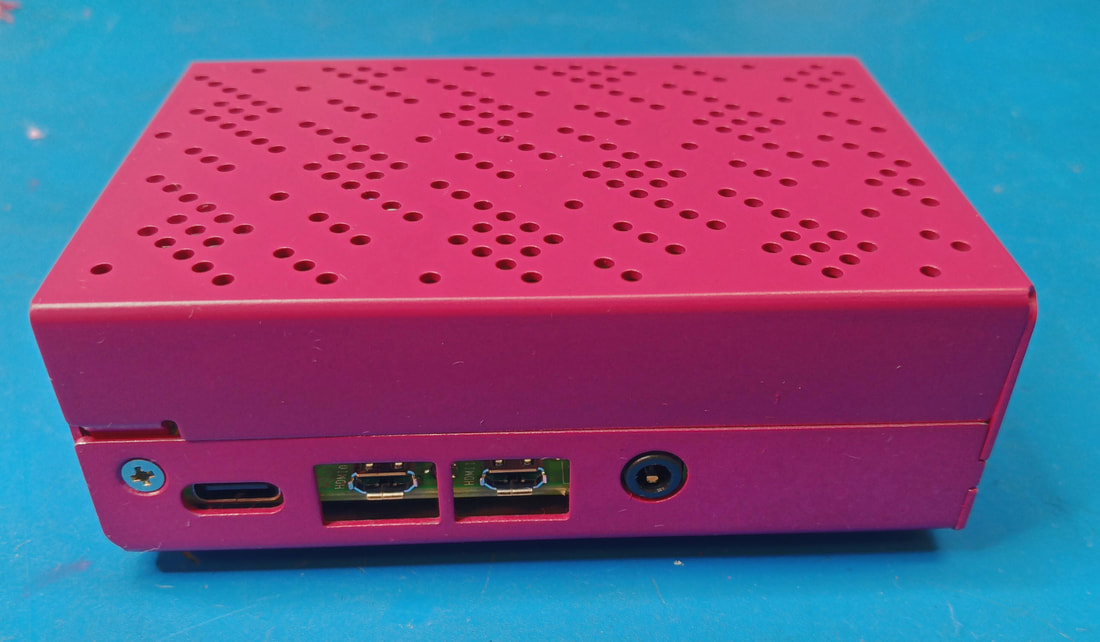
On the side of the PCB, from left to right, are the USB-C 5v power input port, 2 micro HDMI ports and a combo stereo audio/composite video jack. The primary HDMI port is closest to the USB C port.
|
|
The documentation recommends at least a 128GB class 10 micro SD card. I went with 256GB because it will allow plenty of storage for images and in the webui it states I have storage for two weeks of images. Again, the small extra cost of the larger SD card is worth it to me to keep everything running smoothly.
|
The SD card needs to have the Raspian OS installed from a PC, or another Pi, before inserting it into the micro SD slot. The easy way to install the OS is using the free Raspberry Pi Imager software. I installed the 64-bit Lite version, which does not have the graphical UI, but saves space on the card and in memory. The UI is really not needed and even with it a terminal window is still used to install Allsky. All the Linux commands are clearly spelled out in the instructions.
|
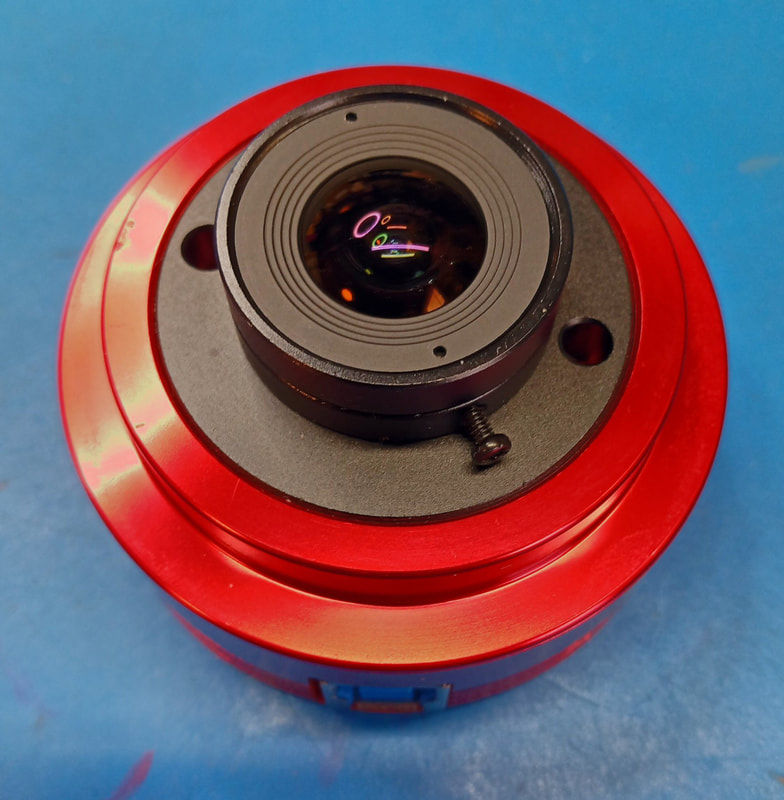
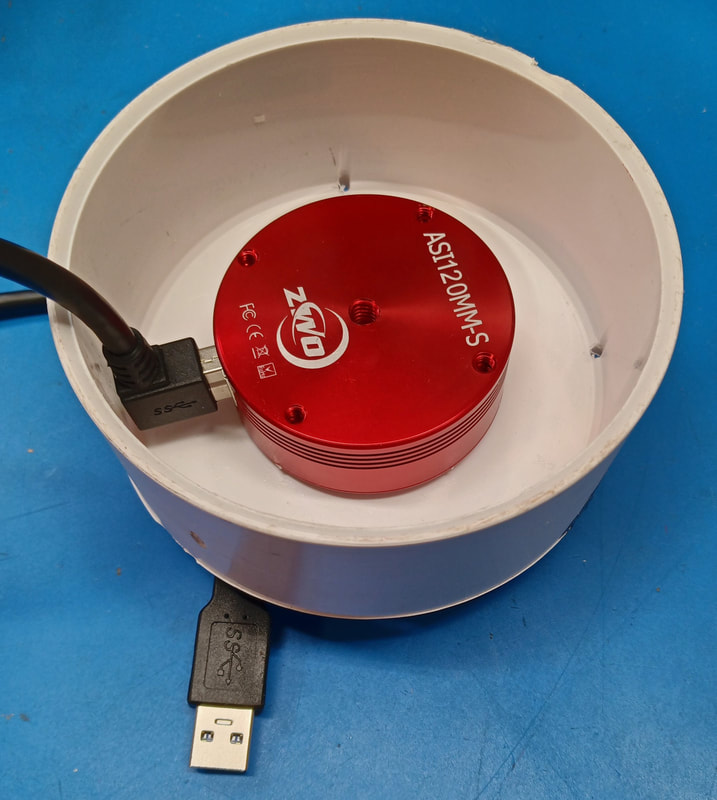
For the camera, I am starting with a ZWO ASI120MM-S and will see how the images look. I read in the documentation that the ASI120 is not really recommended because of connectivity issues and user complaints that the images are too noisy. But I think those complaints are with the older USB 2.0 version of the camera. So far I've had no issues setting up the newer USB 3.0 high speed version. If for some reason it's not satisfactory I'll try my ASI178MM.
To get started I'm using the 2.1mm focal length, 150° FOV lens that came with the camera. If the FOV is not sufficient I'll order a 180° lens. |
|
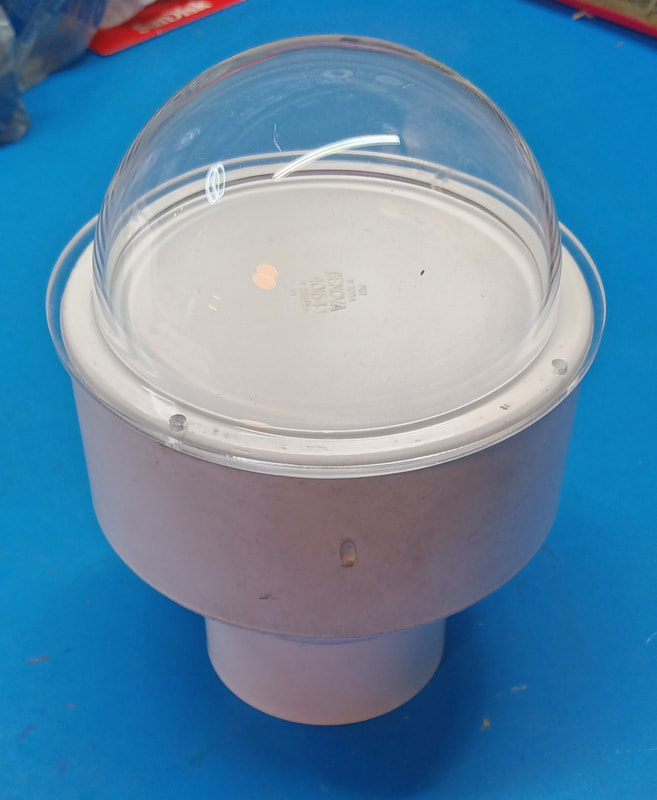
My weatherproof enclosure is made from 4" thin wall PVC and consists of a 4" cap and a 4" to 2" reducer, plus there is a section of 2" pipe for the pole. I ordered a 4" clear acrylic dome ($15 on Amazon) to protect the camera from the weather. Next I need to cut the hole in the top cap to fit the camera.
|
|
One issue with using 4" diameter PVC is not having enough space inside for a straight USB 3.0 connector to stick out the side of the camera. I had to order a cable with a right angle connector to be able to fit the connected camera inside.
|
Not done yet...
Page created 4/30/2023
Last updated 5/20/2023
Last updated 5/20/2023
