
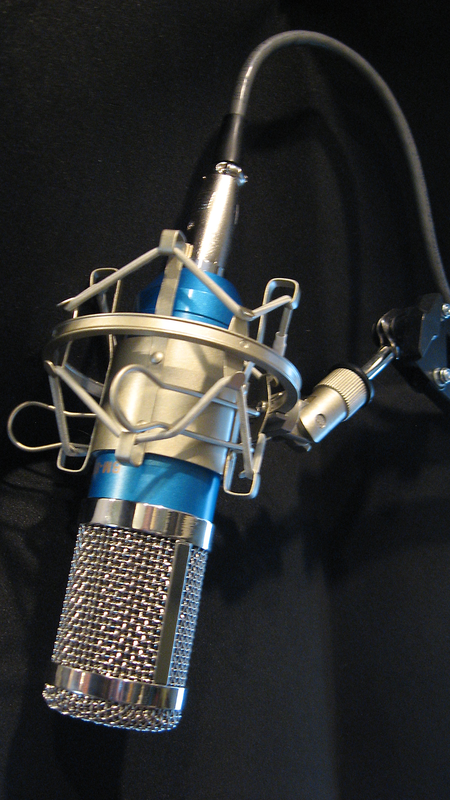
A Station Boom Microphone
A few years back I found an interesting webpage by amateur G4IZH on converting a commonly available BM-800 microphone for amateur radio use. His page provided detailed info on converting these into a decent station microphone.
|
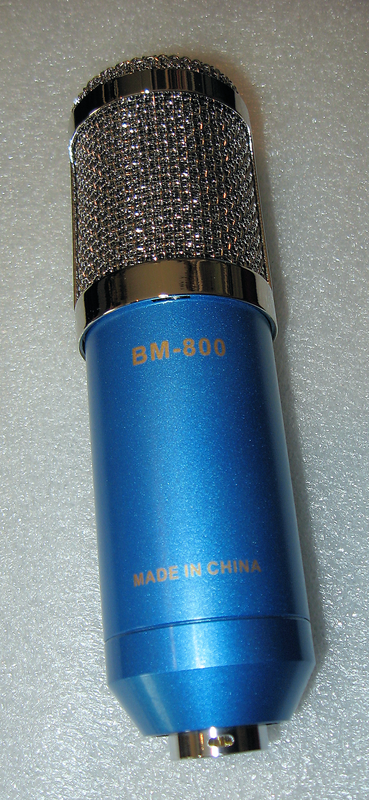
The BM-800 came in a variety of color choices and I chose blue and silver. On the inside it's an electret condenser microphone requiring a separate power source (phantom power) to operate.
The modification converts the output to unbalanced and tailors the frequency response for better performance with an amateur transceiver. It might not beat out an expensive, high-end amateur microphone, but then I wasn't willing to pay the high-end price either. And I prefer DIY projects whenever possible - for me that's what the hobby is about. |
|
BM800 Microphone Conversion
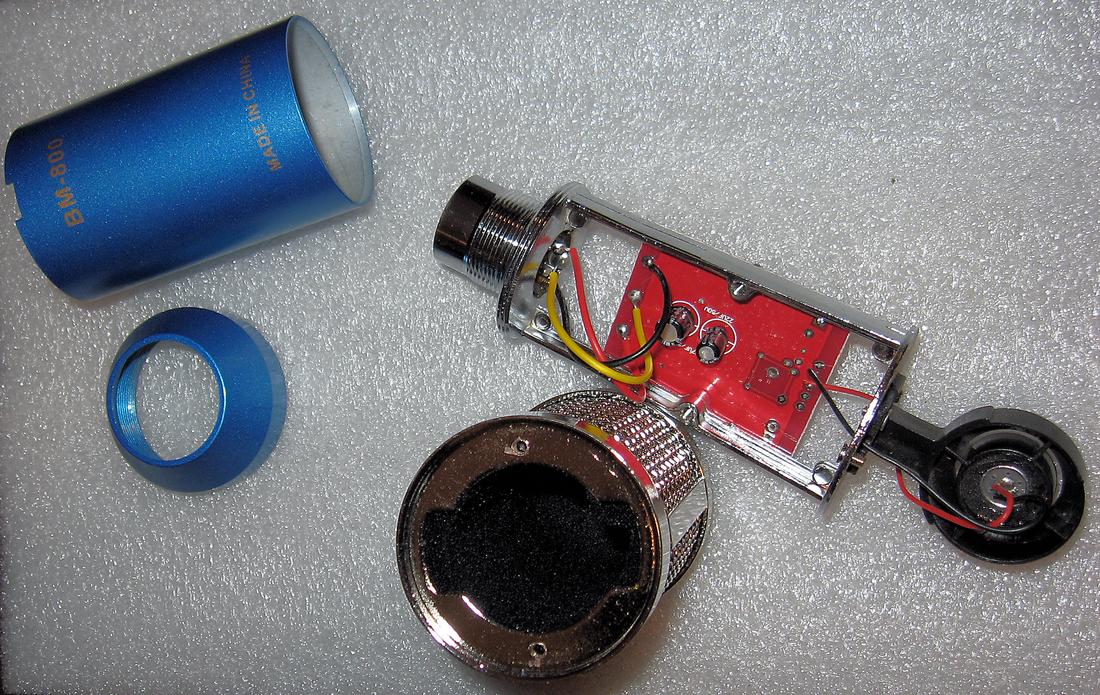
Although these mics are inexpensive, they are still reasonably well constructed. The shell and frame are all metal and only the internal electret mount is made of plastic. It's easy to disassemble the BM-800 - just unscrew the end and the metal shell slips right off. Then there are two screws inside that hold the screen in place. And there's plenty of room inside for the conversion.

|
There is one circuit board in this mic. Some of these had a second unused blank PCB mounted on the opposite side but not this one.
|
|
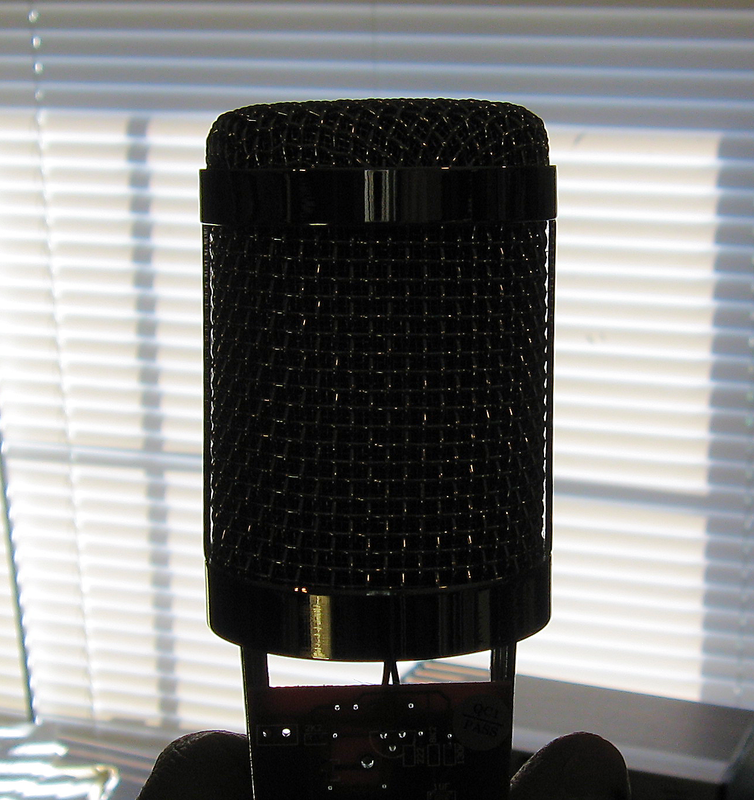
The screen removed to expose the microphone element/holder. The screen now has a foam insert unlike older BM-800's I saw online.
|
|
Thanks to the foam insert, the internal microphone element is not visible through the screen even when backlit, unlike older versions where the element was easily seen. Hopefully there shouldn't be any need to add the external wind cap. Also, the front of the mic element faces the lettering on the body.
|
|
Besides the foam cap, the accessories include a metal shock mount and 2-wire microphone cable. The shock mount works fine as is, but the original conversion circuit required a 3-wire mic cable because it used a separate lead for power. I altered the mic circuit to use phantom power on the audio line, eliminating the need for a third wire. Now I can use the supplied 2-wire mic cable along with my windcamp adapter to feed "phantom power" to the mic from the FT-817, instead of adding a battery inside the mic's case. I was able to match the hand mic's gain using the 5-volts available from the 817's microphone jack
|

|
This mic has a different electret module than the one shown on G4IZH's site. This one is smaller and has the FET built into the module hence there is no FET on the PCB.
|
|
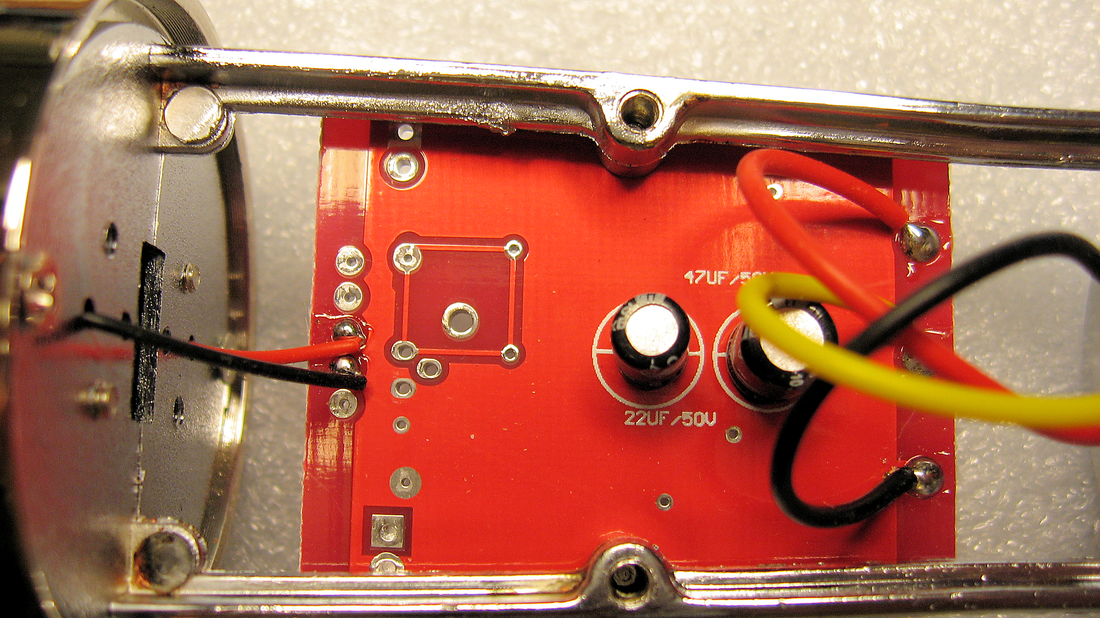
The only components on the back of the PCB are two 47uF electrolytic capacitors. The caps stick up about level with the frame, so I added washers under the add-in board's screw holes to space it up a little just to ensure nothing shorted to the tops of the caps.
|
|
A closeup of the PCB gives a better look at the traces and components. The red and black wires for the mic element connect on the left and the XLR wires on the right.
|
|
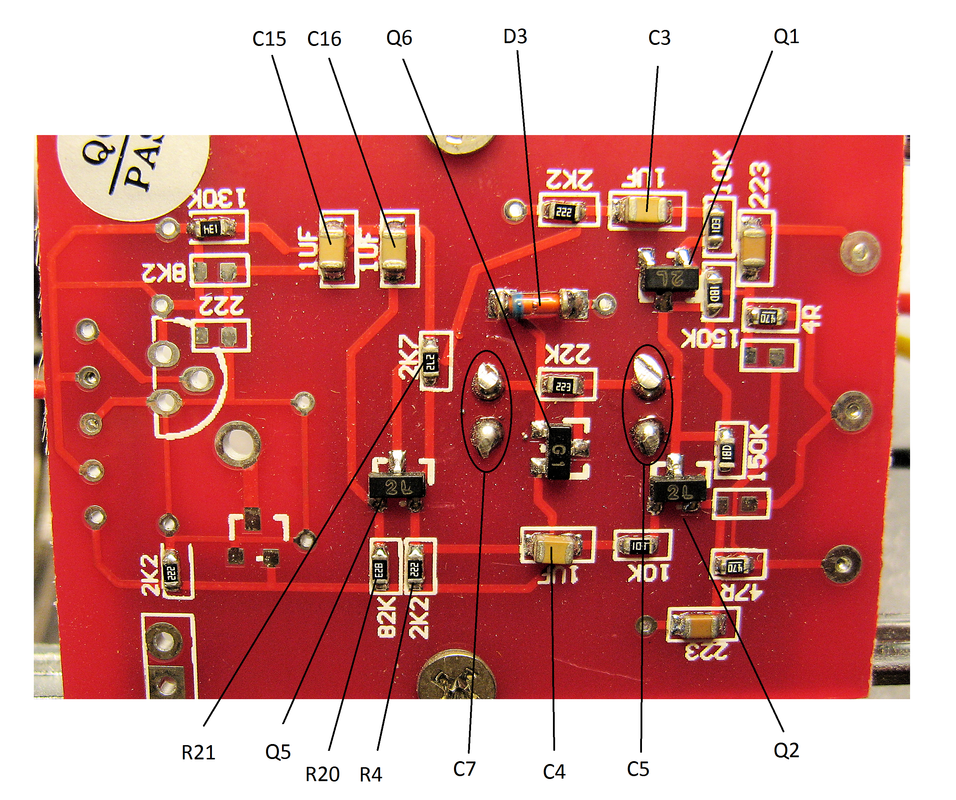
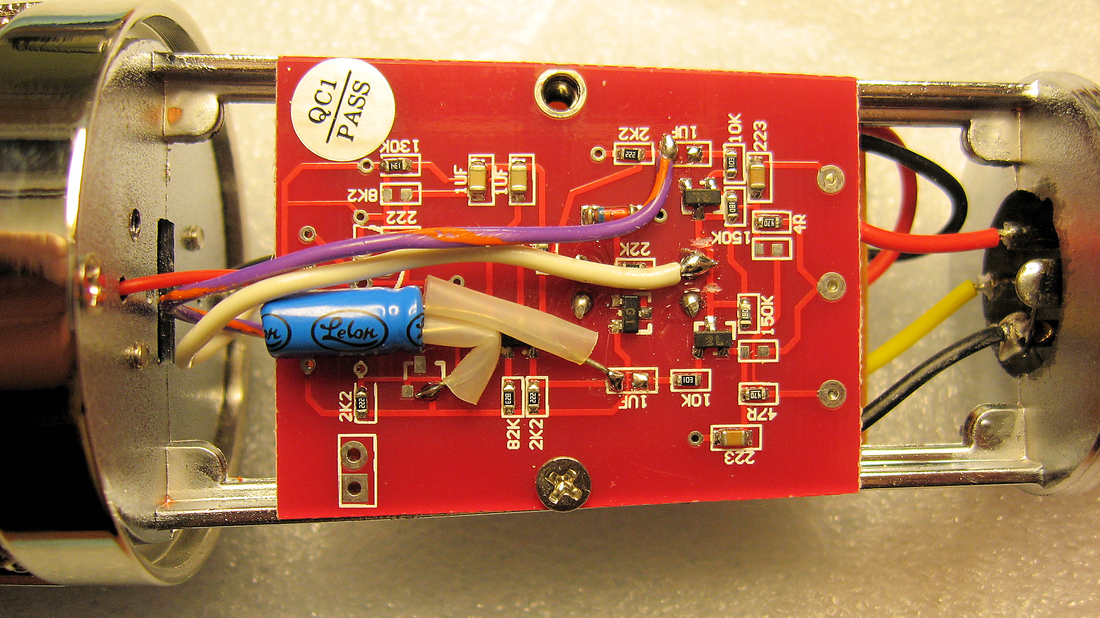
The mods to the PCB and connections to the add-in board. The blue cap is the 2.2uF across R4. The violet wire picks off the audio from Q5, sending it to the input of the Lo and Hi audio filters. The PCB traces from C5 to the collectors of both Q1 and Q2 were cut to remove them completely from the circuit. The white wire from the power filter connects at C5. Also, C3 and C4 were removed.
|
|
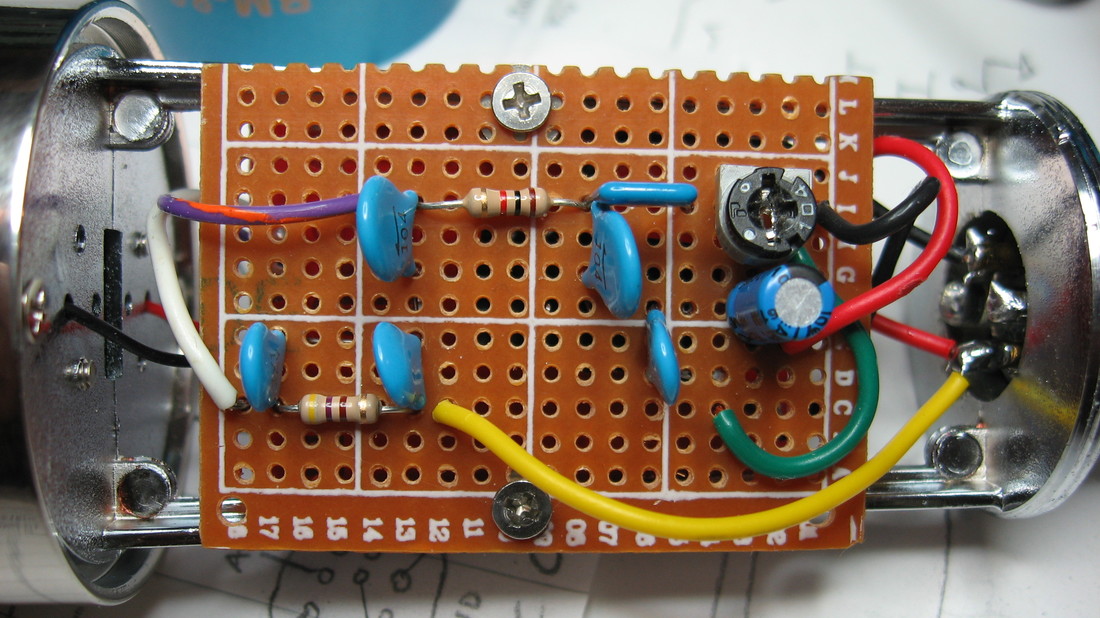
The add-in board has the capacitors and resistors for the power and audio filters, and the VR1 audio out level adjustment. Using an o'scope I adjusted VR-1 to provide the same level out as my hand mic.
I modified the original mod, adding phantom power for the mic on the audio lead, by removing the yellow power wire from pin 3 and connecting it to the red audio wire on pin 2. Then a 4.7uF capacitor was added between the red wire and the wiper on VR1, to block DC voltage from getting to the potentiometer. |
|
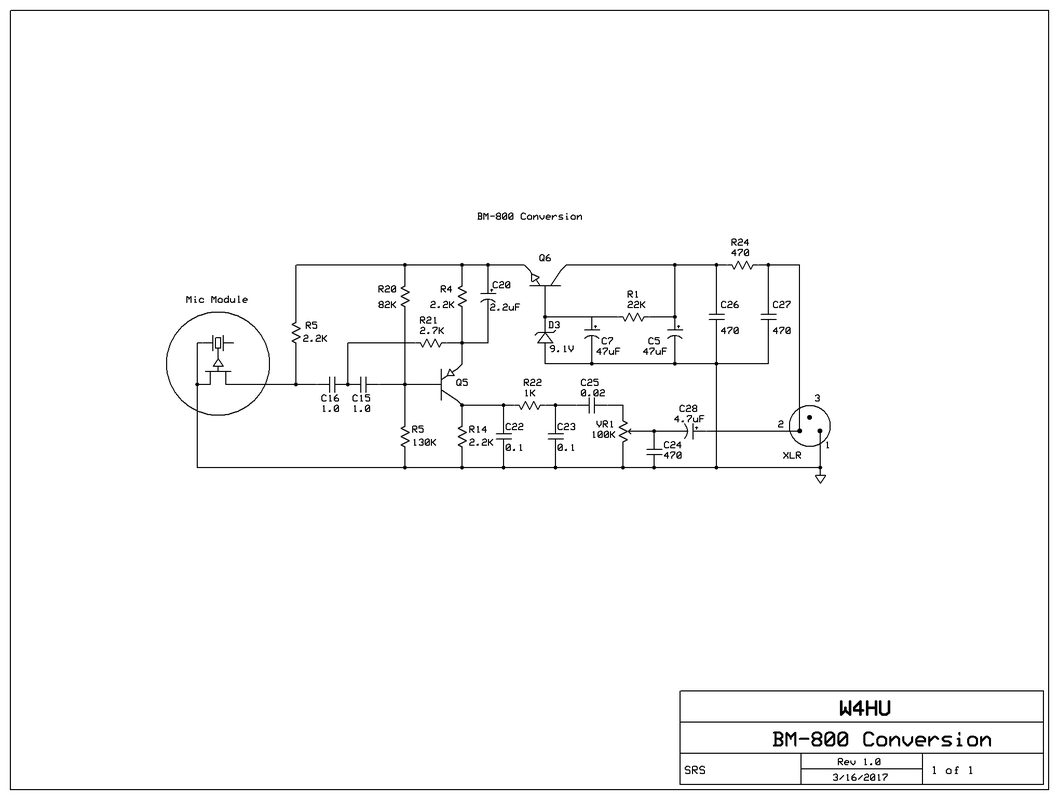
Schematic with the component values in my converted BM-800. A few of the part values in my mic circuit vary from the G4IZH schematic.
|
|
The converted microphone mounted on a scissor boom arm using the included metal shock mount. Not bad for less than thirty dollars including the scissor arm.
|
Last update 5/11/2017
