
Setting Up New Observatory Computers and Network
My old Exploradome computer was an HP dual-core Athlon originally running Windows XP and later Windows 7. It's too old and slow to use in the new observatory, so it's time for something a little newer and a lot faster.
One of my goals is to completely eliminate MS Windows from my network. I still have a couple of old computers that will dual boot to Windows 10, just in case I need to recover some files from a Windows only program, but once I'm sure I've converted all my data and graphics then Windows will be wiped from those, too. All my computers from here on out will be running on Linux Mint, an OS I really enjoy using. I don't even want a Windows virtual machine running in Linux if I can help it. It's not that I don't know Windows, but quite the opposite. I'm a relatively new Linux user, just maybe six or seven years experience with it, but I was a Microsoft Certified Trainer, a Microsoft Certified Systems Engineer, and a network administrator, for more than 20 years before I retired. I've used every version of Windows up to Windows 10, but that's the end of the road for me. I find Linux is a breath of fresh air.
I now won't buy any equipment or software that won't run on Debian/Ubuntu (Linux Mint is based on Ubuntu) along with the INDI Library. I don't use cloud-based apps and I won't "rent" software. I was an ardent Photoshop user until it became "rental" software so I dropped it. Then I moved to the Affinity suite which I like but I'm dropping it too, because there is no Linux version and last time I checked, it doesn't run under Wine either. I use other Linux-compatible astrophotography apps like Star Tools and Nebulosity, and now I'm looking into Pixinsight.
A New Image Processing Workstation
|
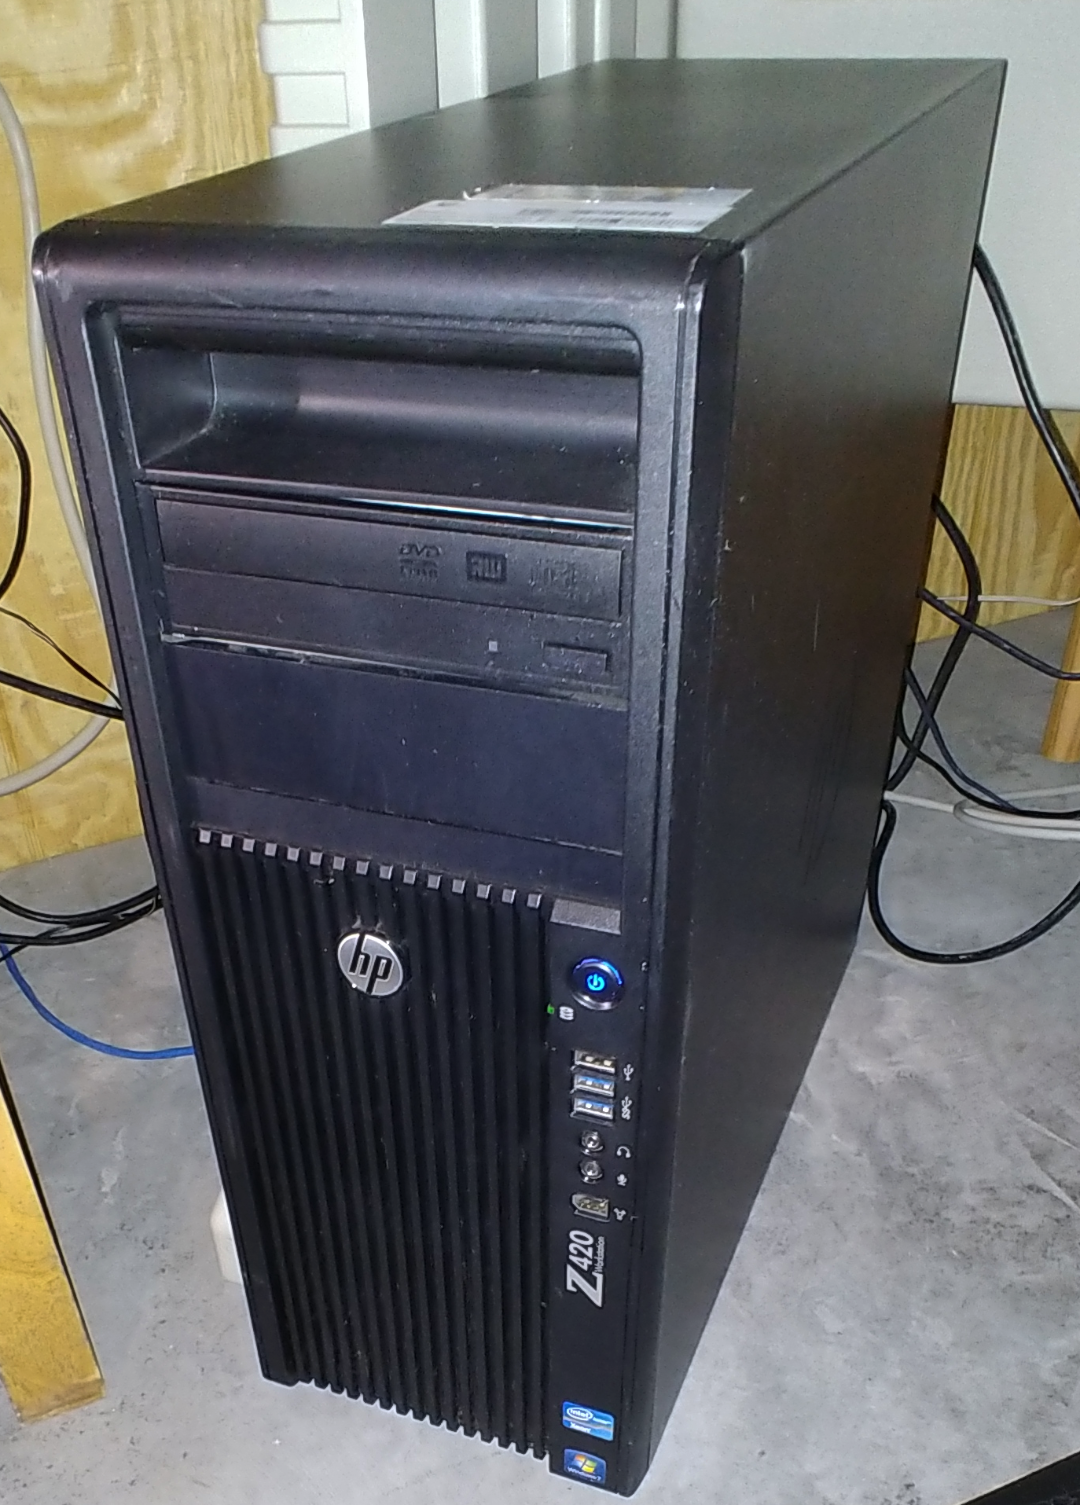
Back at the end of 2021 I purchased a refurbished HP Z420 workstation advertised with a 6-core, 12-thread 2.5GHz Xeon processor, 32GB of RAM and a 2TB HDD, for just $300 shipped. I was pleasantly surprised when I received a Z420 with an 8-core, 16-thread 2.6GHz Xeon at no extra charge. I only needed to add a 240GB SSD for the OS and the HP serial port option to have a "real" serial port.
It already has the no-tools case, extra case fans and ducting for improved cooling, a dual-port DVI video card, USB 3.0 ports, and a 600-watt PS. |

|
For the OS I installed Linux Mint and started adding Astronomy related programs. And I plan to purchase Pixinsight for image processing.
More recently I found a couple of brand new Acer 27" monitors at a local auction and they work great with the workstation, but after my latest Mint upgrade, the Nvidia graphics card is no longer supported with a proprietary Nvidia driver and has to use a generic linux driver instead. For some reason I can't get it to work with dual monitors, so rather than trying to keep the old card going, I purchased an Nvidia 1060 to replace it, which also happens to support three monitors. I purchased another new 4K monitor as well, and now I have a triple monitor display setup. |
My original plan was to use this workstation to control everything in the dome, but as things have progressed those plans have changed, and now I am adding another computer in the dome, so I will keep this workstation in the lab for image processing and remote access.
The Dome Computer
The observatory dome won't have a dedicated warm room attached, which means no climate-controlled space for a normal PC. Instead I'll use a computer that can stand up to a wide range of temperature extremes and humidity.
|
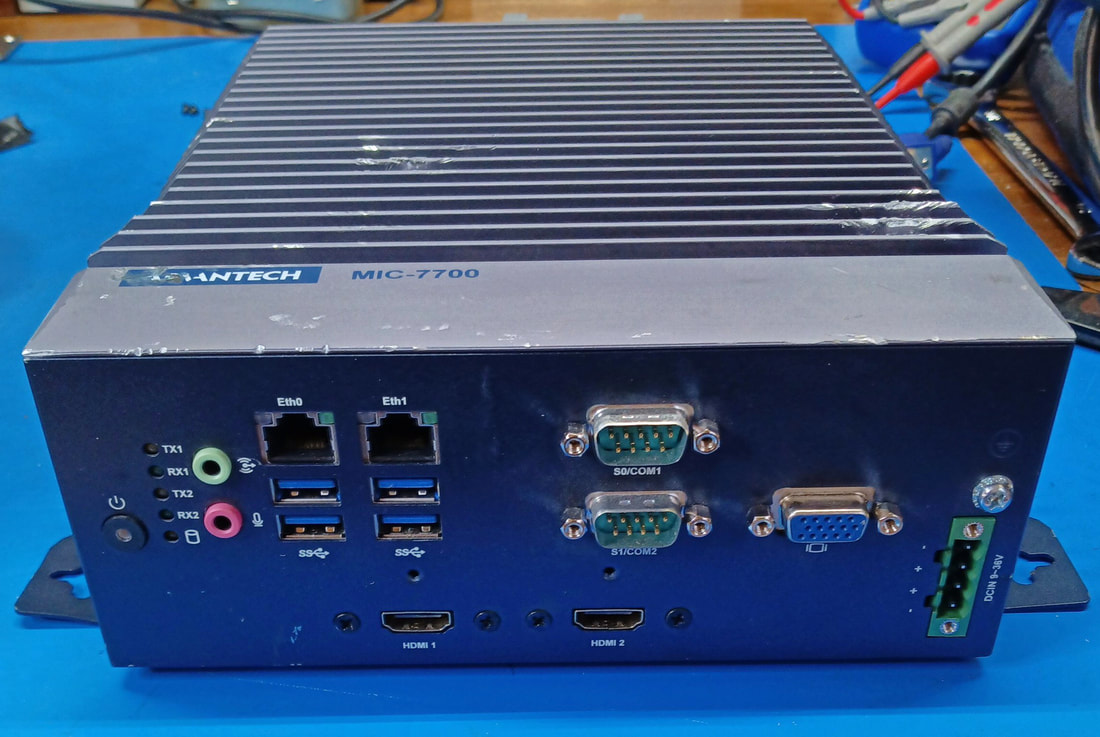
I found this used Advantech model MIC 7700Q online. It's an industrial fanless computer and is built for harsher environmental conditions than a normal PC. Manuals and drivers are available online and its specs are:
|
For this location -10C is sufficient as I have some other gear with similar tempurature limits. It does occasionally get colder than that, but not by much. And the unit's max non-operating temps are -40C to 85C.
The MIC 7700 can run on any voltage from 9-36VDC, but the lower the voltage the higher the amperage. At 12VDC it has a max current draw of over 10Amps. Its AC power brick provides 19VDC @ 7.9Amps and since the dome will have AC power I'll just use the brick.
Linux Mint has been installed as the OS, plus Kstars, EKOS and INDI. Next the mount and imaging cameras will be set up.
The NAS Server
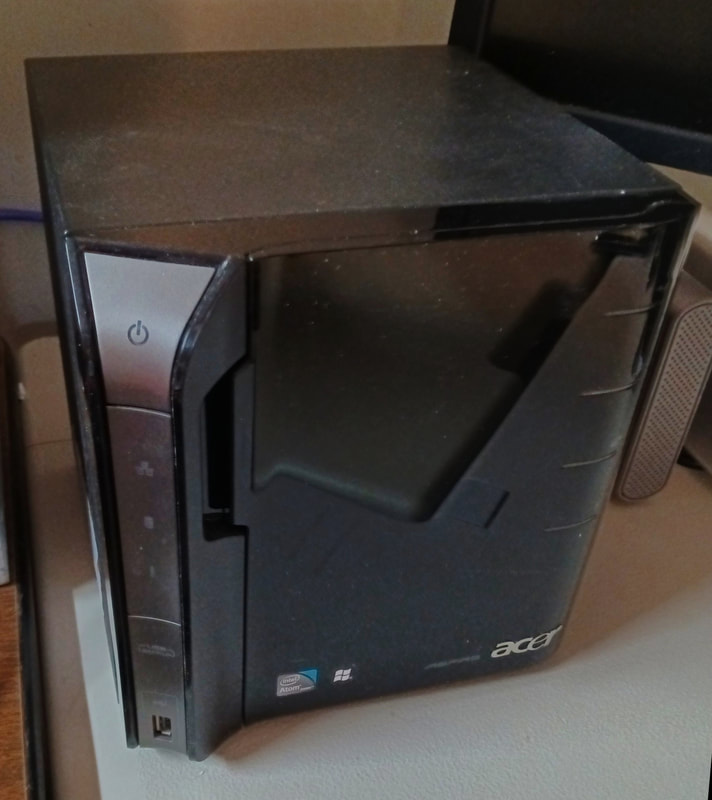
I'm using Linux OpenMediaVault running on an Acer Aspire easyStore H340 as my network attached storage (NAS). It has a 2TB RAID 5 array for data storage and a 200GB drive for the OS and OpenMediaVault. It stores all my astrophotography backups.
|
The Acer H340 was originally a Windows Home Server until WHS died on the vine. Then it became a Linux Amahi NAS, but there were a few things I didn't like about it, so I finally ended up with OpenMediaVault, which I really do like.
Out of the box the H340 is a headless NAS. There's no connector for attaching a monitor, but there is a header on the motherboard that allows for modifying the unit to add a VGA connector. Once I modified it, I replaced WHS with Linux and never looked back. I also found a G-RAID 3TB standalone USB/Firewire drive at the same auction where I found the monitors, and it will be used for offline backups. |
Remote Control of Dome Power
|
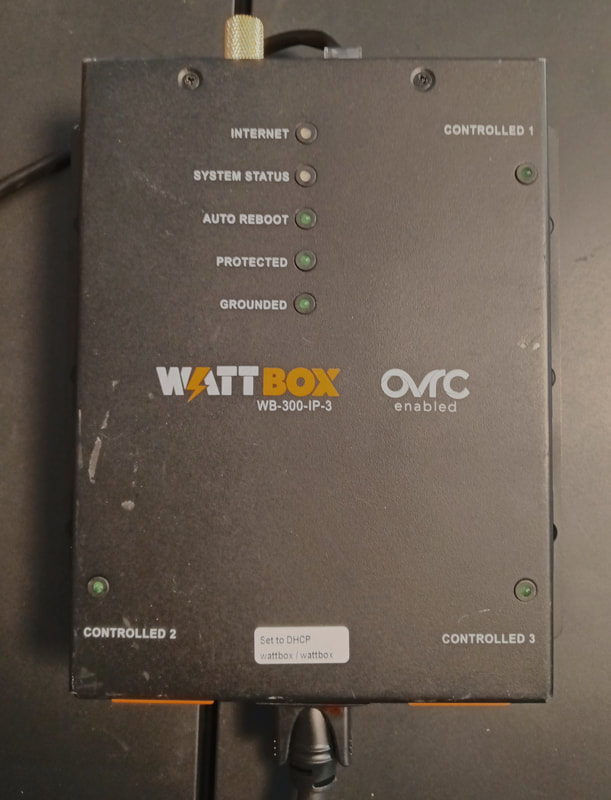
I picked up a used WattBox 300 to remote control the AC power in the dome. Since it's a used unit I made sure to order one that had been tested and reset to its default configuration, including the username and password. It provides the capability of controlling three AC outlets through a web interface, which will let me control all my equipment power remotely. I found the manuals and configuration utility software on the SnapAV website and the setup was pretty easy.
|
Page created 12/28/2021
Last update 7/20/2024
Last update 7/20/2024
