
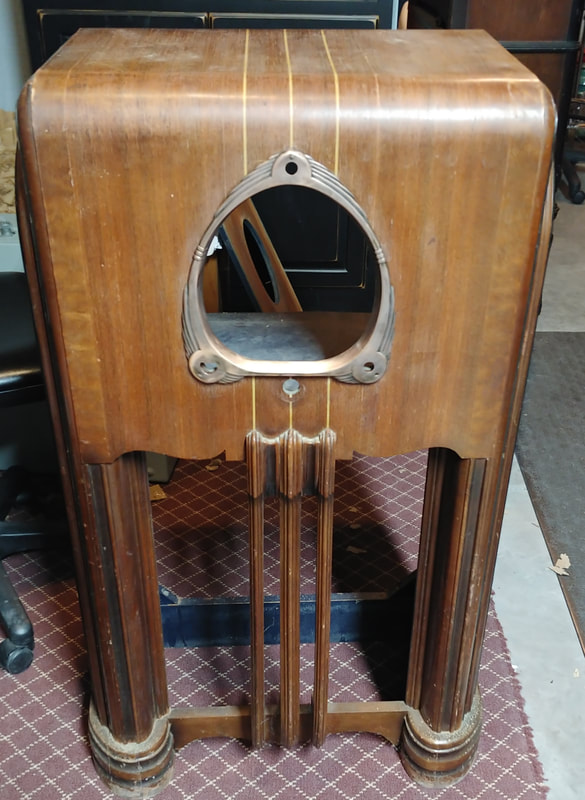
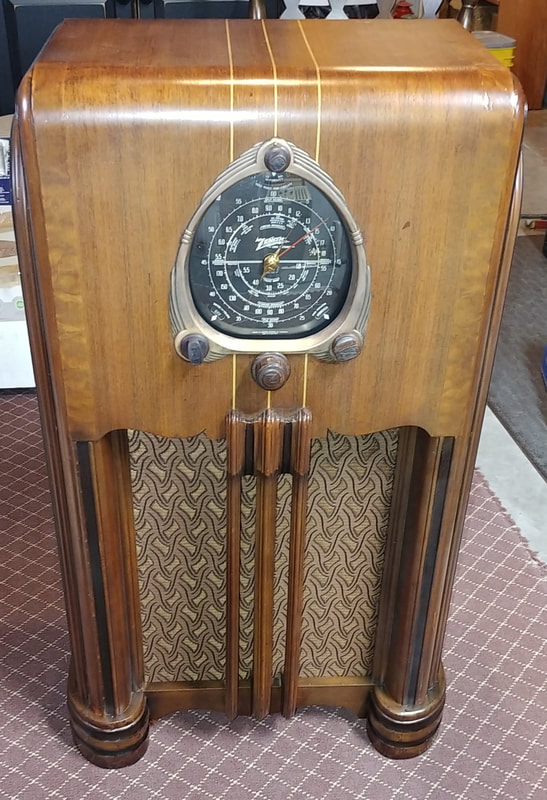
1938 Zenith 6-S-254 Console
This console was part of Zenith's 1938 line up, and was introduced in the fall of 1937. It's a nice looking little console, but being only a six-tube set, it was not a high-end model, and was priced at $69.95 (the average rent in 1938 was about $27). Still not cheap by 1938 standards, but a top of the line model was well over $200.
|
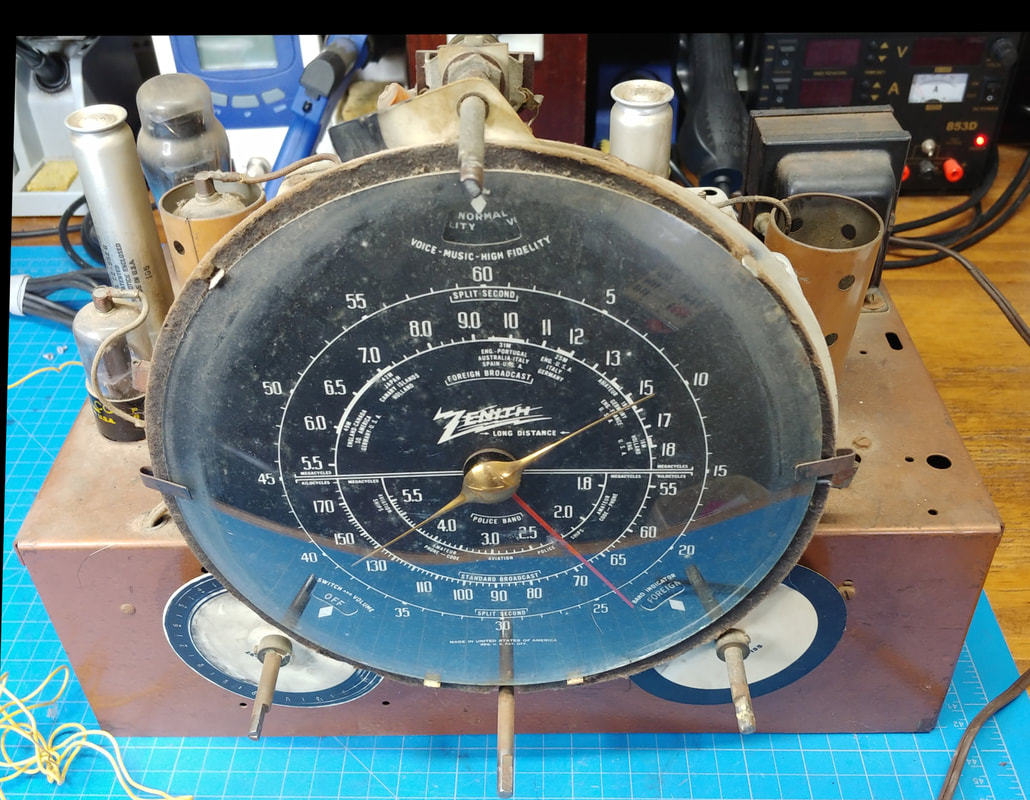
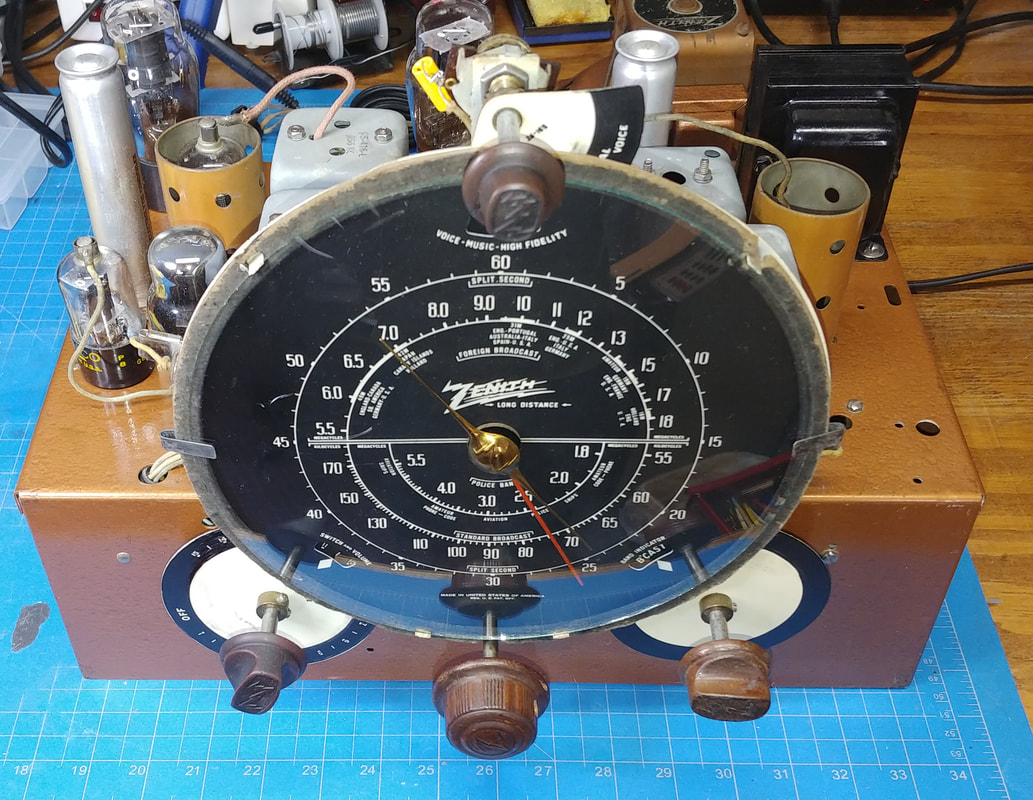
One of the best features of this set is its large black dial with the "second hand" sweep. And all the controls have their own small dials that are visible in windows on the main dial.
|
|
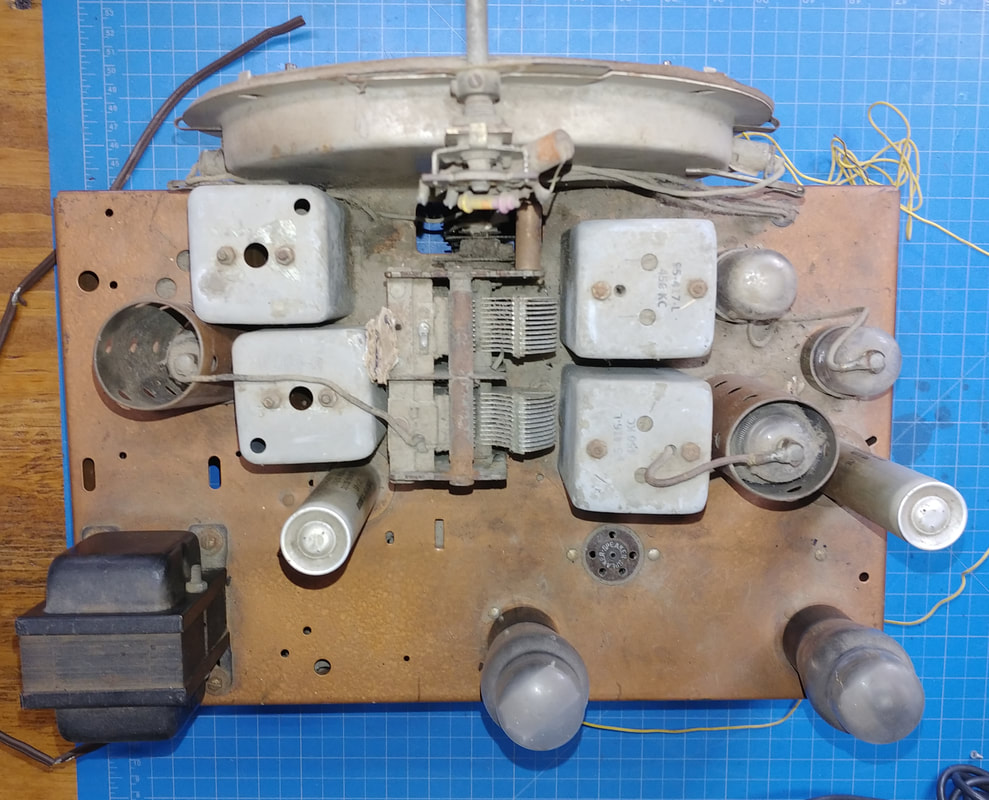
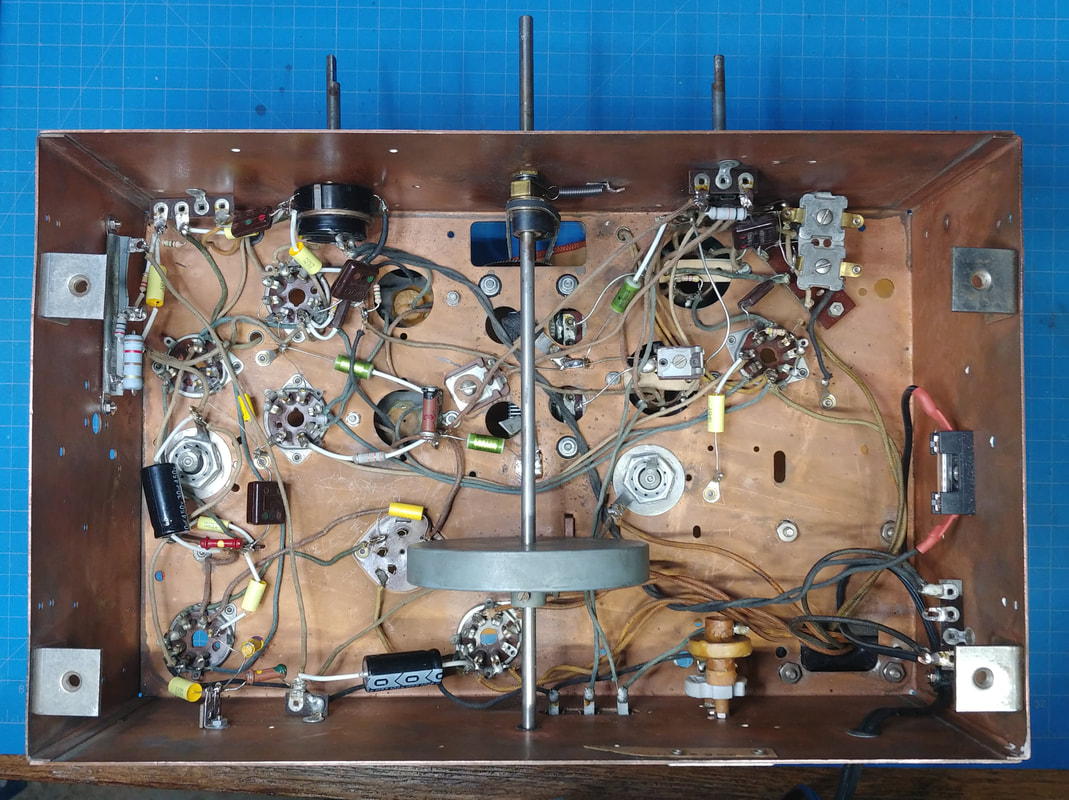
The hammertoned-copper paint on the chassis is in good condition, with just a few small scratches and a lot of dirt. The rubber grommets supporting the tuning condensor need replaced, as they always do, which will happen when I pull the condensor to clean it. I checked the tubes and they are still usable, but the 6F5 and 6H6 are the later ST-style, and the 6A8 is a metal tube, so I'll see if I can find the correct G-style shouldered tubes.
|
|
Under the chassis looks original with only the electrolytic caps having ever been replaced in circuit. But the original filter caps are still mounted on the chassis. Also the tension spring on the tuning belt is not original, and the old belt was replaced with string. I should have a real belt for this somewhere in my stash of stuff.
|
|
Removing the dials was fairly easy. Getting that big dial out of the way makes it easier to work on the top side.
|
|
|
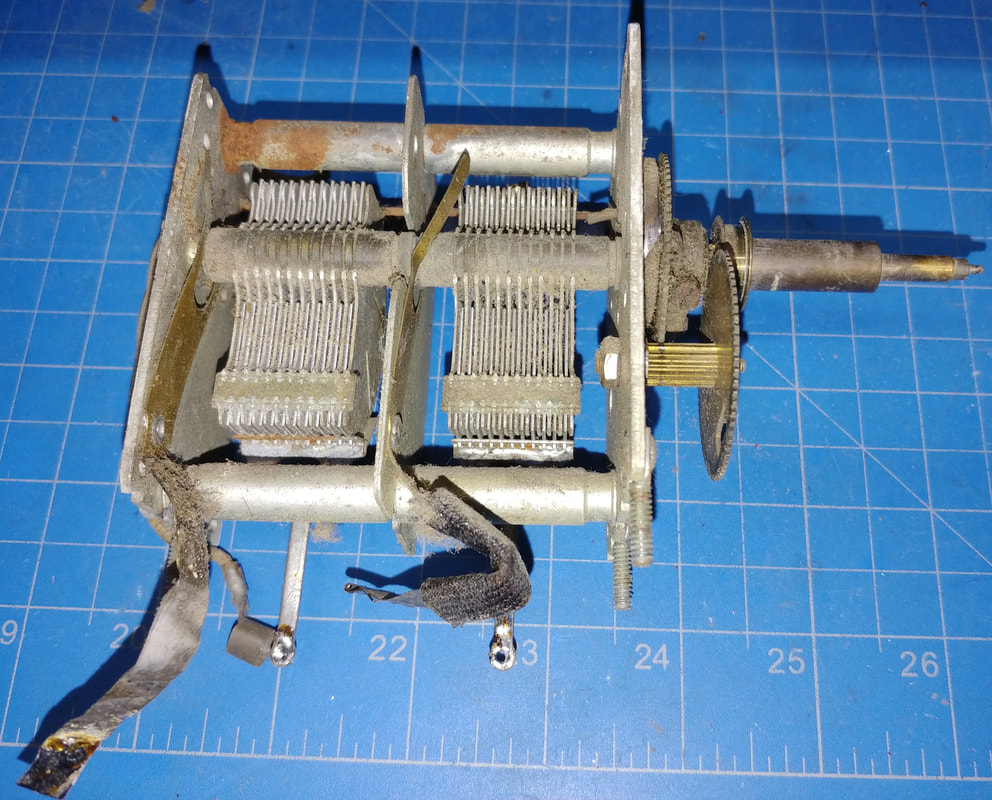
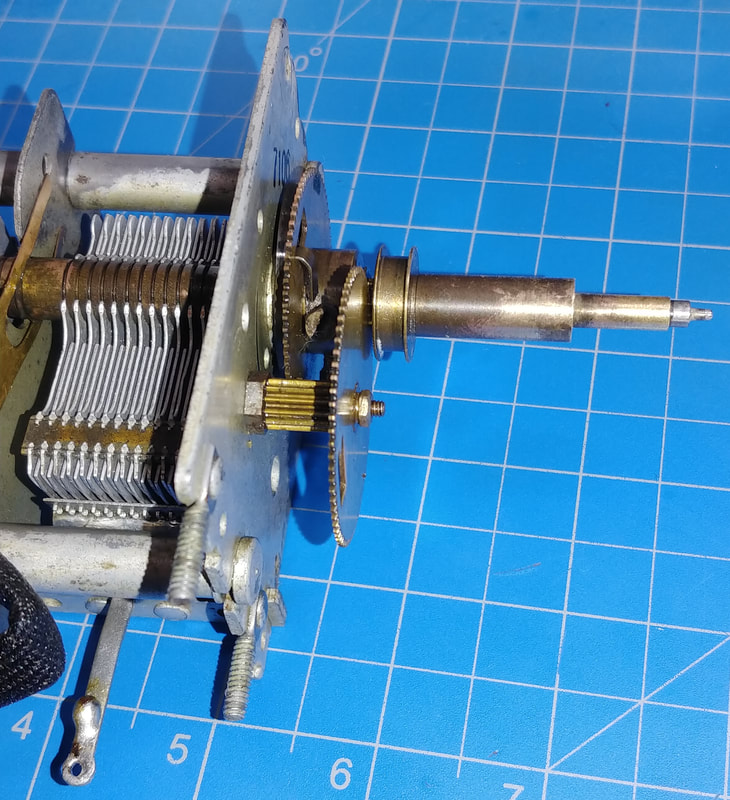
I pulled the tuning condensor to clean, de-rust, and lubricate it. One of the ground strip contacts is bent up and needs fixed, too. It also has something most variable capacitors don't, a "main spring" around the center shaft, right behind the vernier, that winds up as the plates are unmeshed. Out of the radio, releasing the shaft lets the spring automatically unwind and remesh the plates, but with the condensor reinstalled it becomes an essential part of the flywheel tuning. In the second photo the gears have been cleaned up to make everything easier to see. The spring is behind the larger gear, right up against the capacitor's frame.
|
|
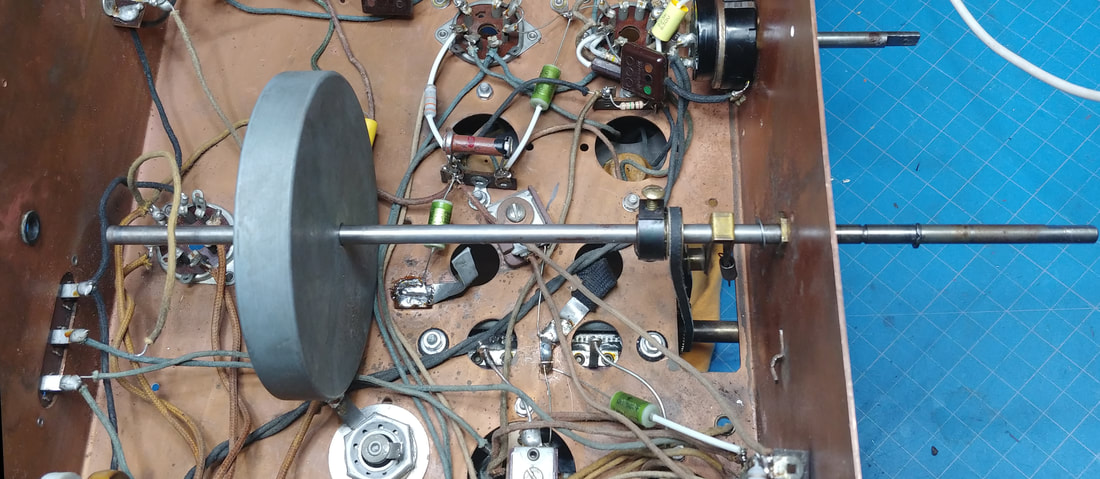
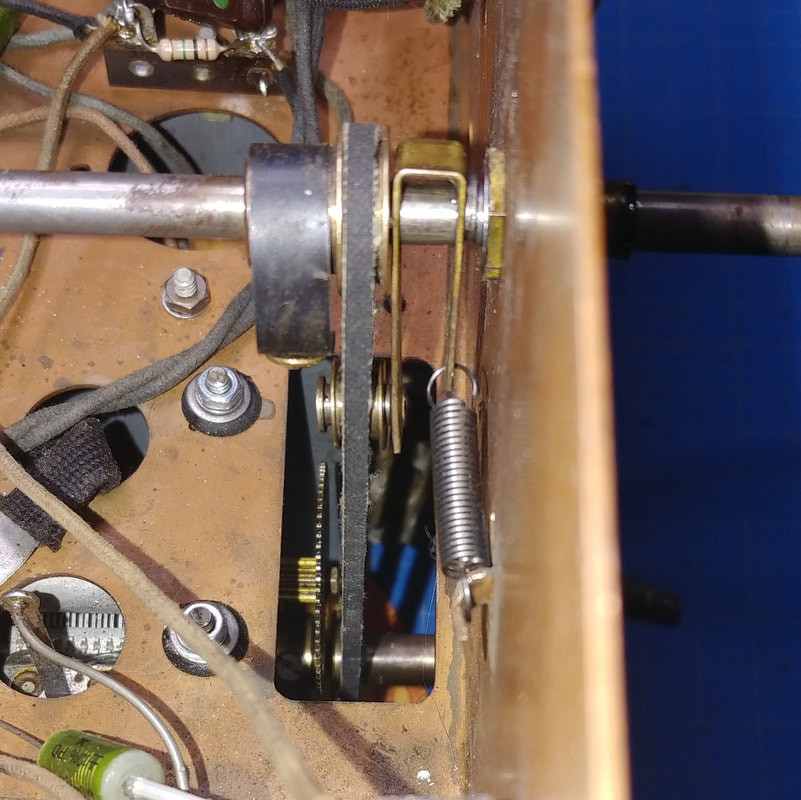
I pulled the tuning shaft and cleaned off the rust. Just need to pull off the retaining clip on the shaft that's up against the front wall. I found a NOS belt and installed it as I reassembled the tuning, and added a new tension spring, too. The tuning knob spins nicely in both directions now.
|
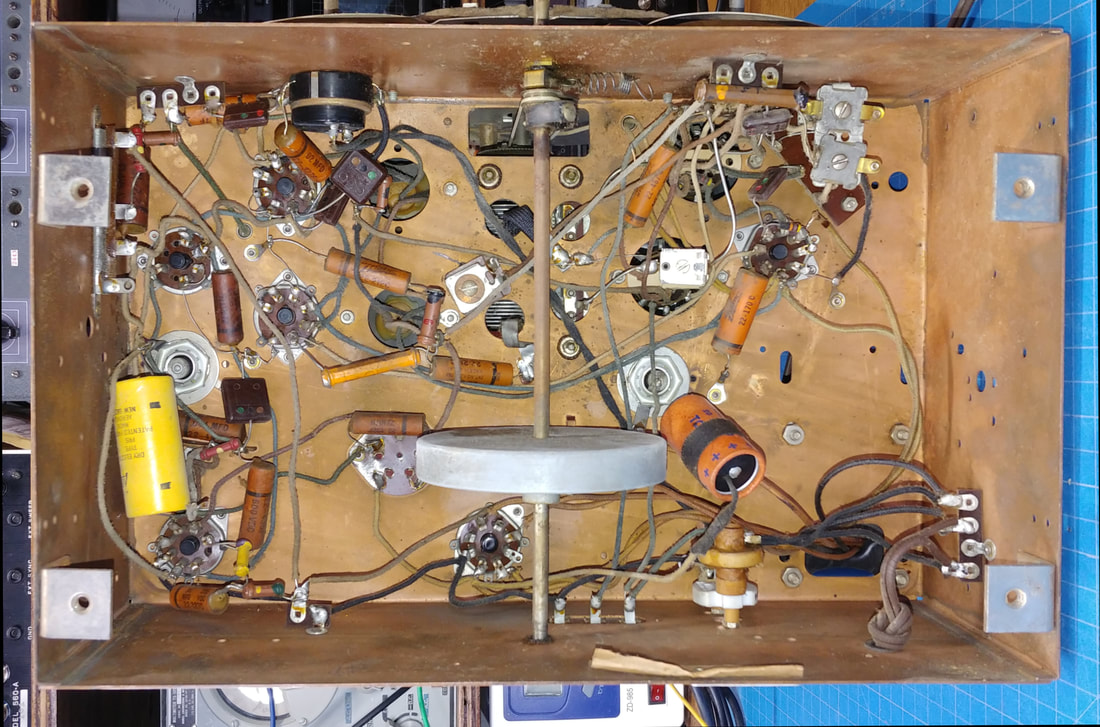
Under the chassis is almost done. I need to install one more power resistor to replace a section of the candohm and then it should be ready to test. I've added a fuse to the AC line, and a polarized power cord, for safety. I slightly rewired the AC input so that the line side of the power cord goes to the fuse first, then the power switch, and finally back to the transformer.
I had to replace the 3-section candohm resistor because it was starting to fail. Pressing on the terminals caused the resistance to change (bad mechanical connections to the nichrome wire), plus the paper insulation was crumbling from age. So I opened it up, stripped out all the nichrome wire, installed new insulation and reassembled it. Now it's useable as mounting terminals for the replacement resistors. |
|
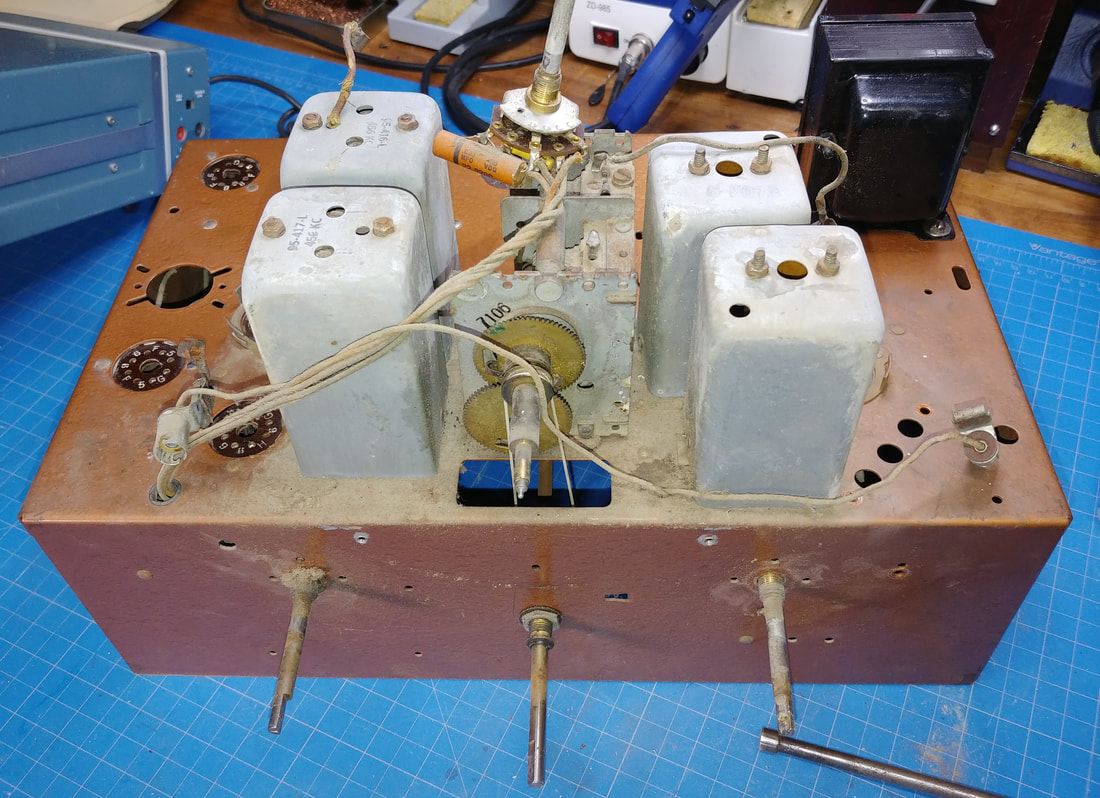
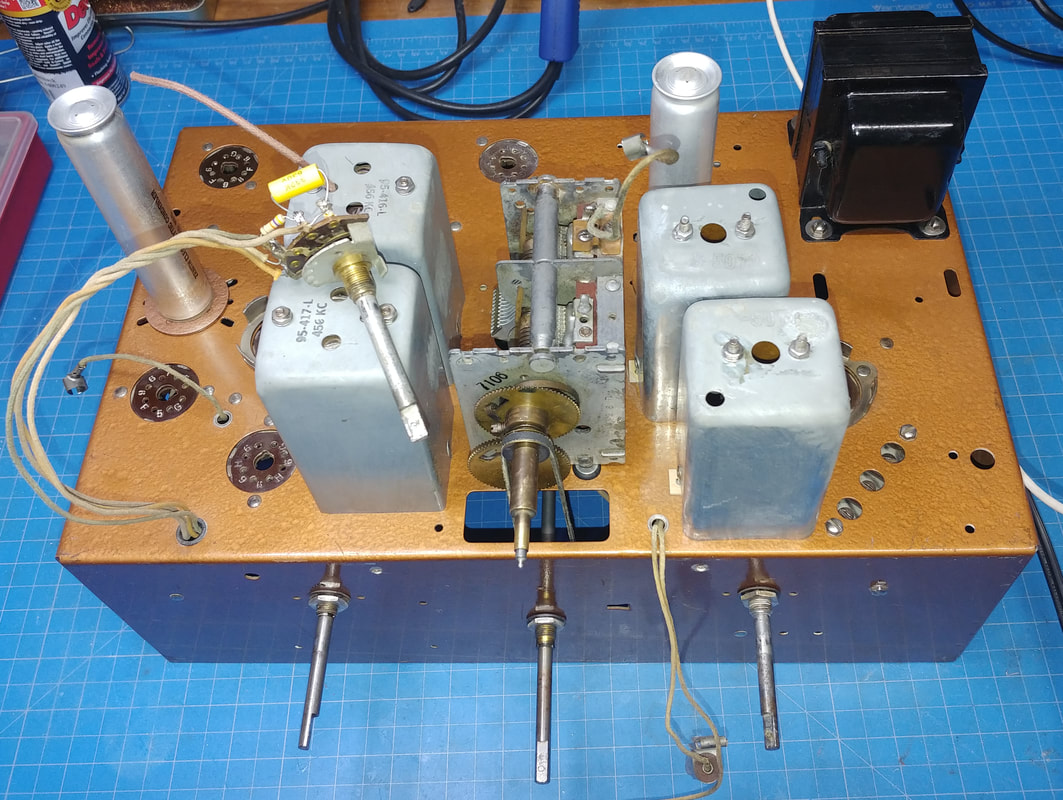
The top side has been cleaned and waxed. The power transformer has been painted, and the tuning cap was cleaned and lubricated. The NOS drive belt can be seen around its shaft pulley. I had to clean and reuse all the nuts, both top and bottom, on the IF and RF transformer cans because they are 6-40 threaded, not the more common 6-32 thread, and I didn't have any on-hand.
|
|
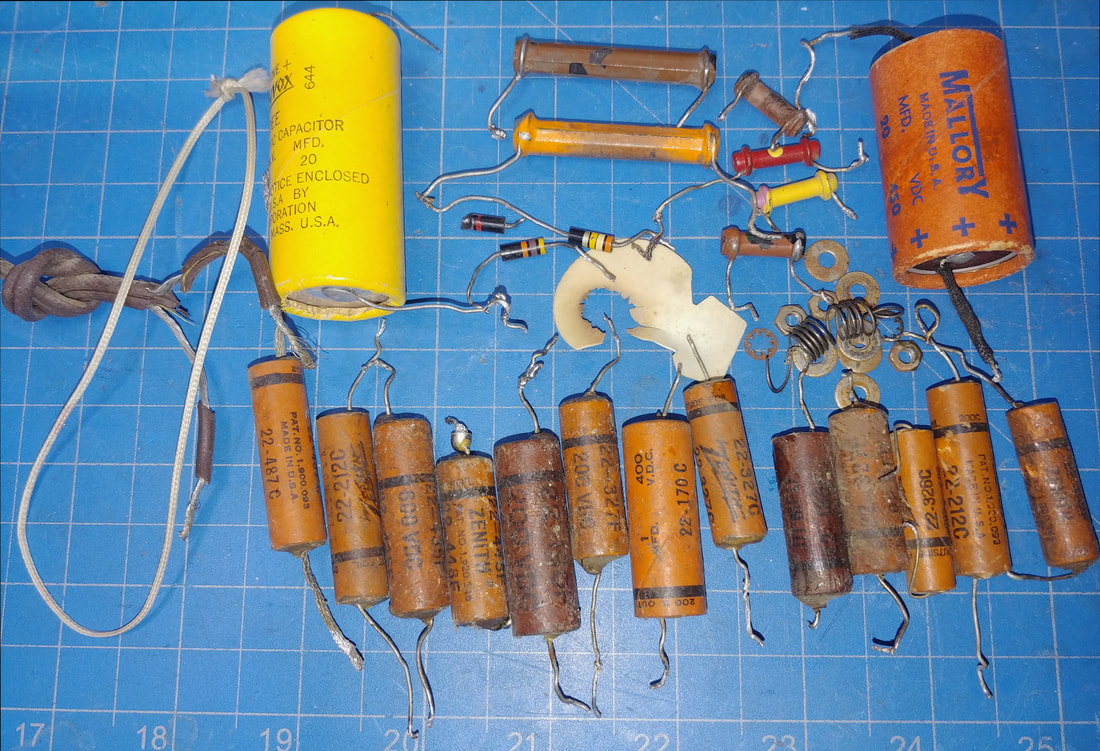
So far I've replaced the 2 electrolytic filter capacitors, 13 paper and foil caps, 9 resistors plus 3 more for the candohm, the tuning belt, belt tension spring, and all the hardware and the 3 grommets for the tuning capacitor. A polarized power cord and fuse were added and 2 new dial lamp shields were recreated. Now I need to order 4 rubber chassis washers, a new grill cloth and replacements for missing Tone and Volume knobs.
|
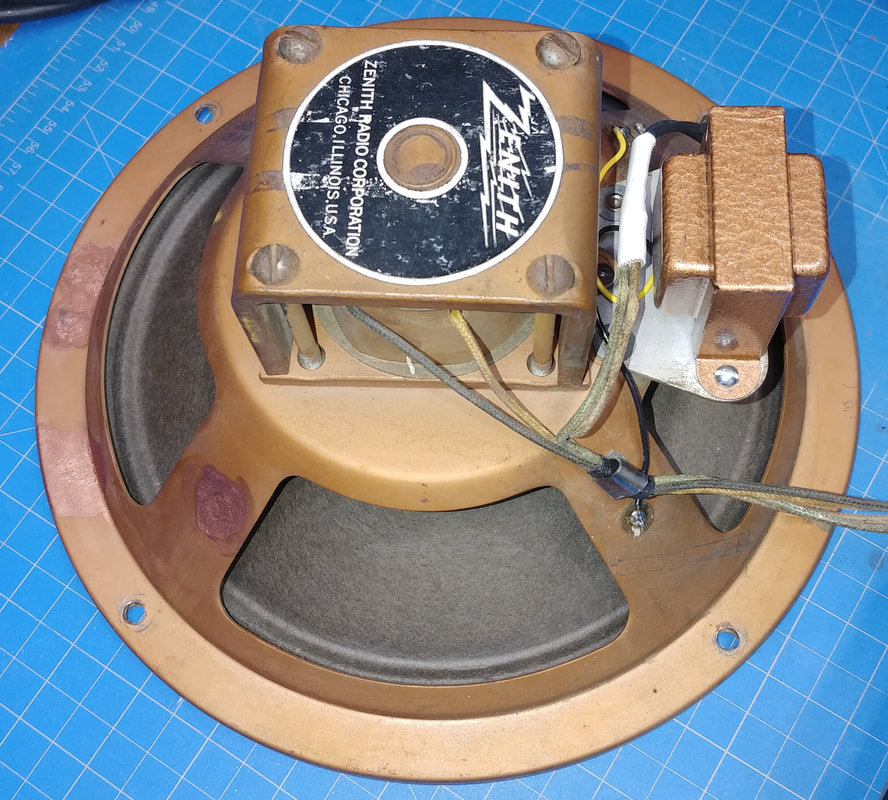
And add to the list the 6F6 audio output transformer. The radio chassis was stored separate from the cabinet and I just pulled the cabinet from storage to clean it up, and remove the speaker for testing the chassis, and of course it turns out the transformer primary is open. So I've ordered a replacement that's made for certain models of Fender guitar amps, but it has the right specs and physical size, so it should work well.
|

|
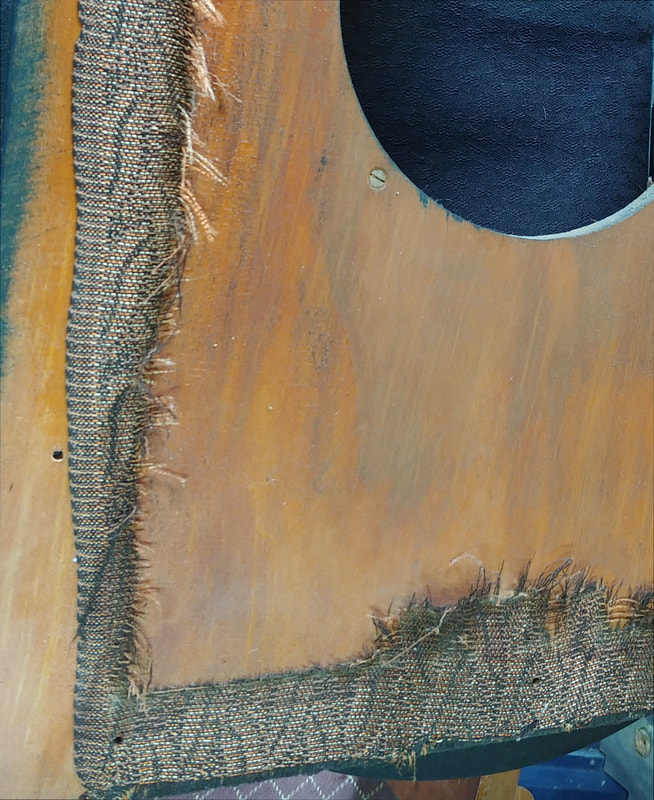
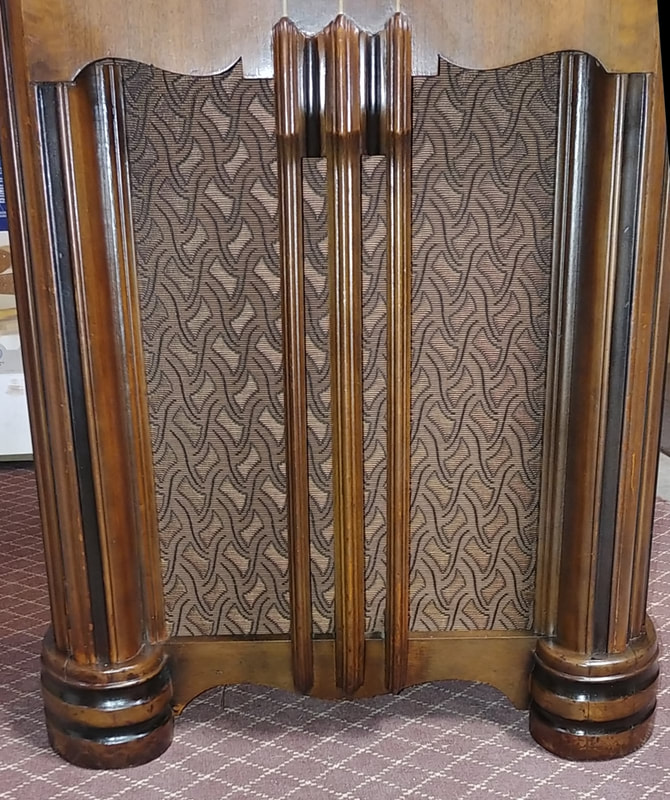
All that's left of the original grill cloth are the edges that were sandwiched between the speaker board and cabinet. But it's enough to see it's the Zenith leaf pattern. The first image is the face that's visible. The second photo is the reverse side, which shows the pattern better. I've already ordered a reproduction leaf pattern cloth made by Richmond Designs.
|
The cabinet needs a bit of work, but isn't too bad. There are several scratches in the finish on top and down each side of the speaker columns, with the worst wear being around the bottom. I'm not going to strip it, just give it a good cleaning, do some light sanding of the top coat and then touch up the toning and recoat the laquer. I'll try to keep it as close to original as I can. And I'll leave some of the patina on the brass escuthcheon.
|
|
The new output transformer is finally here. I repainted it hammertone copper to match the chassis. The specs on it are:
- 8 watts - 7000Ω primary - 3.2Ω secondary - the mounting holes match the speaker holes perfectly. Now that the transformer is installed I powered up the set for a test and everything seems to be working well. All three bands are receiving and the worst thing I could find was just a noisy band switch in need of some futher cleaning. |
Next I'll reinstall the dials so I can align the set. The main dial is in decent shape, but the three small dials, for the volume, tone and band switch, are warped, and the volume dial has some scratches because it was warped quite a bit. Replacement dials are available online, but I've spent too much on this radio already, so I'll see if I can flatten and touch up the original dials.
|
The dials are touched up and back on, and it's ready for an alignment. I pressed out enough of the small dial's curl to reuse them and the two replacement knobs have arrived so it has all its knobs now.
|
|
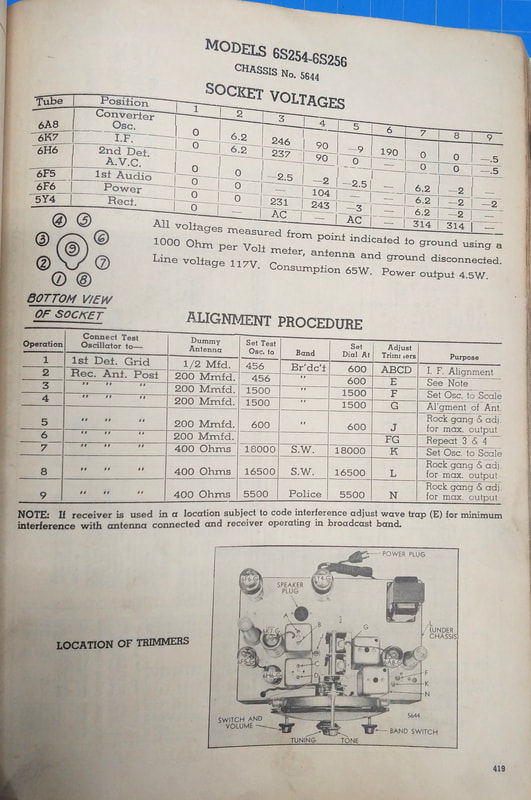
I found the alignment instructions in an old original Zenith service manual. The alignment is straight forward, but adjusting the trimmers to get the frequency spot-on on the shortwave bands takes patience. Interestingly, there are two trimmers under the chassis, next to the band switch, that are not even mentioned in the alignment instructions.
Next is finishing up the cabinet and installing the new grill cloth as soon as it arrives. |
|
Here's the new grill cloth installed. It's not an exact copy of the original, but it still looks very nice. It came from Richmond Designs.
|
|
It's all back together and sounds good with the speaker remounted in the cabinet.
|
Page created 3/4/2021
Last update 5/15/2021
Last update 5/15/2021
