
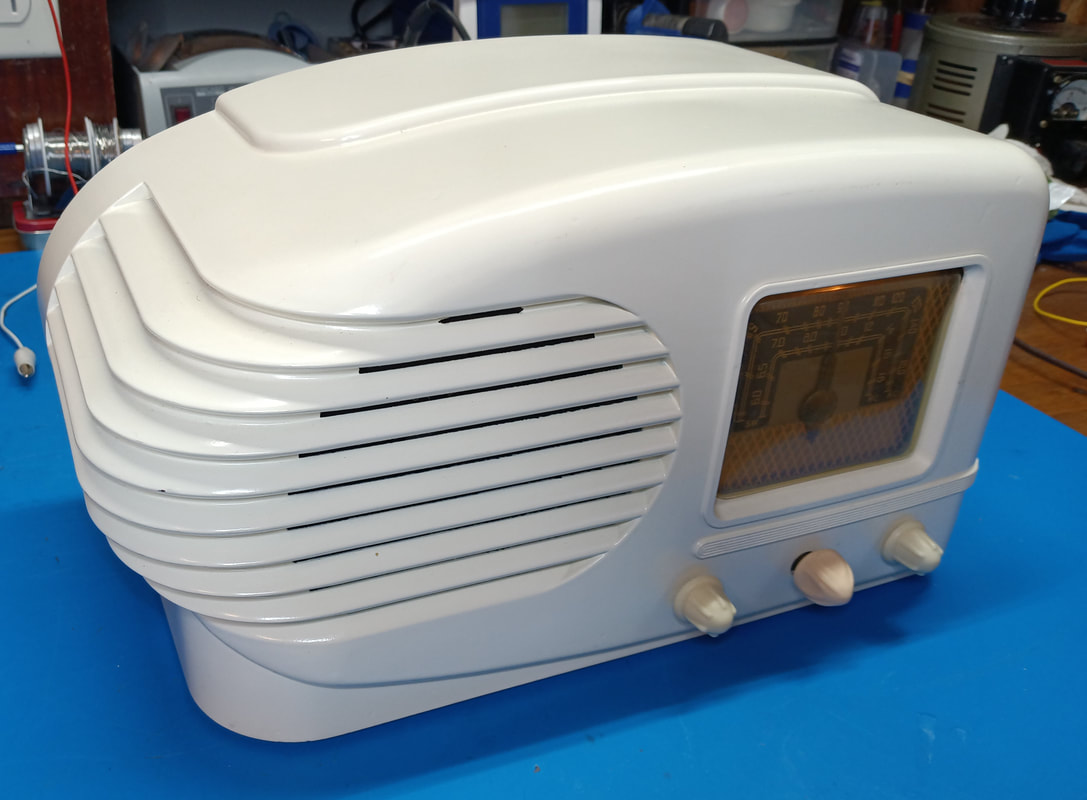
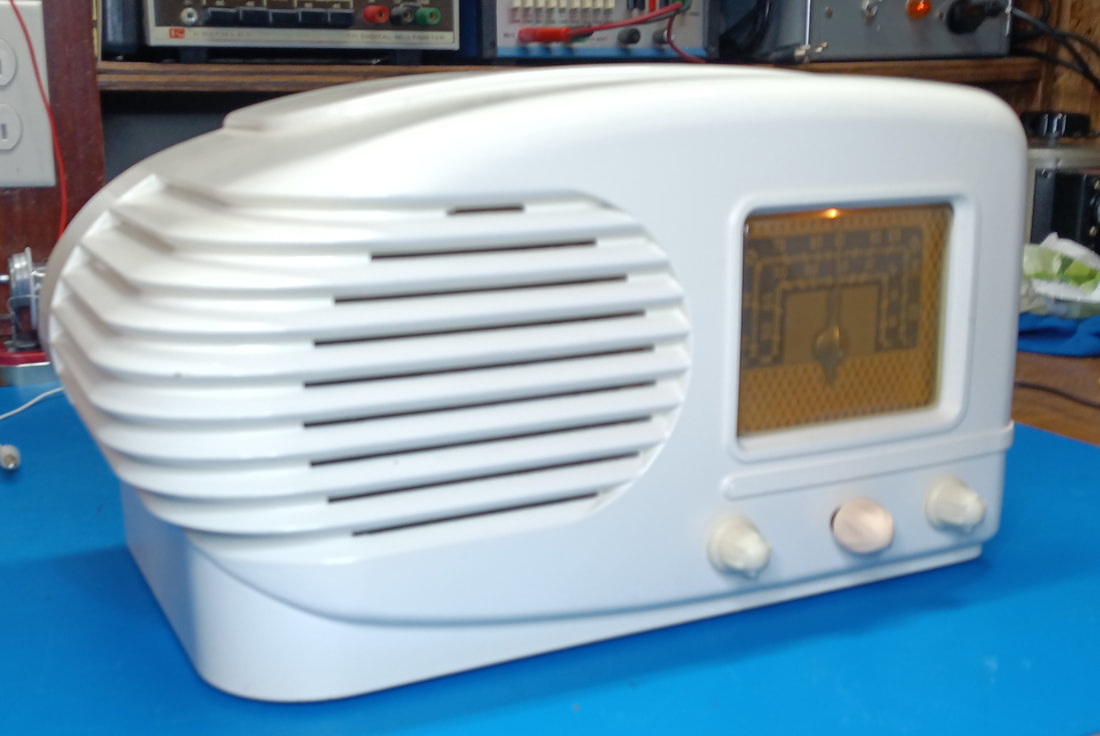
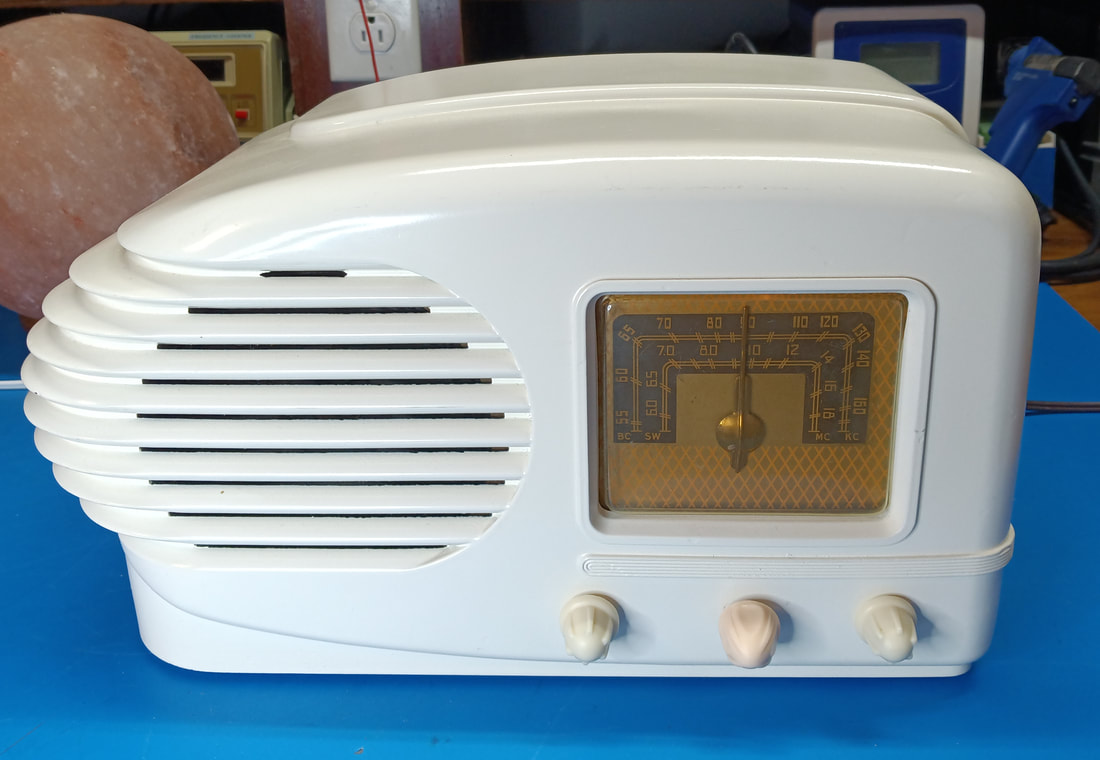
Troubador Deco Ivory Bakelite AM/SW Radio
This is another set I've had on the shelf, or in storage, since the early 1990's. It has no brand name or model number marked anywhere and at first I had no idea who made or sold it, but after several days of online searches I finally found a schematic thanks to a mostly intact licensing label on the rear of the chassis that has the only hint at a name. It has "W. M. Co." on it which I finally discovered was the Warwick Manufacturing Company.
I eventually found a picture online of another set like this one that was identified as a "Troubador" brand, and it is the same AM/SW version. A comment on it mentioned the Warwick Manufacturing Co. as the manufacturer, which led to finding the correct schematic.
I actually have two of these radios, this one is white painted Bakelite, and the other is walnut Bakelite, and is an AM only farm (battery) set. It appears to be a Troubador model 2401. Both radios have the "W. M. Co." license label attached.
|
I had already cleaned up the cabinet some three decades ago, but the chassis is still waiting to be restored.
|
|
The schematic and chassis diagram is the Warwick model 0-71 in Riders Vol 11. For Warwick model numbers the first digit, a "0" in this case, is the last digit of the year, so this model is from 1940, and the second digit, the "7", is the number of tubes in the set, which includes the resistor ballast "tube".
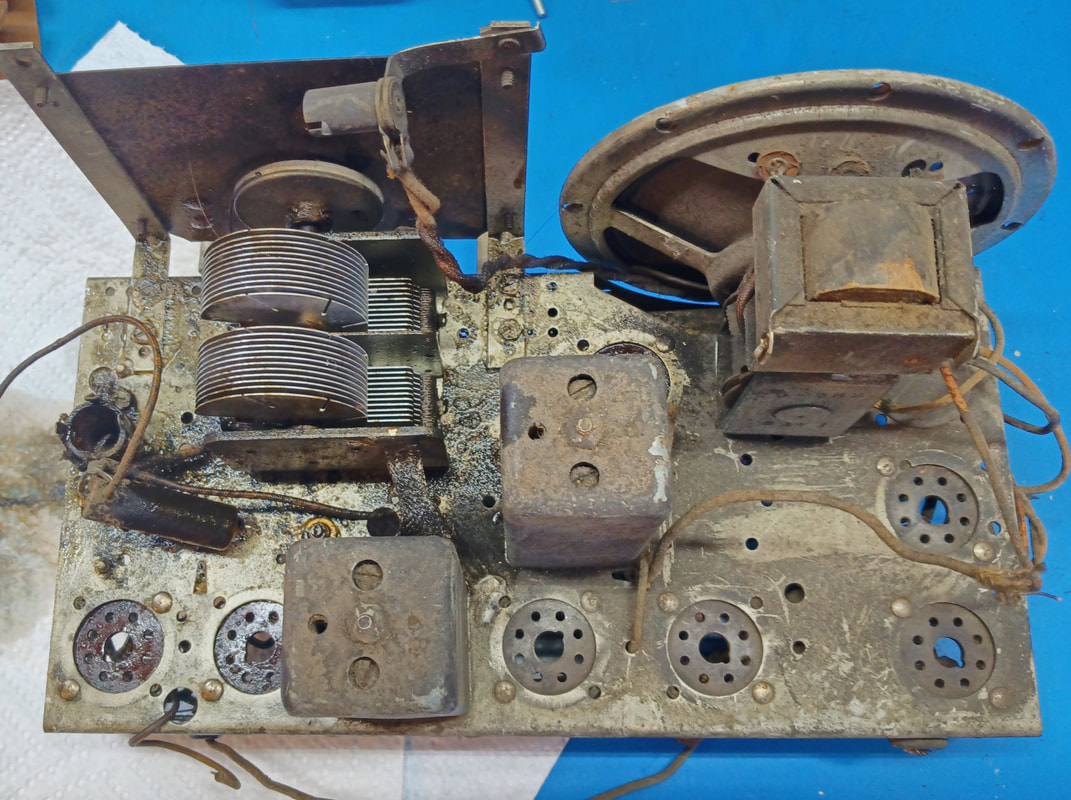
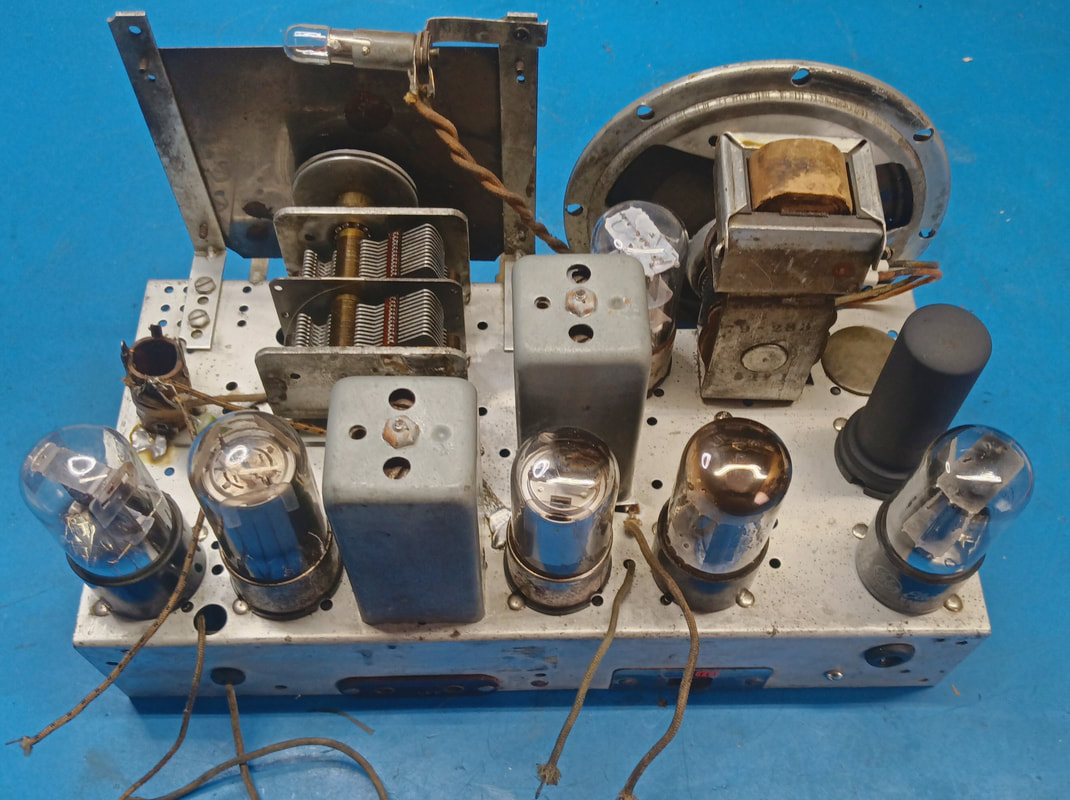
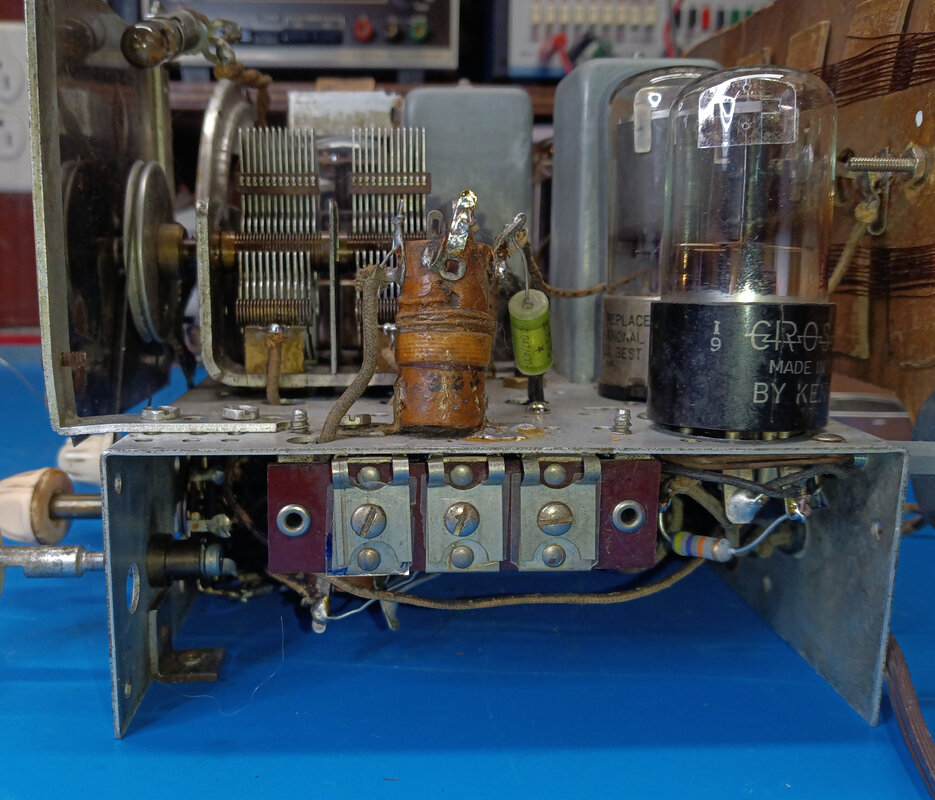
This chassis is a mess. It's missing all the tubes including the filament ballast, the speaker cone has a lot of cracks, but fortunately is still repairable, and it's covered in some sort of greasy, sooty crud. |
|
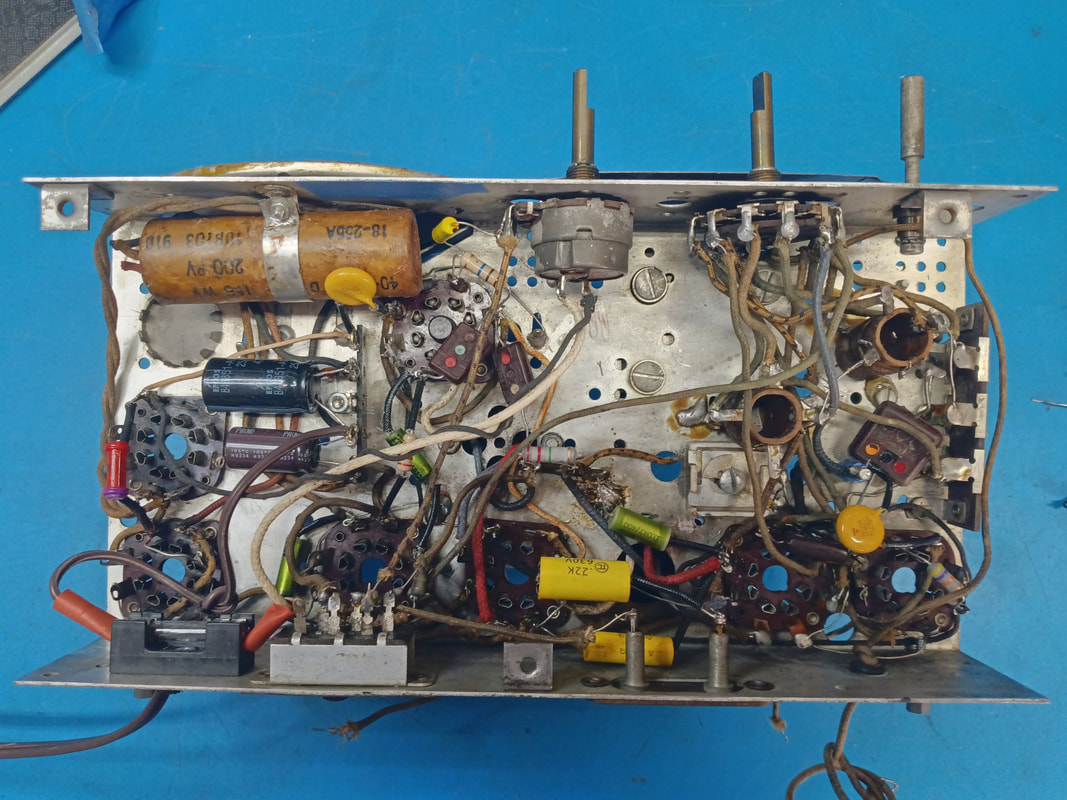
Underneath it's a little cleaner, but most all the capacitors and resistors need replaced, and the IF cans have rubber coated wiring that is now crunchy and falling off. Plus the antenna needs to be rewound.
|
|
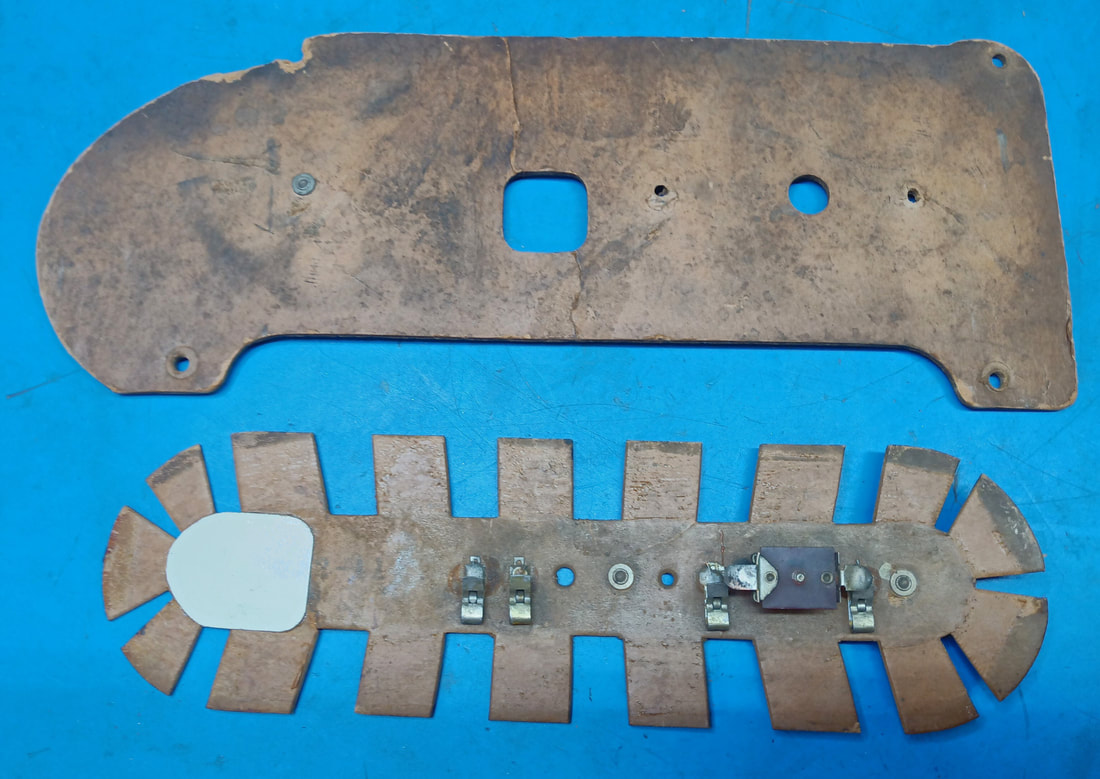
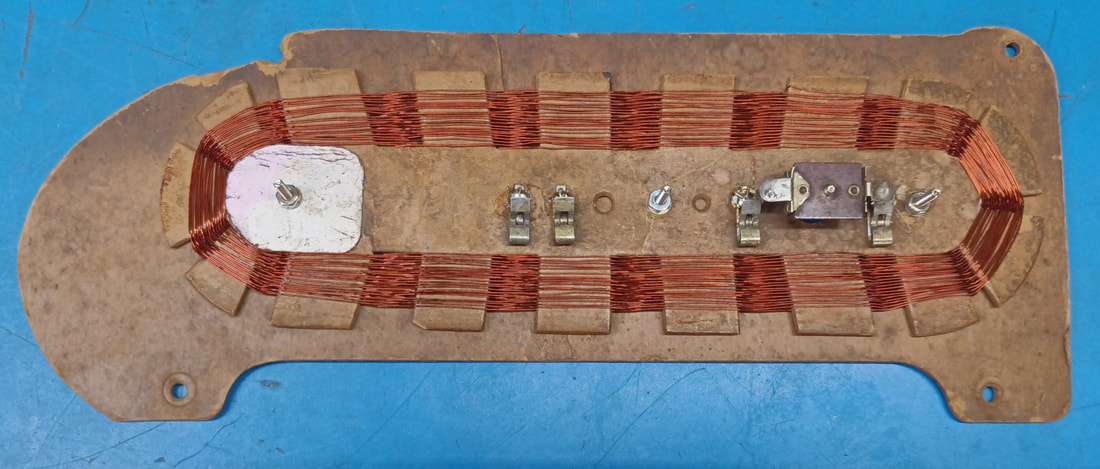
This radio, and another one like it that came from the same place, was rescued from a fellow I met over 30 years ago in Virginia who was a tinkerer. He had an old workshop out back of his mom's house that was full of radio parts and pieces. I say parts and pieces because he didn't have much, if any, radio repair knowledge, but he sure knew how to strip them down to a pile of mostly junk. I bought these two radios before he completely "disassembled" them. Unfortunately, he had already stripped the wire from this set's antenna and pulled its tubes. But at least I did get the cardboard back and coil form so I could rebuild it. The form was in three pieces but I was able to glue it back together.
|

|
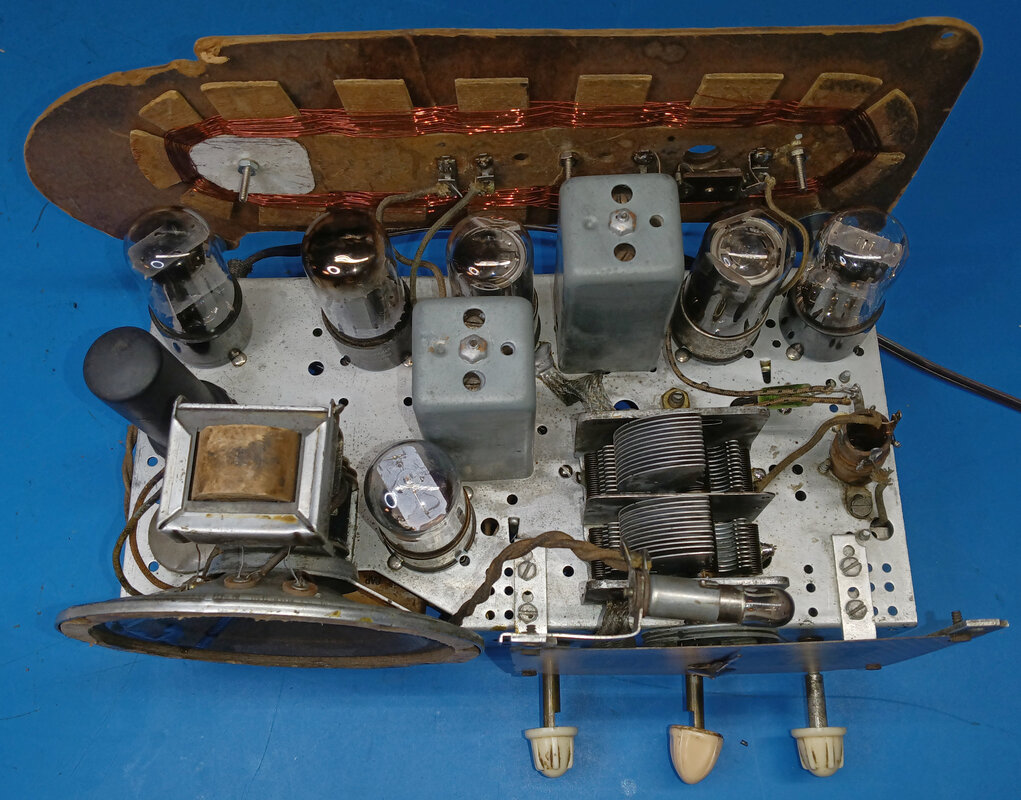
While trying to figure out the wiring on this radio I drew a chassis layout and wiring diagram. The only part of the wiring that had me scratching my head was around the 6SA7 and 6P5 tubes. These two tubes were the only two with penciled in labels on the chassis, but the wiring just didn't make sense. It turns out the handwritten chassis labels were reversed. After searching through a bunch of Warwick schematics I finally found the 0-71 schematic that matches the circuit and my wiring diagram.
|
|
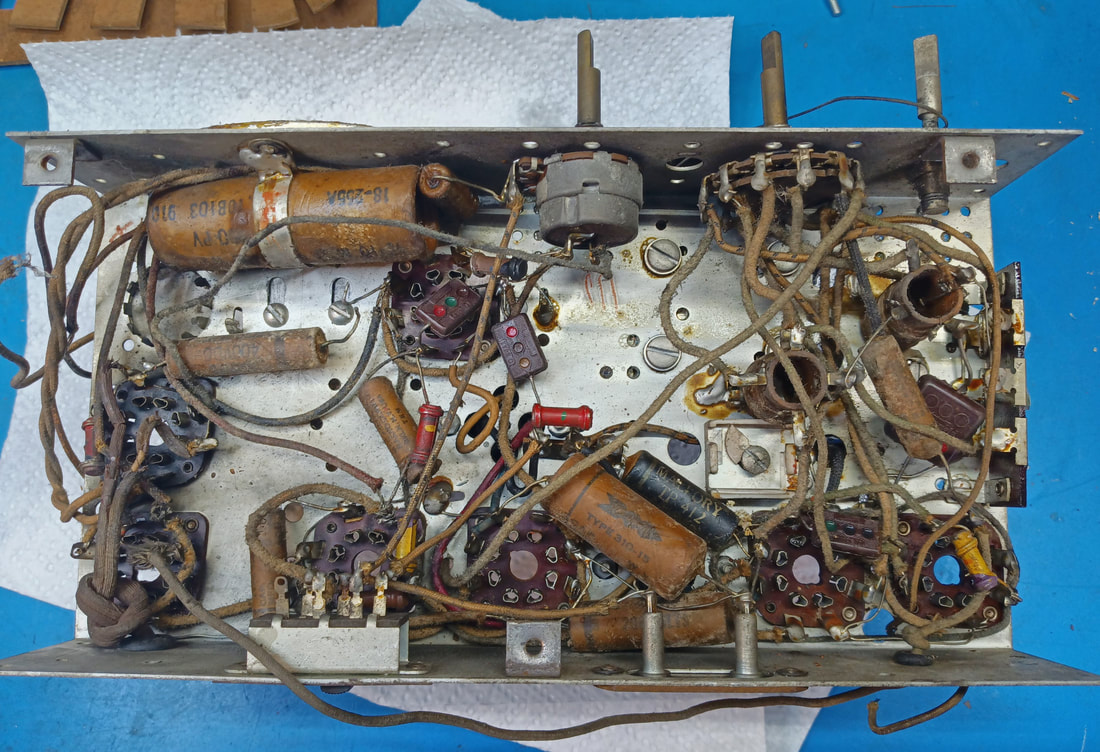
After cleaning the chassis it's looking much better. On top I removed the IF cans to clean them and replace the disintegrating rubber-coated wiring. I also replaced the old waxed paper capacitor on the topside coil, fixed some damaged wiring, and replaced the crunchy grommets under the tuning "condenser". Everything on the topside is now ready for testing.
I found all the tubes in my tube stash and even found a filament ballast that I didn't know I had. The original ballast was a BK-42-K which used a #47 dial lamp. The one I have is a BL-42-K and it uses a #44 lamp, but otherwise they appear to be the same. |
|
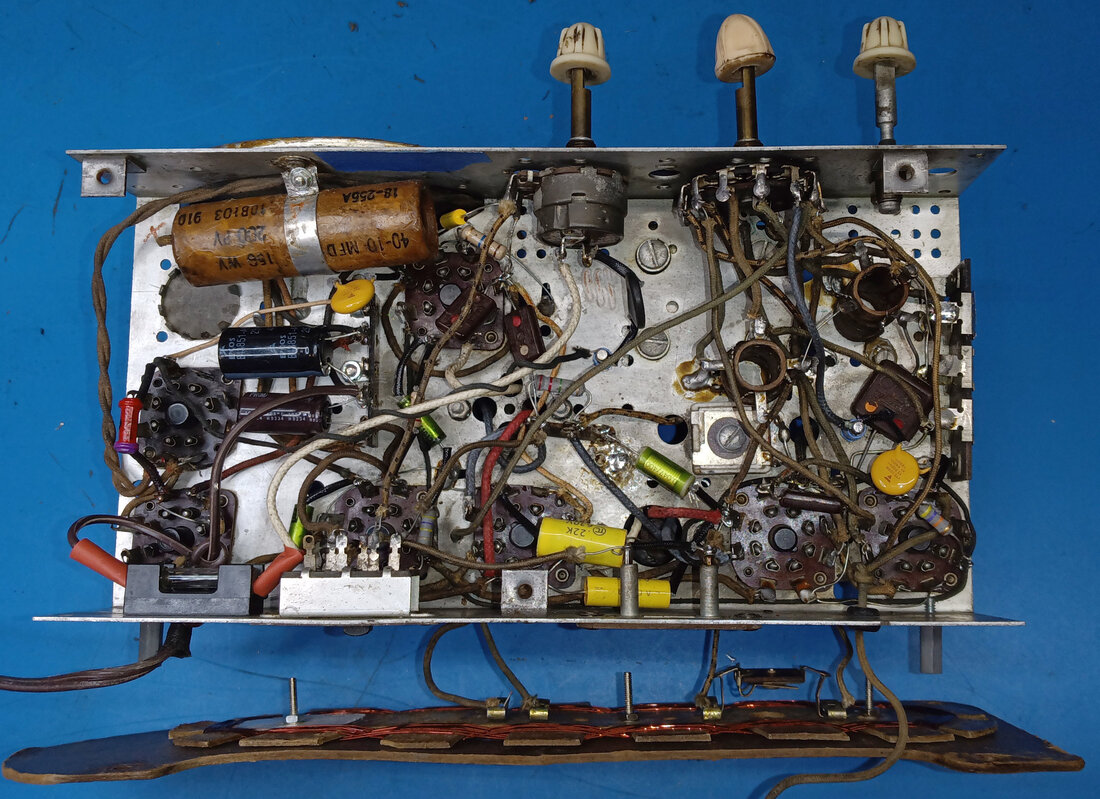
All the bad parts under the chassis have been replaced. I cut the wires to the original electrolytic cap and left it in place for originality. I added a terminal strip to mount the new electrolytics. The ceramic spacer on the 600KC trimmer capacitor near the 6P5 was broken so I replaced just the spacer with a nylon one. And all the switch contacts and the potentiometer were cleaned.
A fuse was added to the AC line and the AC input was rewired. A new polarized line cord was installed, with the line side going to the fuse first, then to the power switch, and finally to the 25Z6 rectifier tube plate. The neutral side goes directly to the circuit common. |
|
The antenna is rewound and ready to test. Since I didn't have an exact turns count for the two coils I measured the capacitance of the main tuning capacitor (~475pF) and calculated the inductance needed to make it resonant at around 550KC (~175uH). Using an LCR meter, I wound the antenna's larger coil to match the inductance. For the small coil I wound 2 turns. It works well enough so I must have it reasonably close.
|
|
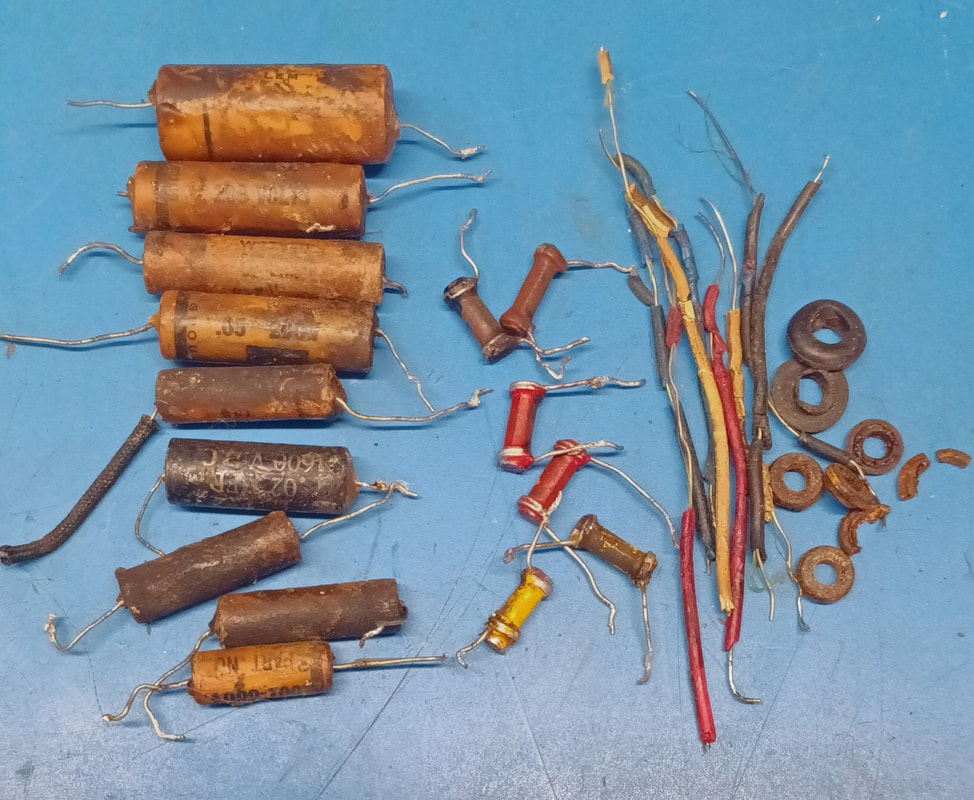
A summary of parts replaced include all nine waxed paper capacitors, the power supply electrolytics, and six of the seven resistors. Also, all the rubber-coated wiring for the IF transformers was changed, plus all the old grommets in the set. A fuseholder was added to the AC line as well as a new power cord, and I had to dig up a full set of tubes.
|
|
There was one issue that needed troubleshooting while aligning the radio. The shortwave band had very low sensitivity which I traced to the 15MC alignment trimmer (on the left). The mica insulator between it's plates had a piece missing which was causing a low ohms "short" across the RF input grid of the 6SA7 mixer tube.
|
|
|
The completed chassis, tested and aligned, is ready to be reinstalled.
|
|
The radio is actually pretty sensitive for a set without an RF amplifier. I really like the beautiful wrap-around grill and sloping cabinet, and with a shortwave band covering 6MC to 18MC there's a lot more to listen to than just AM. And it only took me 32 years to restore.
Page created 7/30/2023
Last edited 11/21/2023
Last edited 11/21/2023
