
My Modified Celestron C11 XLT
These mods will probably lower the resale value of my scope, but I'm OK with that if I can achieve some improvement in focusing. And I could easily have messed something up and made things worse, but I was willing to take that chance. I don't recommend these mods to anyone else and If you try these, it's at your own risk.

|
I did these mods several years ago and the components used included:
2 - Sunon Maglev 40mmx10mm 12VDC 9.5CFM fans 2 - 40mm Fan filters 2 - 1" Vent hole plugs 2 - 3/8"-32 threaded Panel Bearings/Chassis Bushings 2 - 1/4" Shaft Lock Mechanisms, 1" diameter |
2 - 1/4" x 4" long aluminum rods
1 - miniature power switch SPST or SPDT
1 - 2.1mm x 5.5mm coaxial DC power connector
8 - 6-32 x 1" stainless steel flat-head screws for fans
8 - 6-32 self-locking nuts
3 - 6-32 x 1-1/2" stainless steel flat head screws
3 - 6-32 external lock washers
3 - 6-32 stainless steel nuts
3 - 6-32 knurled thumb nuts
3 - springs for secondary mirror
1 - stainless steel handle for dovetail bar
|
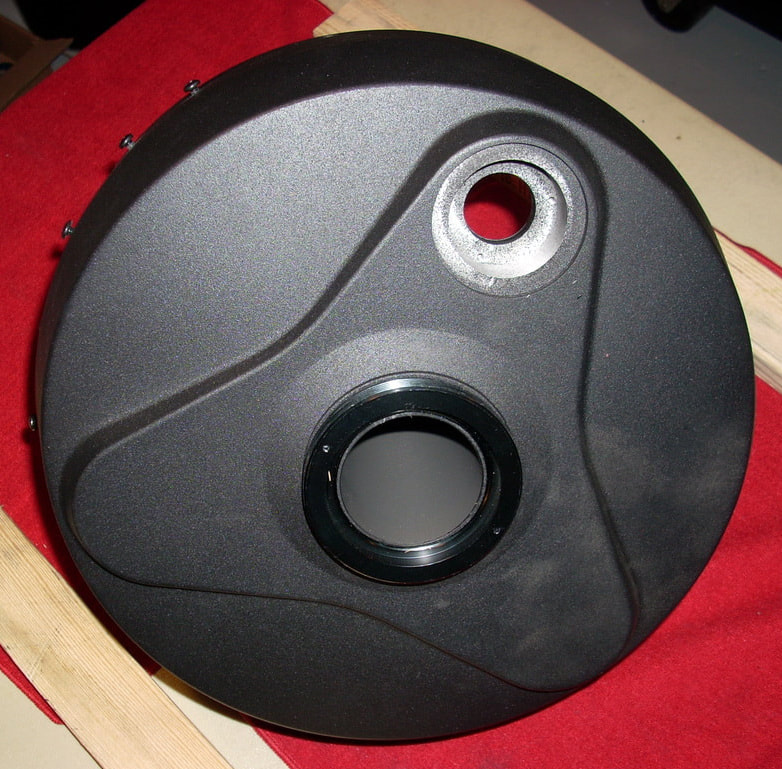
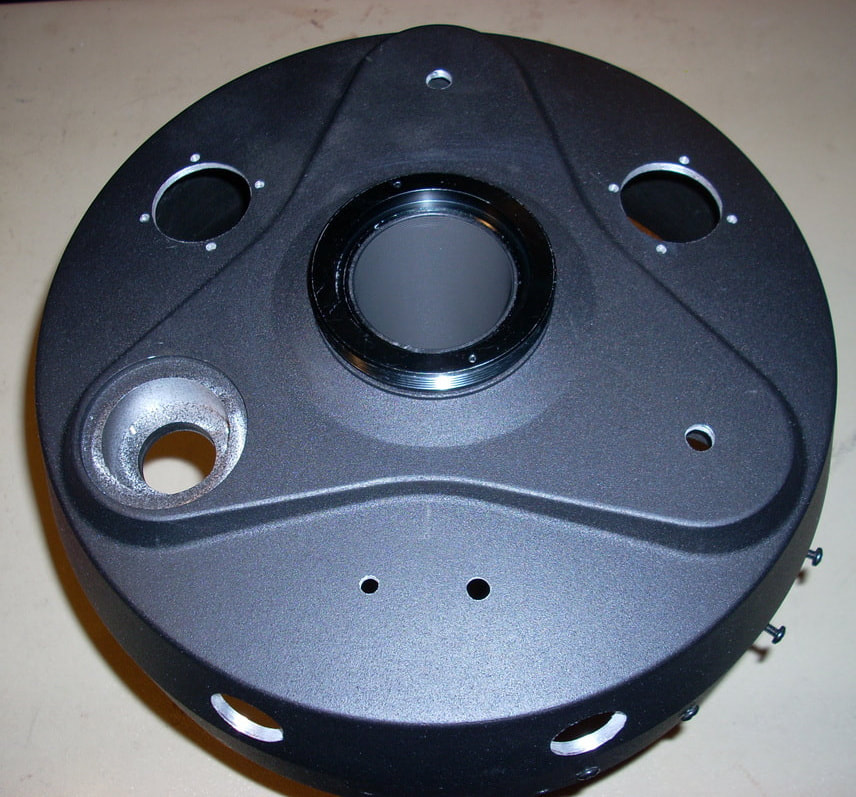
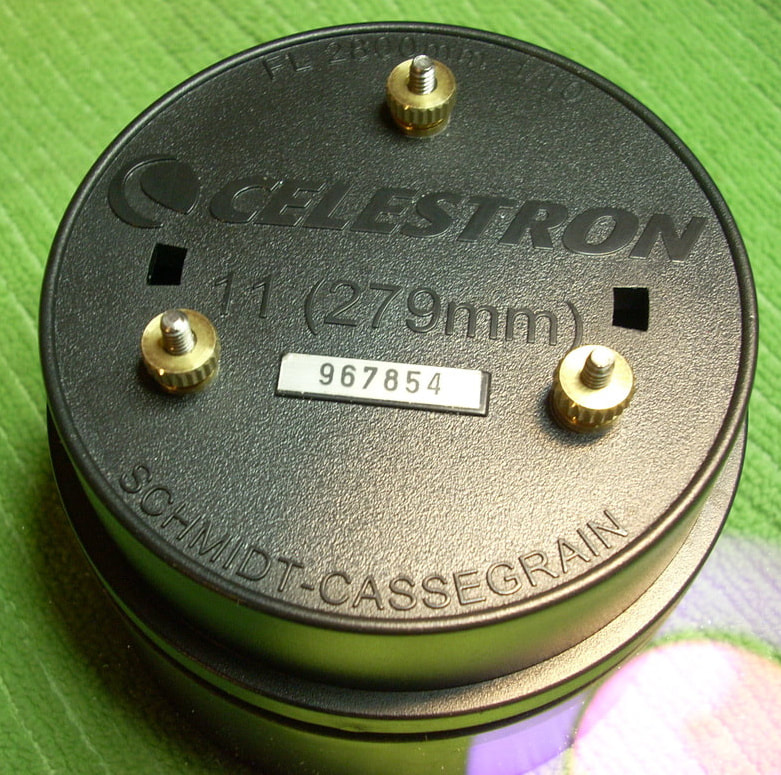
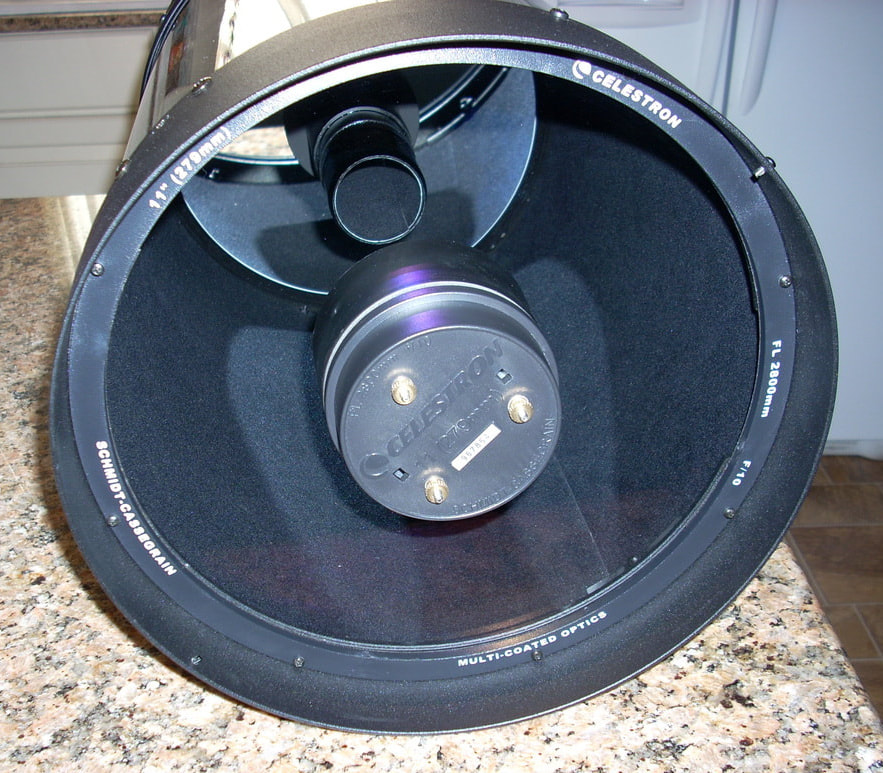
The rear cell of my "newer" C11 XLT. It is a bit lighter in weight than my older Celestar C11 that it replaced. In some ways the older Celestar is superior to this scope, the Celestar has an aluminum corrector plate mounting ring instead of the plastic ring on the XLT and the rear casting is a bit thicker in the sides with larger reinforcing ribs inside. But the XLT has the 3-arm mirror mount and matching rear cell casting to its credit.
|
|
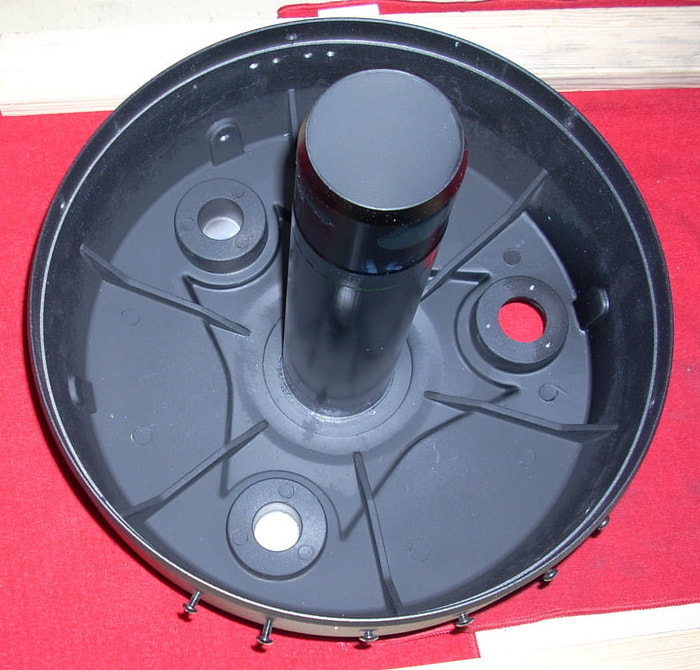
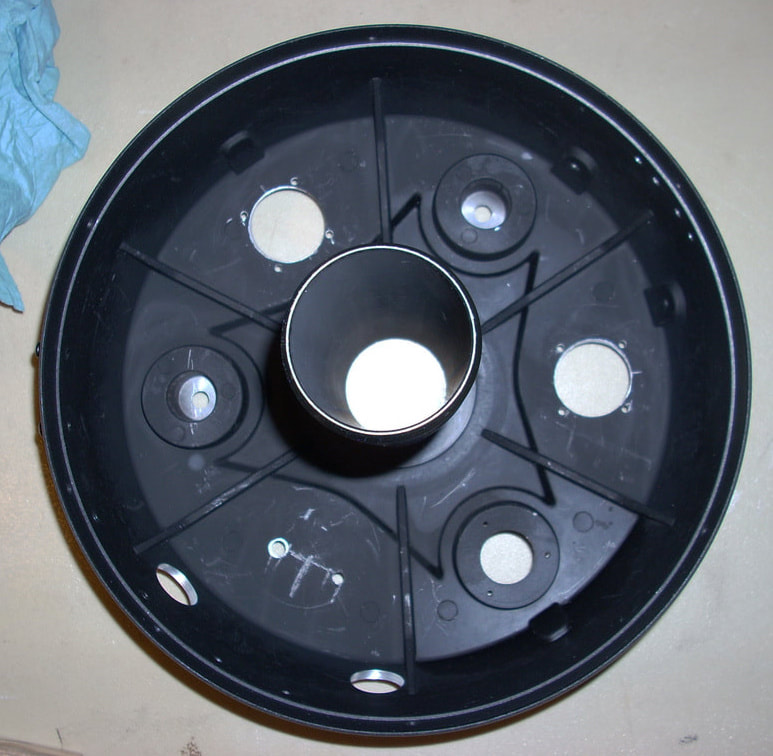
The inside of the XLT rear casting. Celestron made it easy for me to add the mirror locks with the 2 extra rings cast into the cell.
|
|
The three arms of the mirror mount are perfect for adding the locking rods. The Celestar model I used to own only had a single arm.
|
|
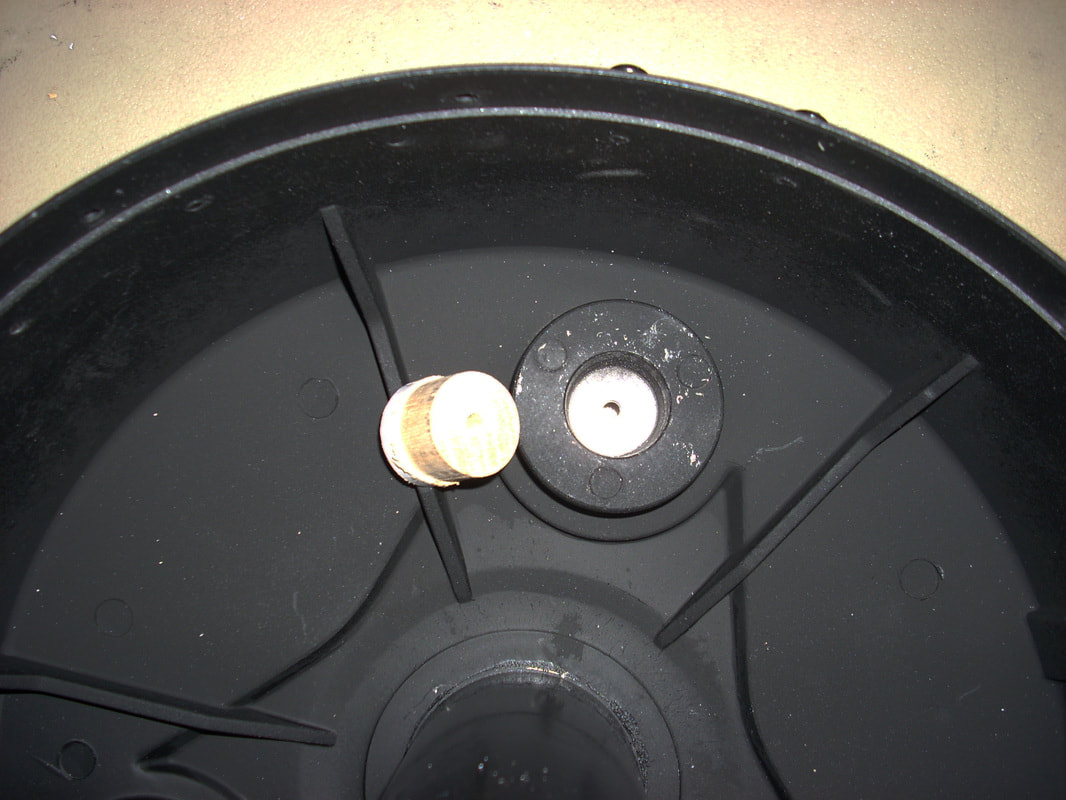
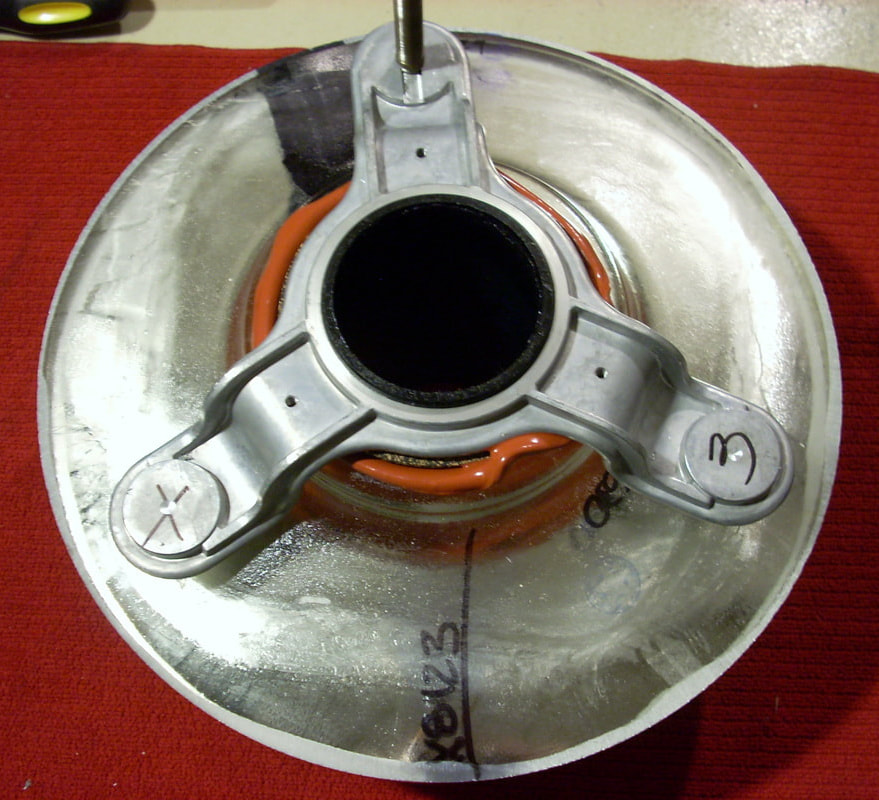
To center drill the blank casting rings I turned a dowel plug to fit in the casting, and center-drilled it, on my lathe. I then placed the plug into the casting as a guide to center the drill bit for drilling pilot holes for the mirror locking rods through the casting.
|
|
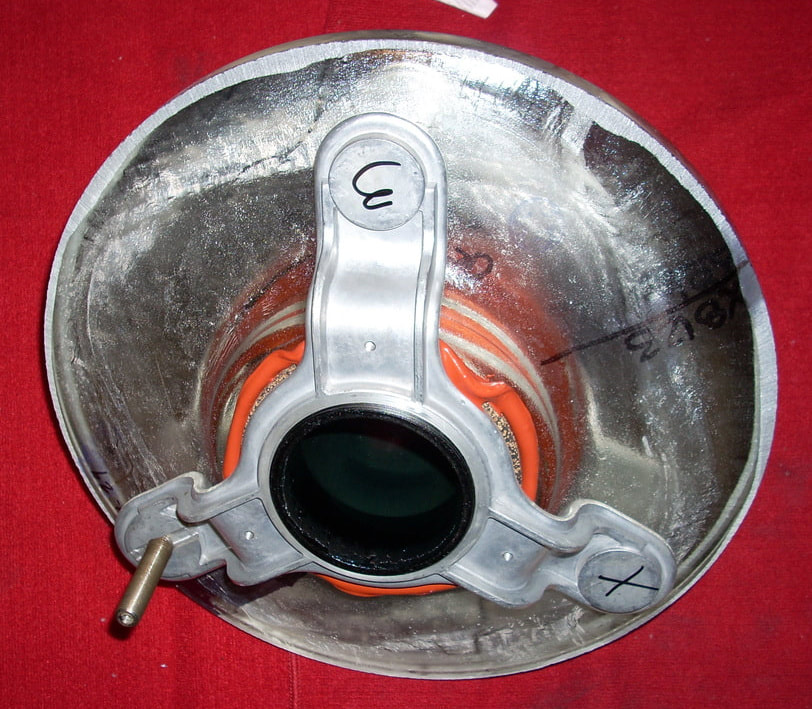
After drilling the two pilot holes in the rear casting I reinstalled the mirror and focuser and then drilled through the pilot holes into the mirror mount arms to mark the hole locations for the locking rods. This way I was sure the rods would line up precisely with the holes in the rear casting. In the photo you can see the drilled dimples in the casting arms. The two dimples were then drilled through and tapped to 1/4" x 20.
I placed a thick metal plate between the arm and the mirror while drilling so that if the drill bit popped through the arm it would not strike the mirror. |
|
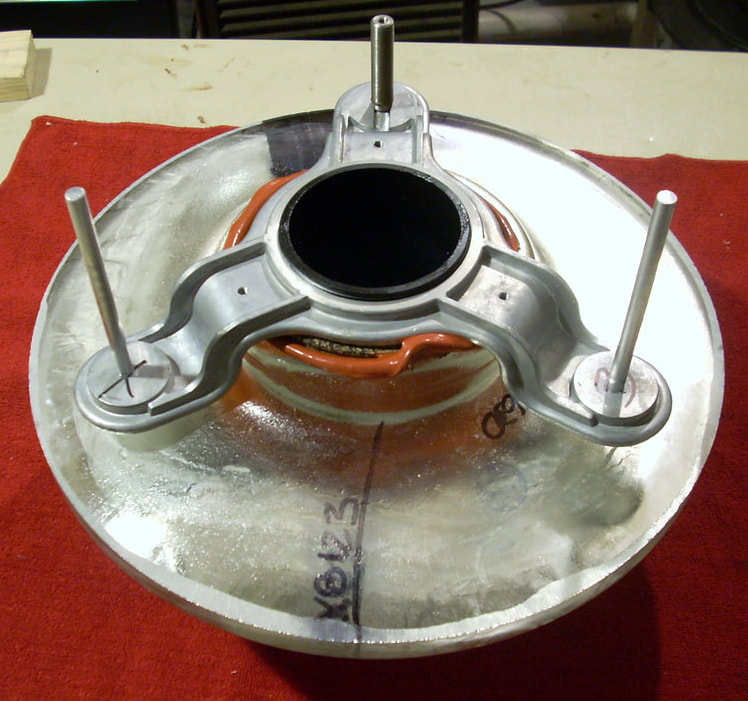
The mirror locking rods installed. They are 1/4" diameter x 4" long aluminum rods threaded on one end to 1/4"x20. I might swap them for stainless steel some day if I ever get around to ordering some stainless rod.
|
|
All the holes for the fans, mirror locks and vent plugs have been drilled in the rear housing. All holes were done on a drill press except the two inner fan mounting holes of each fan, which were too close to the center baffle. I also needed an extra set of hands when drilling the vent plug holes on the side of the housing. One slip there would have meant a nasty scratch in the finish.
|
|
Outside view of the drilled rear housing. The fans, vent plugs and power connection are in slightly different locations on this C11 than where I had located them on my Celestar I modded, mostly because I got in a hurry and misdrilled a hole, so I just relocated things.
|
|
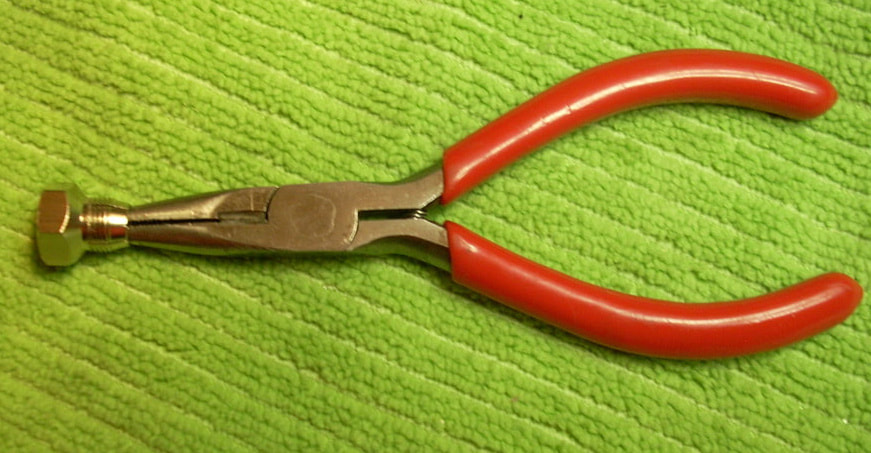
There's an edge on the lock nuts that does not allow the 1/4" rod to slide smoothly in and out of the locking nut. But by rotating a small pair of long-nose pliers around the inside of the locking nut a few times it takes the sharp edge off and smooths things out so the 1/4" rod slides in and out much easier but still locks down tight.
|
|
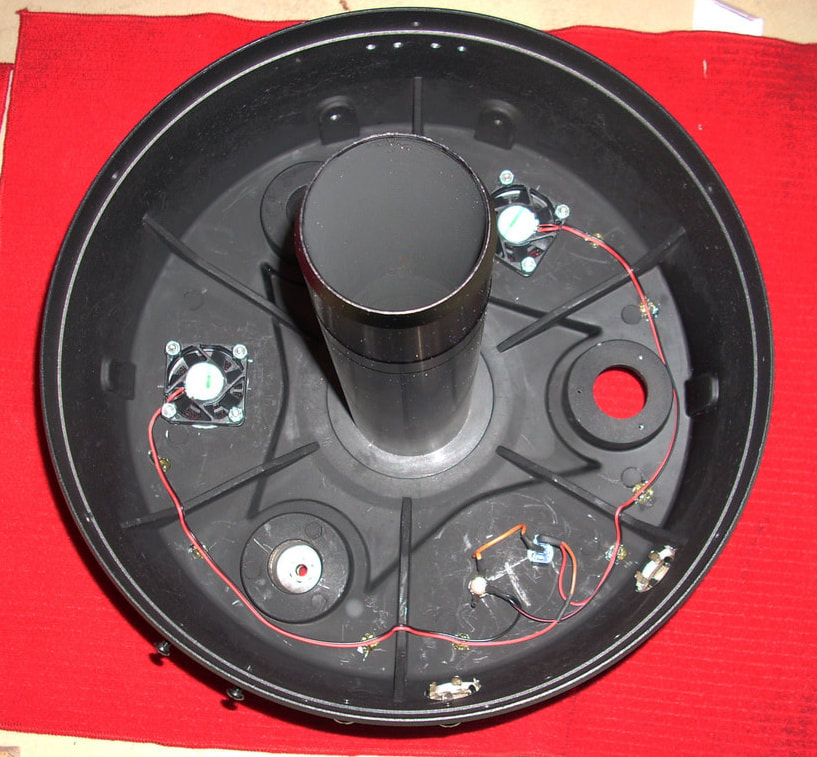
The fans mounted and wired. I hot glued the wiring in place.
The heads of the flathead screws for the fans were a little wide and interfered with removing the fan filters, so I reduced the head size by spinning each screw in a drill press and filing down the side of the head. |
|
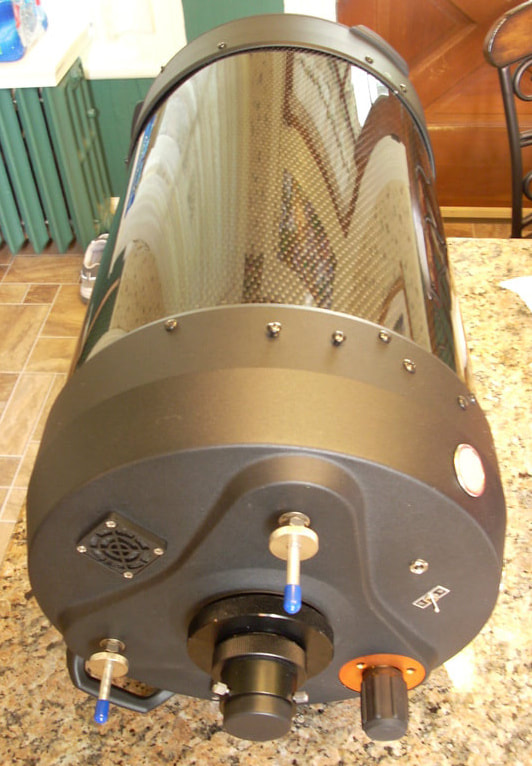
The reassembled mirror cell with fans, vent plugs, power and mirror locks all installed.
The fans pull air into the scope which exits out the vent plugs if the rear cell is capped or out the vent plugs and rear cell baffle if it is uncapped. By using a voltage adjustable power adapter I can vary the fan speed and CFM. The filter covers can be popped off and the filters removed and cleaned without having to open up the scope. I also added a finer filter material to better filter the air. |
|
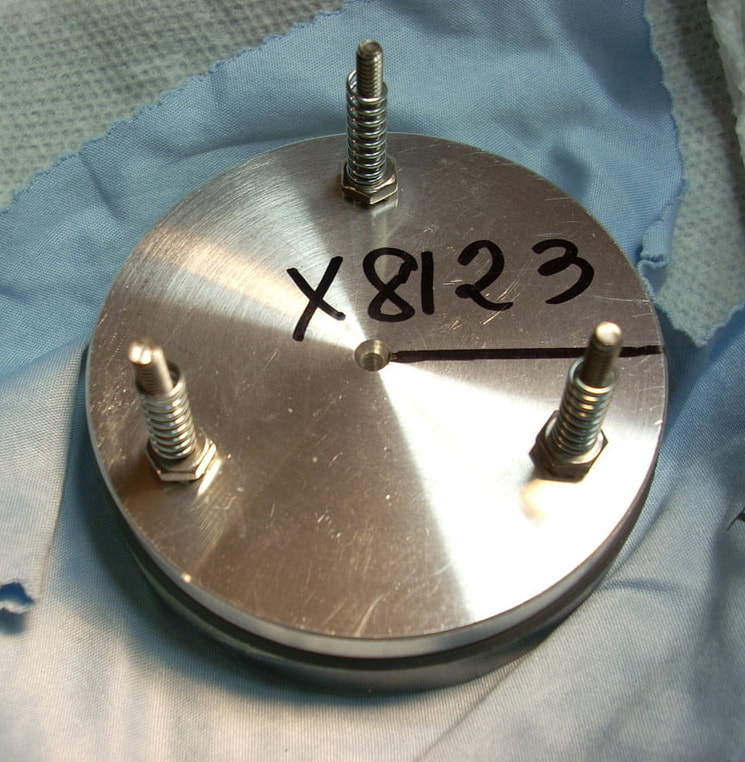
The secondary mirror with 6-32 x 1-1/4" stainless steel studs installed (made by cutting the heads off 1-1/2" flat head screws). Lock washers and nuts keep the studs from spinning loose. The springs float the secondary.
Originally, the XLT secondary used 3mm x 0.5 adjustment screws, while the older Celestar used 6x32 threaded screws. I already had 6x32 hardware prepped when I discovered the difference, and I didn't have any 3mm stainless screws, so I re-threaded the XLT secondary to 6x32 thread. |
|
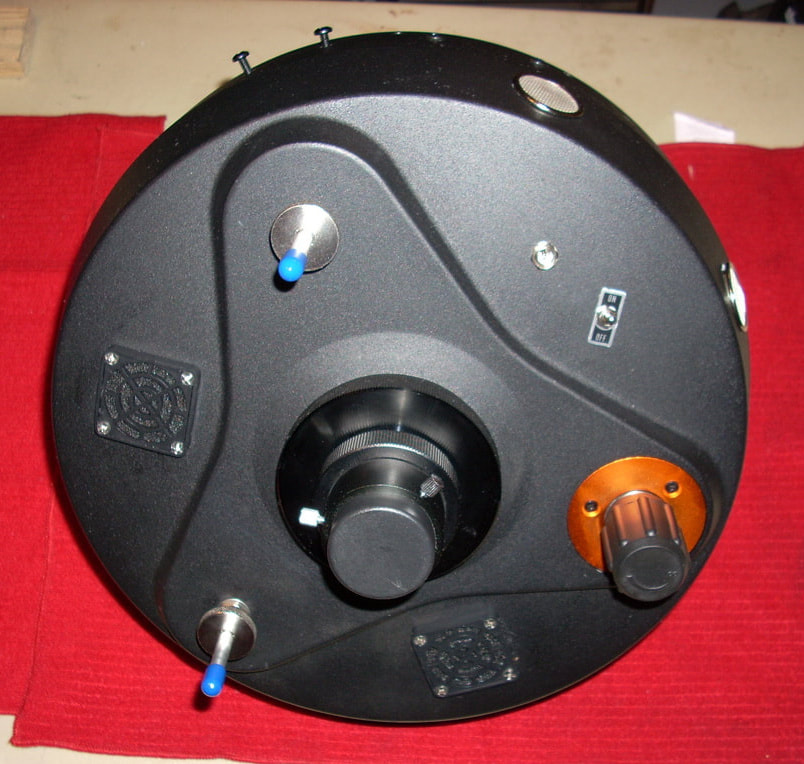
The secondary reinstalled with thumb nuts for adjustment. Since the studs are fixed and adjustments are done with the exposed nuts I don't have to worry about unknowingly backing out the adjustment screws to the point of releasing the secondary or screwing them in to the point of pushing the mirror loose from its cell. This might not necessarily be any better way to collimate, but I like the visual feedback, which is the biggest reason I added this mod.
I also added thin flat washers under the thumb nuts so they wouldn't bite into the plastic housing, but they make the nuts a bit harder to adjust. These small thumb nuts work OK, but I plan to make larger ones on my mini-lathe for my big fingers. |
|
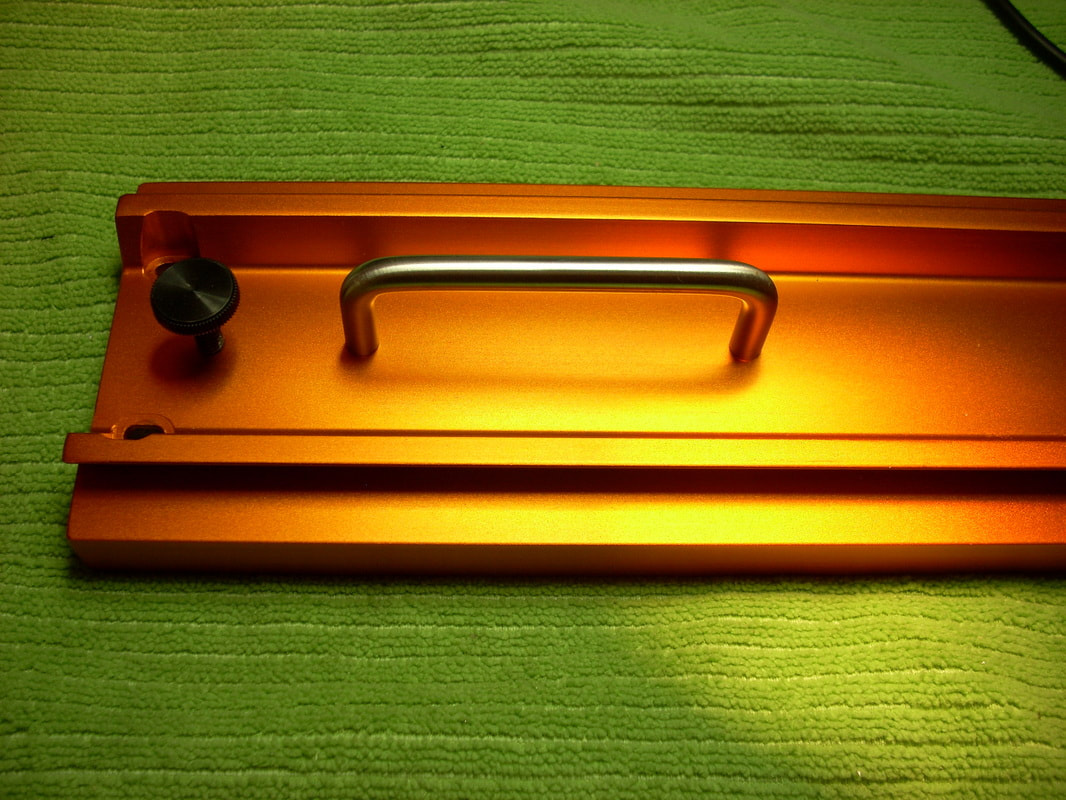
I also added a handle to the front of the dovetail bar to help when mounting and dismounting the scope. I've almost had an oops moment twice while taking the scope off the mount so an extra hand hold is useful.
I thought about adding grab bars to the sides of the scope but I don't have much confidence in the strength of the thin aluminum front casting. |
|
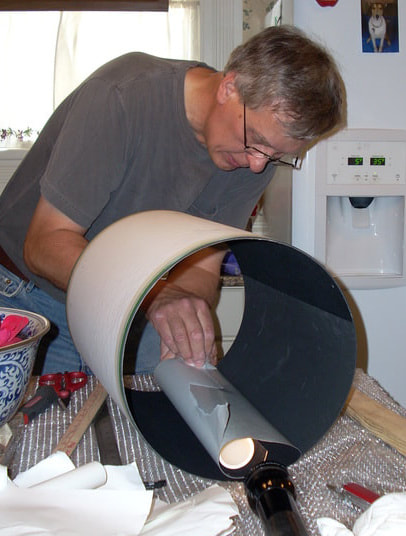
Flocking the new carbon fiber tube.The flocking paper came from Scope Stuff. It's easy to tell what's been flocked and what hasn't - the unflocked area is the tube's original flat black paint.
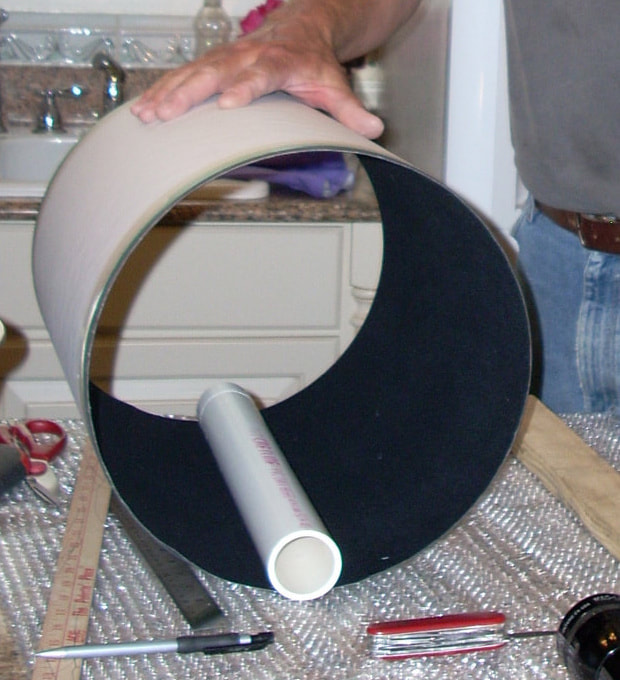
I pulled the paper backing from the flocking a little at a time as I unrolled it and then used a short length of PVC pipe to roll it down. By carefully rolling the flocking I didn't stretch it, or leave bubbles, or need to cut it into small sections. The flocking is wider than the tube so I trimmed the excess after rolling it down. |
|
To finish the seam I lightly rolled the flocking back over itself at the starting edge, laid a straight edge on the doubled flocking and gently cut a seam through both pieces with a razor cutter. I then pulled off both cut edges and rolled down the finished seam.
|
|
The assembled scope with flocking. The bright spots on the flocking are reflections of my flash off the primary mirror. The tube was so dark inside with the flocking I could not get a sharp hand-held photo without the flash. You can also see the finished seam in the flocking.
I used a 3M peel off sticky paper lint brush to clean up any loose fibers on the flocking before reassembling the scope |
|
The carbon tube was a discounted, slightly blemished item from Public Missiles - but the blemish is under the bottom where the dovetail mounts and is not visible. I call that a win-win.
The only issue I have with the carbon fiber tube is that it is slightly smaller in outside diameter than the metal tube and is not a tight fit in the rear and front castings. |
|
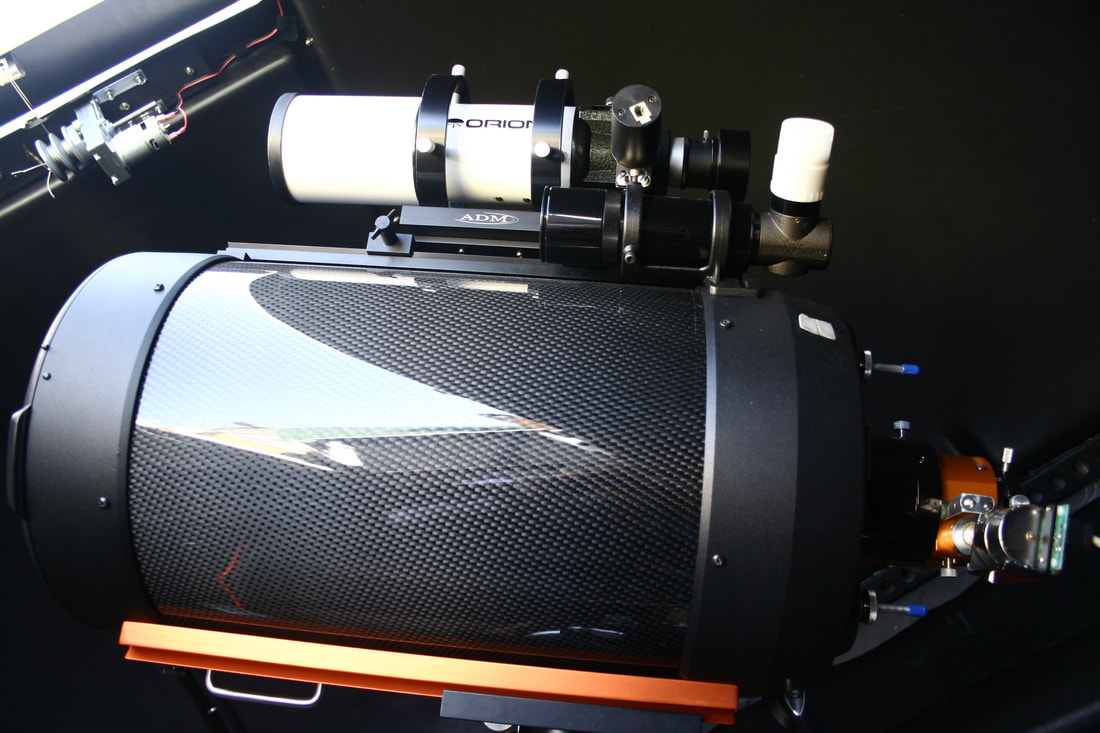
Remounted in the obs, ready to be collimated and tested. Initial testing revealed a couple of minor issues:
The first issue I discovered is that because the carbon fiber tube is a loose fit in the aluminum castings it allows air to leak in around the castings when cooling the tube with the fans and I suppose it could also allow dust to get into the tube. To fix the air leaks I disassembled the scope and placed a half-inch wide strip of self-adhesive flocking around the outside of the tube at each end. This provided a snug fit into the aluminum castings. Now I can feel the air exhausting out the vents I installed. |
The second problem I encountered was mirror flop, a common issue with SCTs where the mirror is designed to ride on the central baffle. Originally I used a light synthetic grease to relube the central baffle tube, which was not thick enough and I had a large amount of mirror flop when reversing focus directions. So, when I disassembled the scope to fix the the air leak around the carbon fiber tube, I also replaced the light grease with Dow Corning high vacuum grease. This thick vacuum grease works much better and there is very little mirror flop now. I still see a small amount when reversing focus, but the image doesn't jump completely out of the FOV like before.
Now I can bring the scope roughly to focus in the center of the attached moonlight focuser's range and then lock down the primary mirror to eliminate mirror movement. Then the motorized Moonlight focuser can fine focus without having to worry about image shift.
Now I can bring the scope roughly to focus in the center of the attached moonlight focuser's range and then lock down the primary mirror to eliminate mirror movement. Then the motorized Moonlight focuser can fine focus without having to worry about image shift.
Last edited 6/8/2021
