
Updating the 1952 Chevy Pickup
The original build of my '52 Chevy truck was done about 20 to 25 years ago, so there's a few things in need of attention now. Plus there's a couple of things I want to change.
|
The first thing fixed in the cab was the stuck defrost cable. It was cleaned and the main reason it was stuck that is it wasn't assembled correctly. It was also relocated from beside the foot brake release over to the dash hole originally meant for the Choke cable, which was unused and plugged with a bolt and dress nut.
I also ordered a new cigarette lighter socket and installed it back in its original place in the dash. I don't smoke but I want a 12-volt accessory outlet. |

|
|
The heater fan was intermittent which turned out to be bad contacts inside the fan speed switch. It's a three position switch with wirewound resistors between contacts. It was mounted in the dash hole for the cigarette lighter but I moved the new replacement switch to the bottom of the dash because of reinstalling the lighter socket. The new switch came with a mounting bracket for this purpose.
After hooking up the new switch and testing it, I now know why the original switch was toast. It appears the fan motor is an original 6-volt unit, which explains why the wirewound resistor on the back of the new 12-volt switch was glowing like a toaster element.
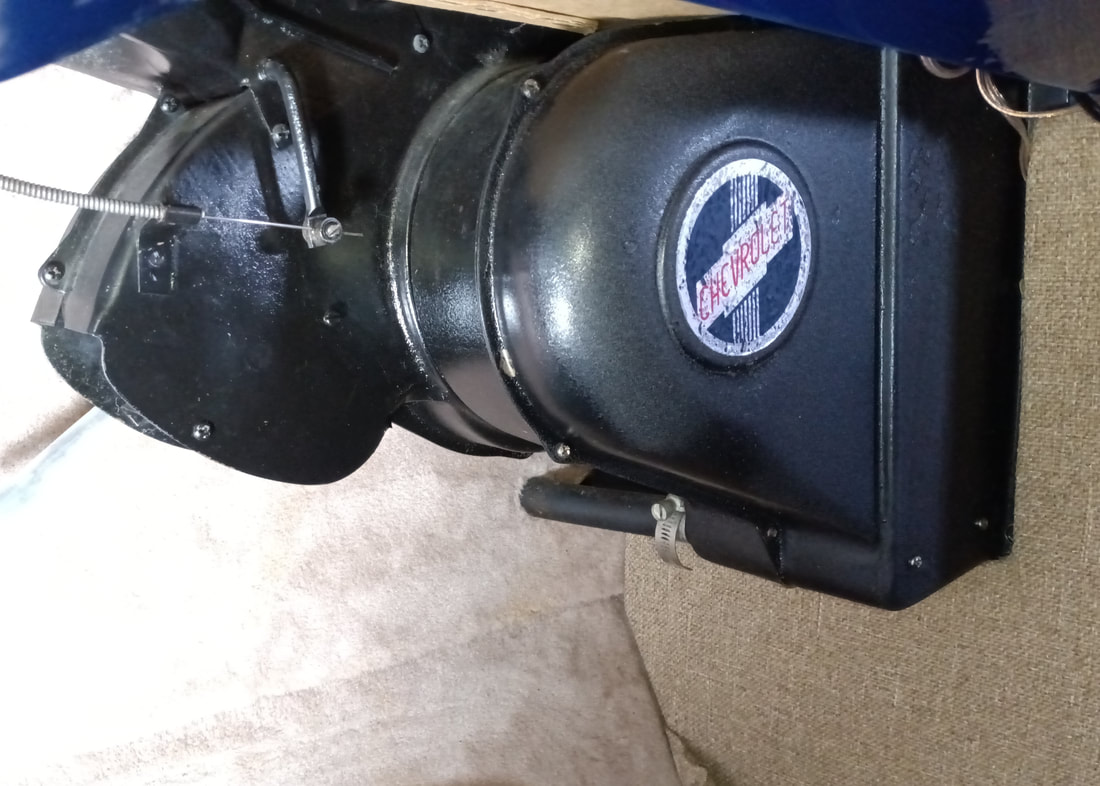
The best way to fix this would be to leave the 12-volt switch installed and replace the 6-volt motor with a 12-volt one. If I kept the 6-volt motor and changed the switch to 6 volts, I'd still have to add a whopping big power resistor in series to drop the voltage down. It would better to just install the correct motor, but turns out it's a major job to just get the heater out of the truck.
After hooking up the new switch and testing it, I now know why the original switch was toast. It appears the fan motor is an original 6-volt unit, which explains why the wirewound resistor on the back of the new 12-volt switch was glowing like a toaster element.
The best way to fix this would be to leave the 12-volt switch installed and replace the 6-volt motor with a 12-volt one. If I kept the 6-volt motor and changed the switch to 6 volts, I'd still have to add a whopping big power resistor in series to drop the voltage down. It would better to just install the correct motor, but turns out it's a major job to just get the heater out of the truck.
|
Once the heater is out, changing the motor is fairly simple, but actually getting it out is neither easy nor simple because of the aluminum plate on the firewall. There's just no easy way to get that plate off now. From pictures I've seen of a disassembled Harrison heater the firewall mounting bracket is spot welded to the heater case and there is a stud on each side of this bracket that goes through the firewall. So the nuts on the studs are under the aluminum plate where I can't get at them. I may have to cut the heater bracket to get it out. Nothing can ever just be easy.
|
|
Even if I don't get the heater out I will still install a heat control valve in the heater hose line so I can adjust the temperature and be able to shut off the heat in the summer when using the fan just for fresh air.
|
|
I wanted to fix the Kenwood radio's problems just to get the truck ready for installing a new radio, so I pulled the driver door trim to fix the silent speaker. The problem was the speaker cable push-on connectors which had been jarred loose from the speaker terminals. These speakers are only rated at about 20-watts RMS so they may be too small for the new radio, but I'll try them first before replacing them.
Also very small gauge speaker wire was used which was spliced in three places, so it was replaced as well, and I installed grommets in the holes through the metal body where the cable passes through. I updated the wiring on the passenger side, too. |
Next I looked at the radios poor reception. It uses a hidden amplified antenna under the metal dash, which is the worst possible place for it, so it was reinstalled on the edge of the passenger-side windshield, with the cable run behind the rubber door gasket. This greatly improved signal reception on both AM and FM, but AM still has a problem with alternator hash.
The running engine overwhelms the AM band with noise. The radio's 12-volt power goes through a noise filter, but the 12-volts to the amplified antenna was tied directly to the unfiltered power. Just moving the antenna power lead to the output of the noise filter instantly solved the problem. So now the Kenwood is working and I'm just waiting for the new radio I ordered to arrive.
The running engine overwhelms the AM band with noise. The radio's 12-volt power goes through a noise filter, but the 12-volts to the amplified antenna was tied directly to the unfiltered power. Just moving the antenna power lead to the output of the noise filter instantly solved the problem. So now the Kenwood is working and I'm just waiting for the new radio I ordered to arrive.
|
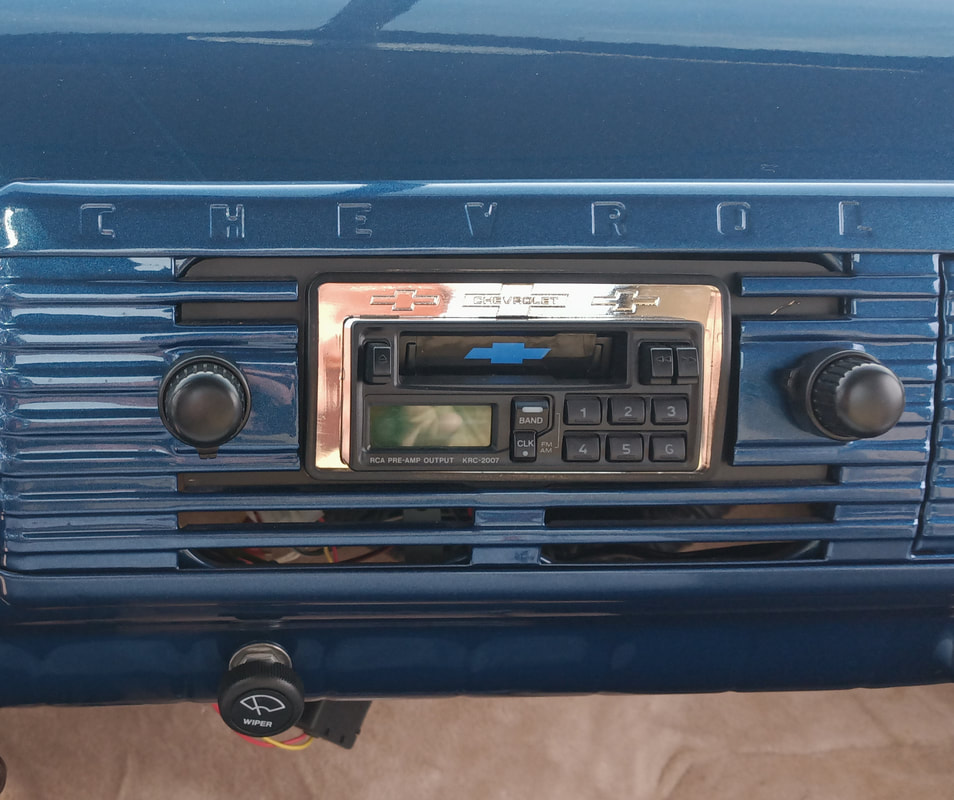
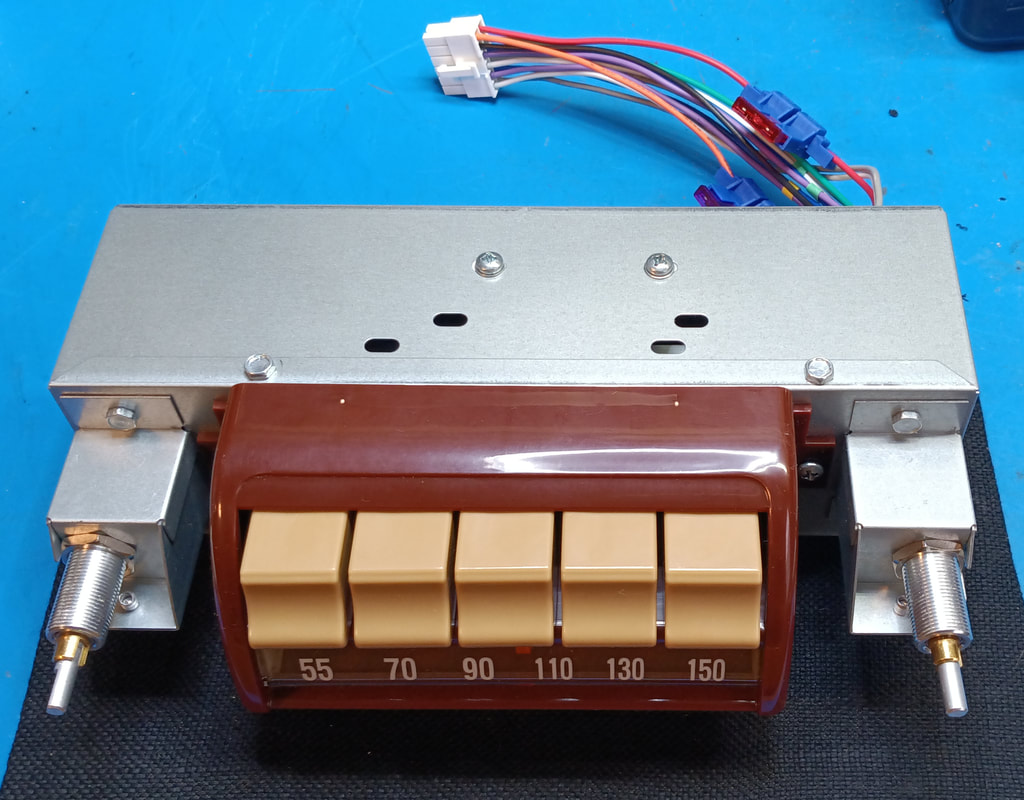
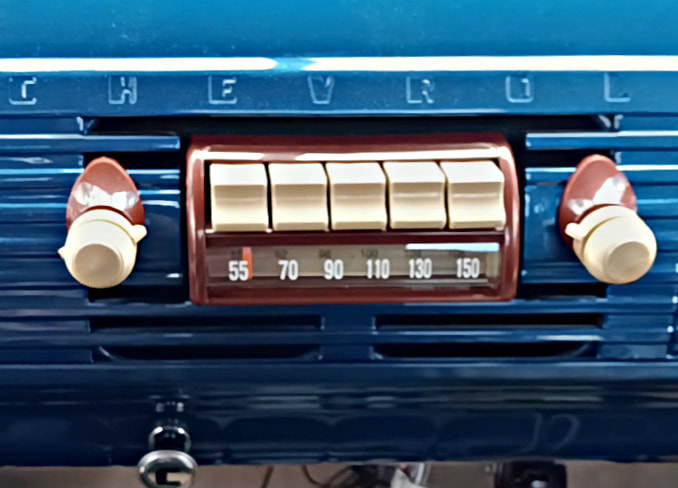
Being an antique radio nut, the most expensive interior update I'm doing is replacing the not-so-original looking Kenwood radio/cassette deck with a reproduction 1950's OEM-style radio, but updated with AM/FM/Bluetooth. It also has an auxillary input which I'll connect to a portable CD player.
The radio is manufactured by Antique Automobile Radio Inc. at radiosforoldcars.com, but I purchased it on sale at vintageautoradio.com. It's not cheap, and I have to wait several months to get it because there's a backlog. |
|
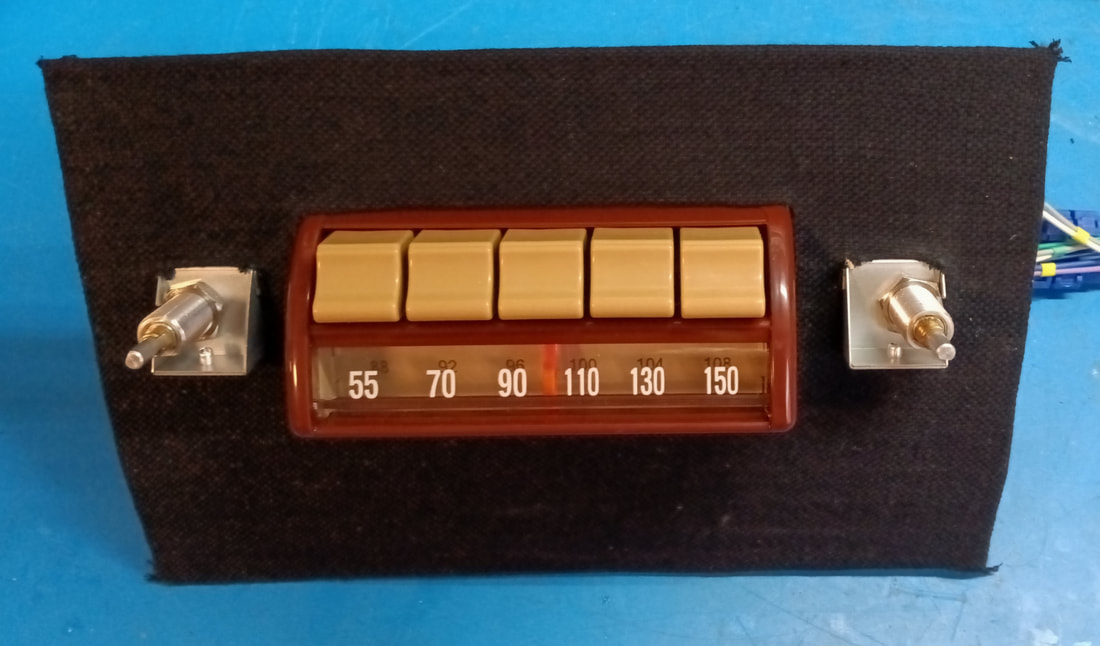
It took three months, but the radio finally arrived in April. I pulled the old Kenwood radio and it's wiring harness and installed the new radio's plug-in harness. I also made a custom "speaker grille" using black cloth over heavy cardboard to mask the grill openings around the new set.
|
|
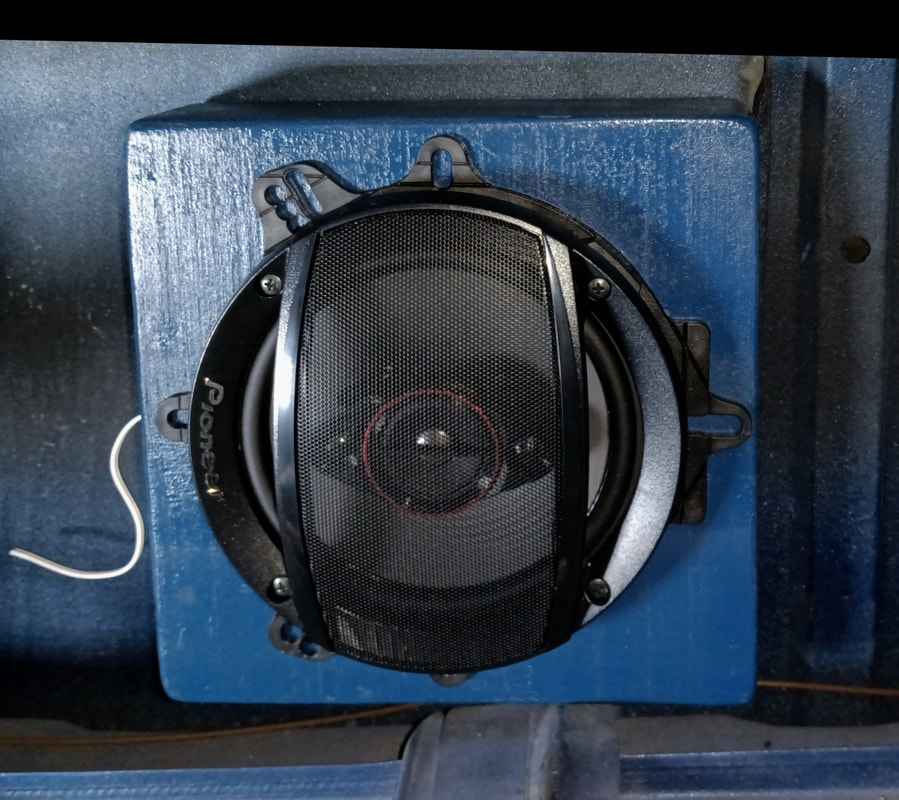
I also added a set of 6.5" Pioneer coaxial speakers rated for 70-watts RMS as the "rear" speakers behind the bench seat. I made a set of wooden boxes to mount them in, painted the boxes blue to match the truck, and attached them with velcro to the back wall above the gas tank. I just screwed the speaker mounting rings on the front of the boxes because they aren't really visible once the seat is reinstalled, so no need to get too fancy.
The first test of the new radio confirmed that the front speakers wattage rating is not enough to handle this radio's output, so they were replaced with a set of 5-1/4” Pioneers rated for 50-watts RMS. |
|
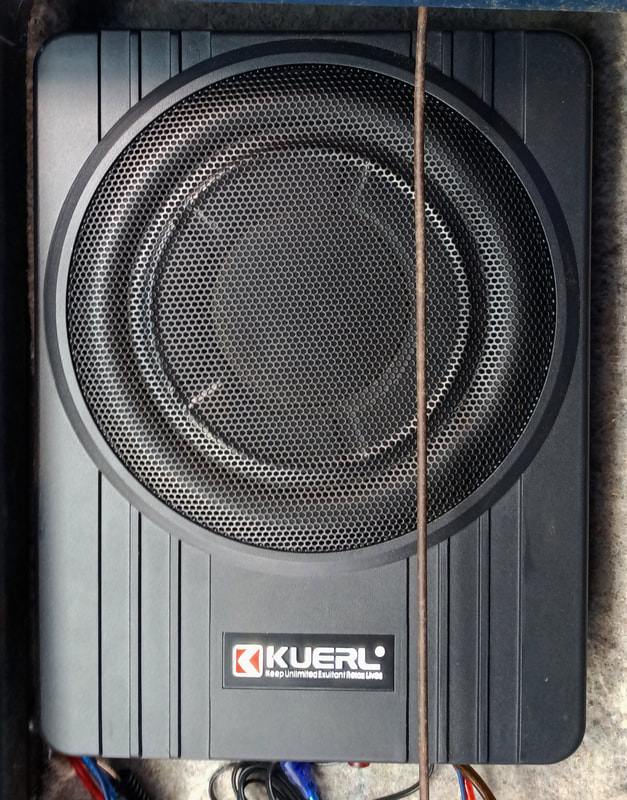
I'm also adding a Kuerl 10" active subwoofer under the seat. There's only about 5" under there so it has to be one of the thin, under-the-seat setups. It's not an expensive unit, as a matter of fact, it's about the cheapest 10" under-the-seat active sub I could find, but it's more than adequate for my 'ol ears. I am also a little surprised that the case is aluminum and not plastic at such an affordable price.
|
|
After all the waiting, work, and time I spent installing the audio system, I immediately ran into issues with the new radio. It just had to be. First, the amplified antenna is not working well with the set. I can hear self oscillation "birdies" in the background that disappear if I connect a non-amplified antenna. This might possibly be the lack of a power ground right at the active antenna's amplifier circuitry. Right now the power ground runs through the coax shield back to the radio before actually being grounded. I may try adding a short wire for a power ground right at the antenna amp to see if that helps. Otherwise I'll need a new antenna.
|
Next there seems to be an issue with the volume control. As I turn up the volume the set will quite suddenly go from a moderate volume to full blast distortion. Possibly a broken carbon wafer in the control or something is out-of-whack in the audio amplifier. So, after only a day or two in the truck for testing, it's already on its way back to the factory for repair. Auugghhh!!! as Charlie Brown would say.
|
|
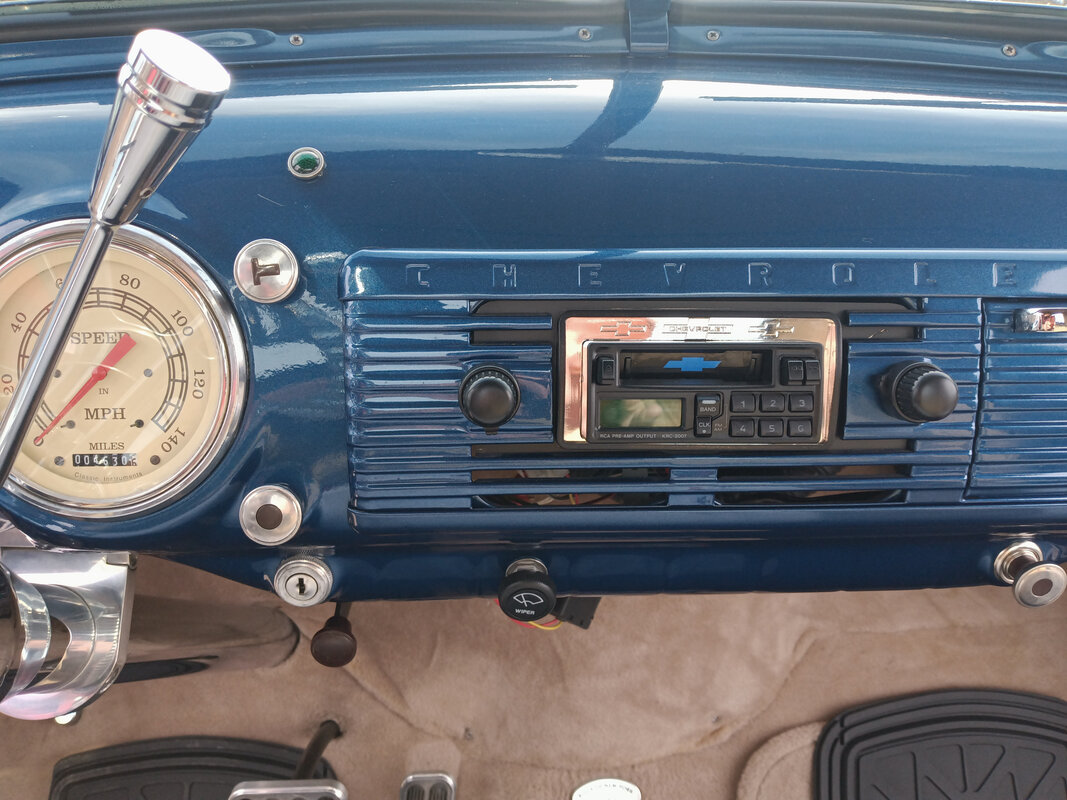
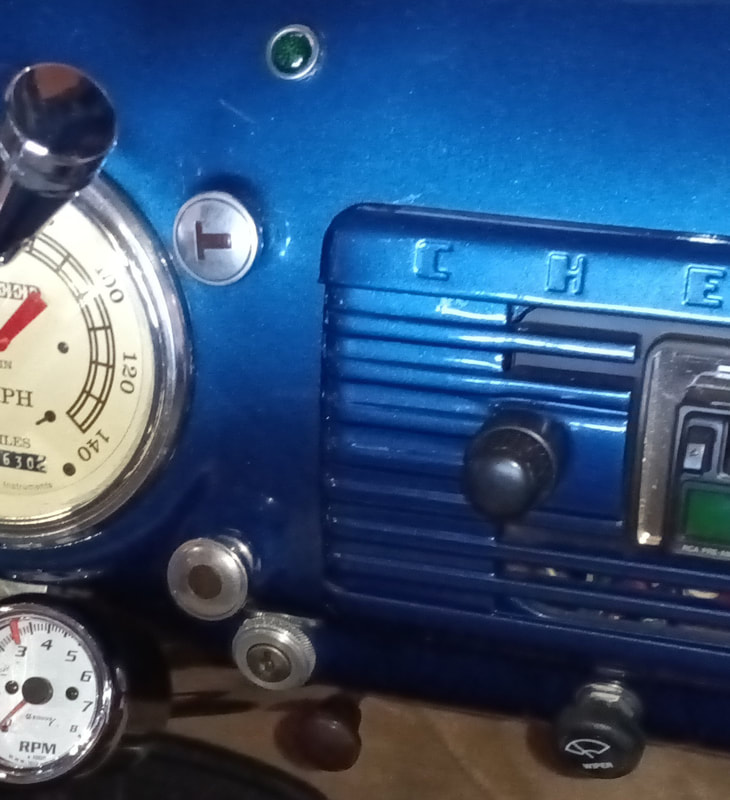
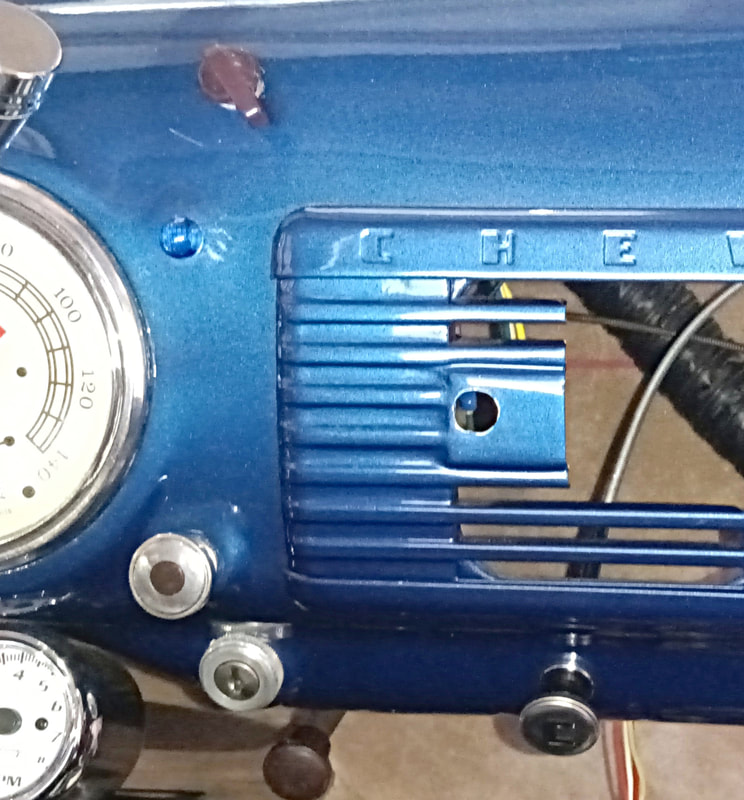
While I had the radio out I took advantage of the easy access to the inside of the dash to move a few things around.
In this build I didn't like the location of the wiper switch, which was mounted in a hole at the bottom of the dash and had a black, modern-looking knob. Also, a green high beam indicator was located in a hole at the top of the dash. And the Throttle cable hole had been plugged with a knob and a screw, probably because of a cluster gauge mounting bracket behind the dash that is very close to it, leaving little room for a control.
In this build I didn't like the location of the wiper switch, which was mounted in a hole at the bottom of the dash and had a black, modern-looking knob. Also, a green high beam indicator was located in a hole at the top of the dash. And the Throttle cable hole had been plugged with a knob and a screw, probably because of a cluster gauge mounting bracket behind the dash that is very close to it, leaving little room for a control.
I moved the wiper switch to the topmost hole and change its knob to an original style. This location is not actually the original wiper control hole, which was a couple of inches higher up and was deleted, but it still makes the wiper control look more like factory.
The original style wiper knob was not originally designed as a control switch knob, so I adapted it by drilling it out, installing a brass insert, and adding a set screw.
Next the High Beam indicator lamp was moved down to the Throttle cable hole, it's small enough to fit, and I also changed it from green to blue.
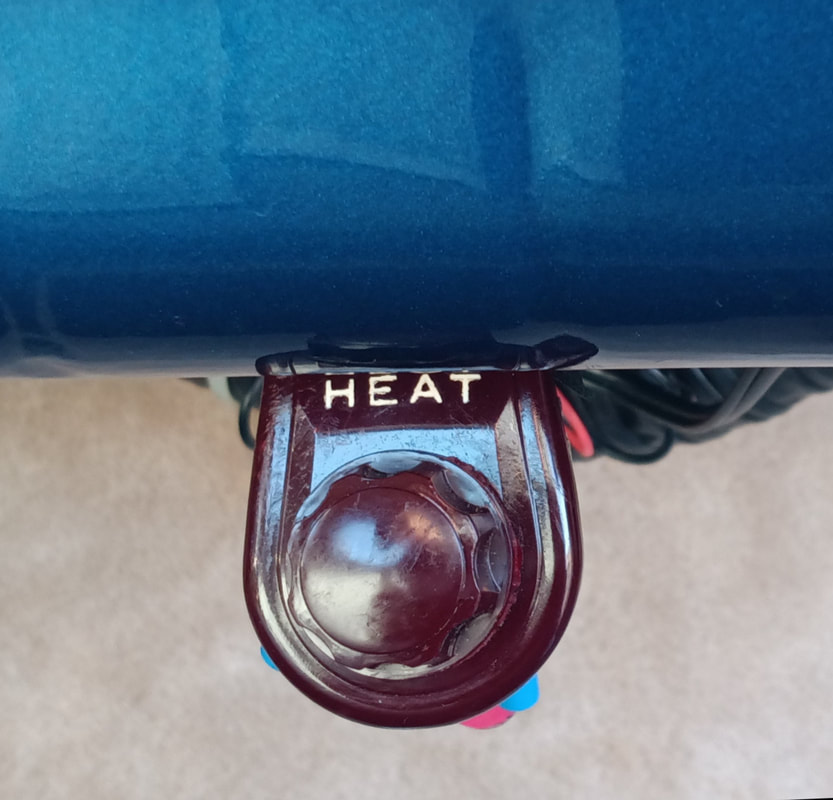
Finally, the control cable to the new heat control valve for the heater was installed in the hole on the bottom of the dash.
The original style wiper knob was not originally designed as a control switch knob, so I adapted it by drilling it out, installing a brass insert, and adding a set screw.
Next the High Beam indicator lamp was moved down to the Throttle cable hole, it's small enough to fit, and I also changed it from green to blue.
Finally, the control cable to the new heat control valve for the heater was installed in the hole on the bottom of the dash.
|
|
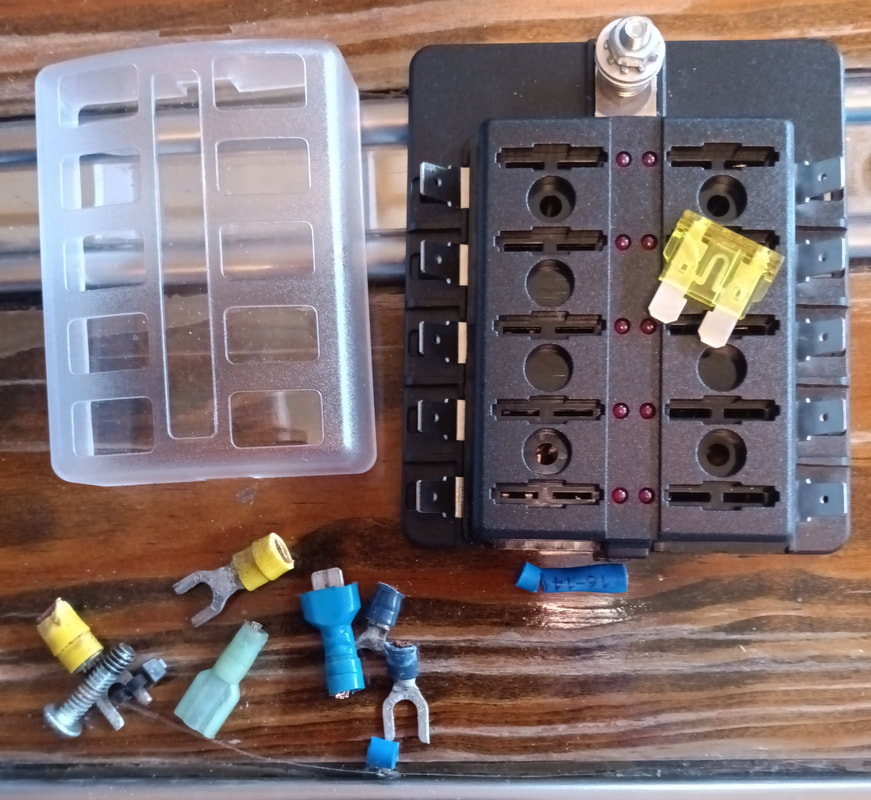
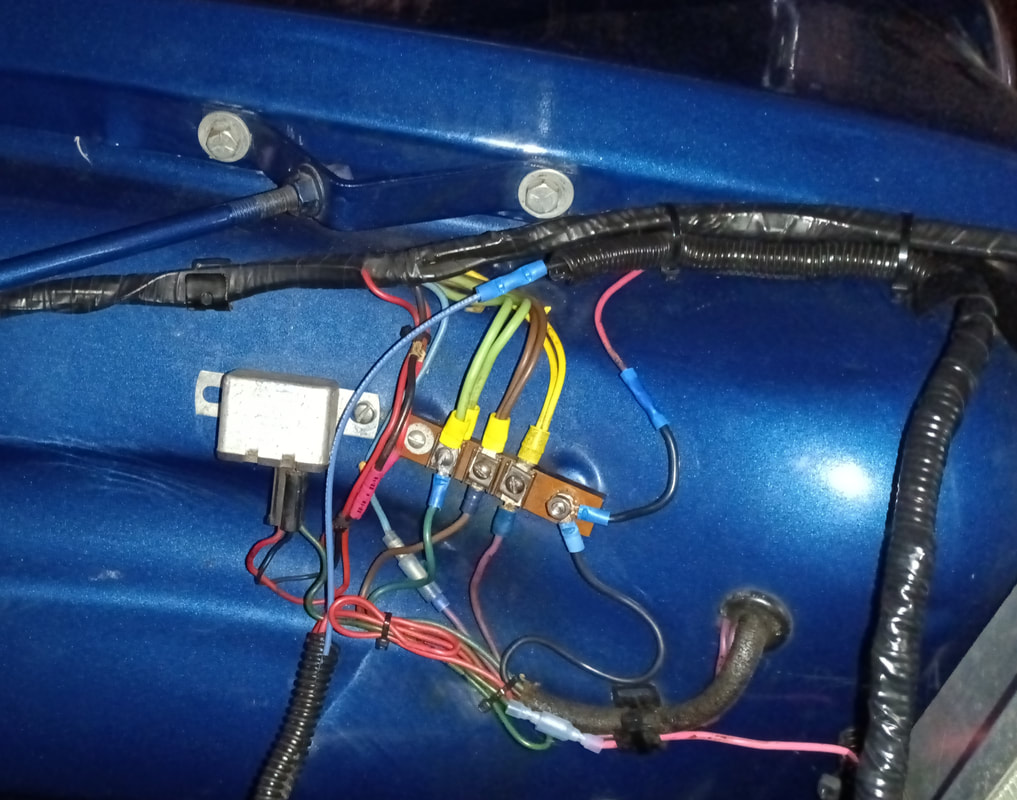
An inspection of the electrical wiring exposed a few issues. There were a number of poorly crimped or broken terminals and I was able to pull wires right out of some of them. These were all replaced and I also added ground studs on both inner fenders because there were several ground wires haphazardly screwed down here and there.
I also purchased a small, modern 10-fuse ATC-style fuse block to replace the original 5-fuse strip that used the old style 3AG glass fuses. I needed a few more fuses and this seemed the best way to get them. The hardest part of the install was just drilling a couple of mounting holes.
I also purchased a small, modern 10-fuse ATC-style fuse block to replace the original 5-fuse strip that used the old style 3AG glass fuses. I needed a few more fuses and this seemed the best way to get them. The hardest part of the install was just drilling a couple of mounting holes.

|
The instrument cluster doesn't have a tachometer so I added a 2.5" tach on the side of the steering column, under the speedometer. It's out of the way but still easily visible. Installation was pretty simple, the electronic ignition distributor cap has a spade terminal for connecting the tach, and the other connections are simply 12-volts, ground, and the backlight.
|
|
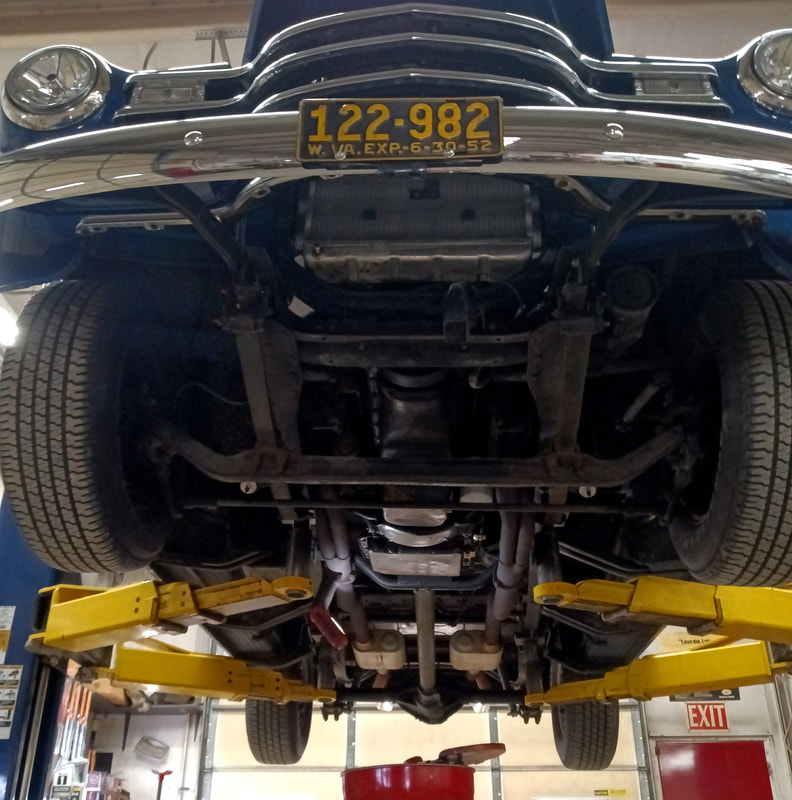
The truck was scheduled for service with a local mechanic who also builds race cars and has restored vintage vehicles. Since I don't know the last time any service work was done, if ever since the rebuild, the truck was completely checked out and the fluids and filters changed in the engine, transmission and rear differential. It was also tuned up, greased, and got new shocks front and rear.
He only found a couple of issues; the transmission pan bolts had been over-torqued which dimpled the pan around the bolt heads, preventing the new gasket from sealing properly, and the Quadrajet 4-barrel carburator has a broken internal spring that's messing with its performance. Although the broken carburator spring could be replaced, the whole carb really needs rebuilt, but for about a hundred bucks more than a rebuilt carb, I bought a new Quadrajet carburator that also has an electric choke. |
I also see a bit of surface rust on the front axle and springs that I'll clean and repaint as well. And I found a broken weld on a muffler hanger that will need rewelded.
|
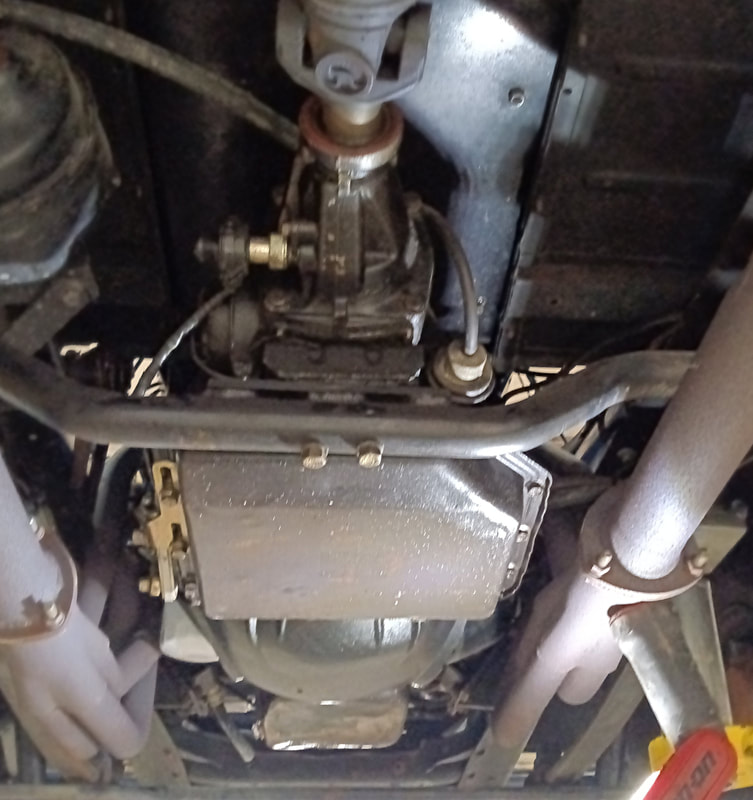
A new replacement transmission pan wasn't available and would have to be ordered, so the dimpled pan holes were peened flat again and it was reinstalled. It actually flattened out very nicely, but if it shows any tendency to leak it will get replaced.
|
|
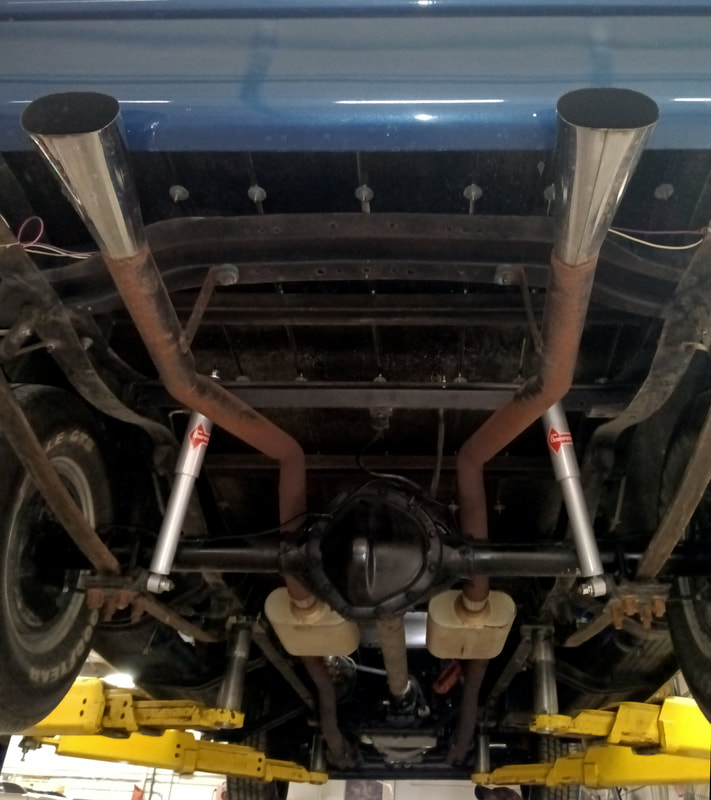
Even though the truck only has about 4500 miles on it since the restoration, after sitting for more than two decades the old "gas charged" shocks are as dead as doornails.
The front shocks, which are still basically the same size as OEM, are readily available. They also crossed right over to KYB Excel-G shocks, which are what I'll use. That takes care of the front, but the rear shocks, which are not the same as OEM because the upper mount points were moved, are a bit of a problem. The Monroe shocks on the rear are no longer made, and are not listed in any Monroe catalog or cross reference. On top of that, after taking measurements of both the truck and the shocks, I discovered the shock dimensions don't match up with the truck measurements. They are actually too short, and the piston in the shocks is only about an inch from the top of the cylinder with the truck sitting level at ride height. |
But after searching through page after page of online shock specs, I finally came up with a set of properly sized KYB Gas-a-just shocks. The ride home from the mechanic was a whole lot smoother than the ride in.
|
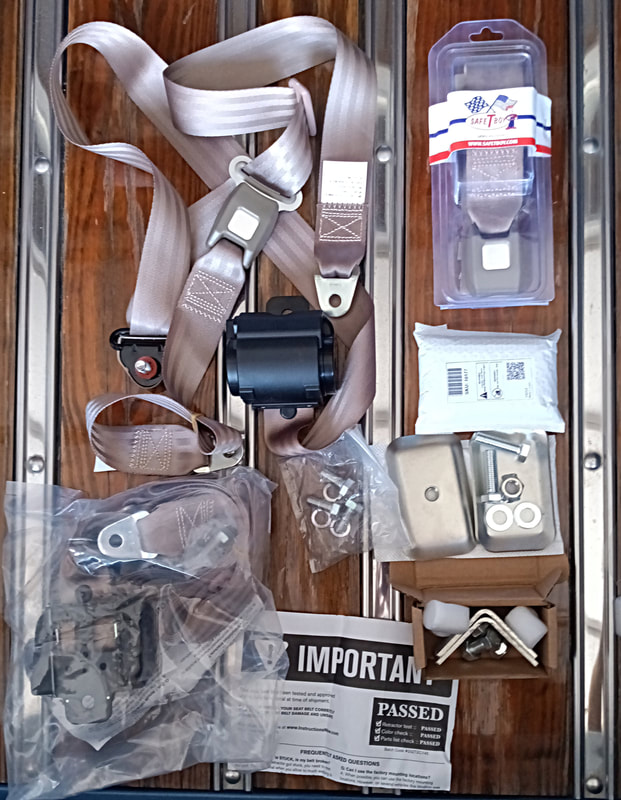
Since the truck does not have seatbelts, I ordered a kit from Johnny Law Motors Online with 3-point belts plus a center lap belt, and it includes mounting hardware. It was advertised as a kit for a 1947-54 Chevy truck, but as I discovered while installing it, the hardware kit is generic and does not have everything needed to complete the install. And the small black button on the belt, that keeps it from going too far into the retractor, hits the 3-point shoulder mount as its pulled out and has to be pulled through the mount in order to buckle the belt. To allow the button to pass through the mount I had to modify the mount's plastic cover, so this kit is not ideal for a 3100 truck, but I made it work.
There are no shoulder anchor plates included to install the 3-point belts, and some of the hardware is not 7/16"-20 fine thread as used in many vehicles, but is metric I think. The missing shoulder plates have to have the 7/16"-20 thread nut plates in order to match the included shouldered bolts for the upper mount. The instructions are pretty generic, too. Calling customer service didn't help much either and I finally went online and ordered the missing shoulder plates and some extra hardware from another source. |

|
I had to remove part of the headliner to get in behind the inner cab wall to install the anchor plates for the shoulder straps. Pulling the liner was easy to do and only required removing about ten screws from the back edge, and then slipping the liner section out of the metal groove at the joint.
|
|
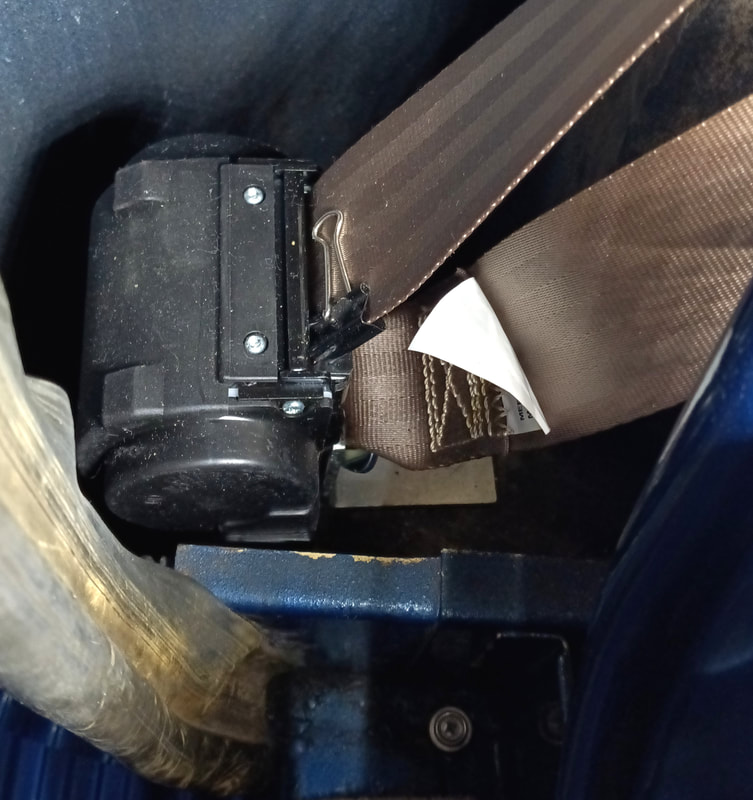
Mounting the retractors in the cab corners is a tight fit, but doable. In my truck there are custom interior panels in the corners which I had to remove and will need to trim to fit back in around the retractors.
|
|
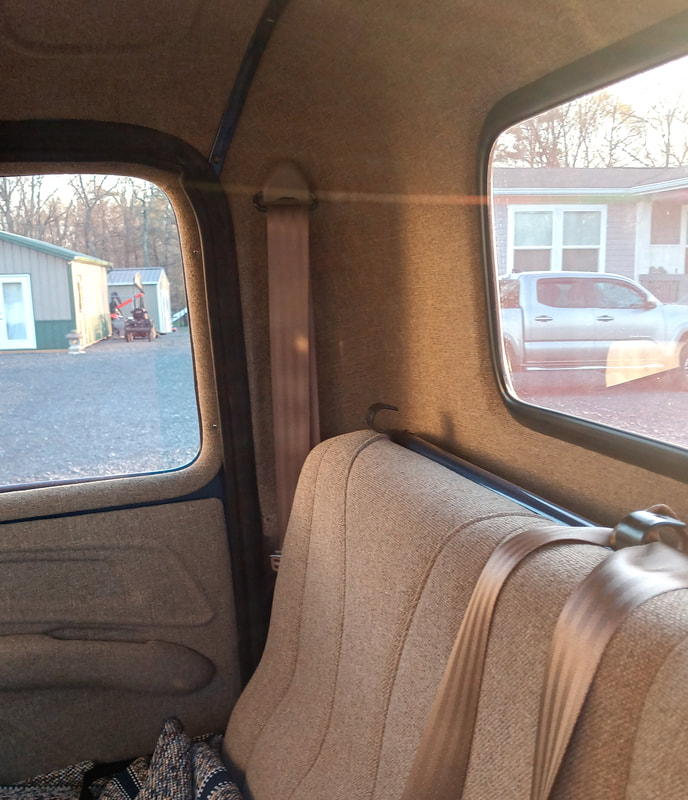
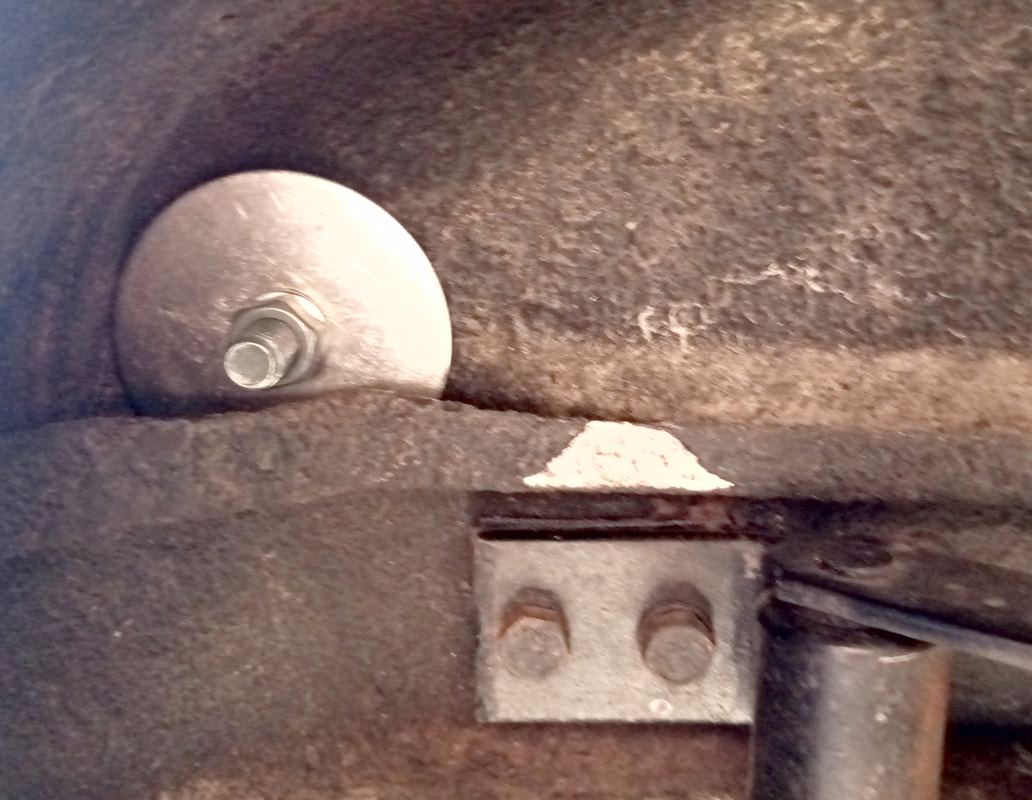
Installing the shoulder mounting points was not too complicated. The hardest part was deciding exactly where to drill the mounting hole. I also had to keep the hole close enough to the edge of the inner wall so I could hold the nut plate while installing the bolt.
|
|
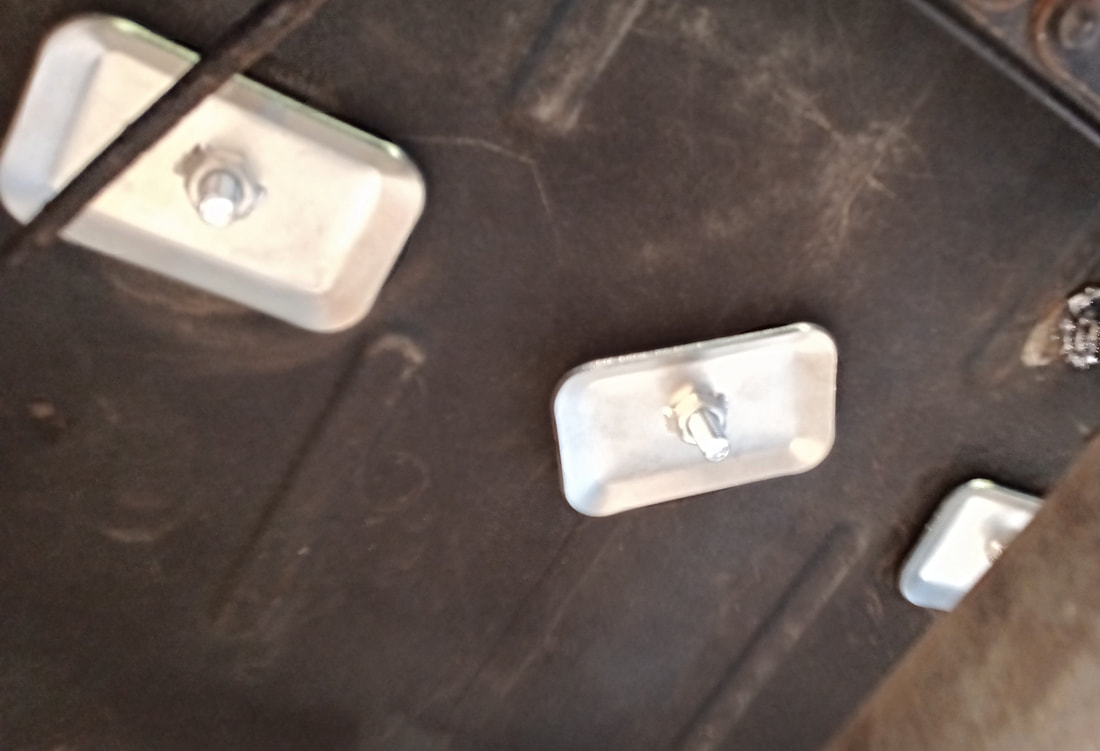
The nut plates that are provided in the kit go on the underside of the floor and have mating bolts and split lock washers in the kit to anchor the belts to the floor.
|
|
To install the retractor mounts in the cab corners I used heavy duty 3" fender washers under the floor. Fender washers were not included in the kit so I had to order some online. The provided nut plates wouldn't fit because the hole is too close to the wall, plus the cab mounts are in the way.
|
|
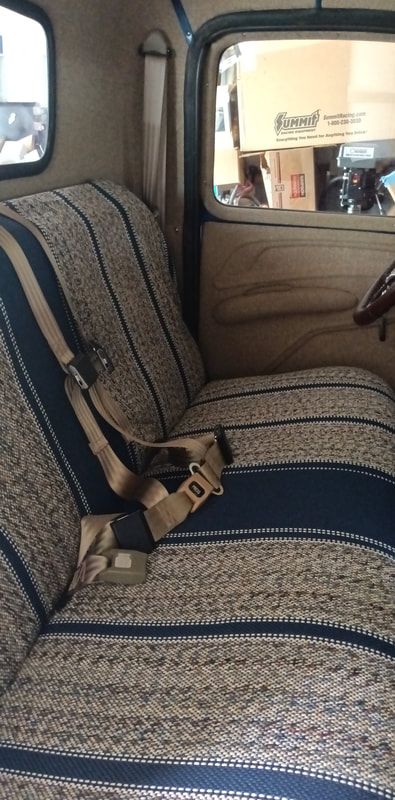
I decided having just a lap belt in the center is not sufficient protection to keep my grandson from hitting his head on the metal dash in case of an accident, so I ordered a 4-point Y-style harness for the center position. It's from Wesco Performance and will be much safer than just a lap belt, but I need to add another anchor point in the floor behind the seat to mount its shoulder straps.
As can be seen, the bench seat now has a seat cover. While I'd rather not use a seat cover, I consider it a necessity to protect the seat fabric. This is the best I could find in a ready-made cover that didn't cost a fortune, and is the "Universal" cover from West Coast Auto on Amazon. West Coast also advertises one called the "Fremont Baja", which which did not fit my seat. The Fremont is way too small and the Universal is just a bit too big, but I made it work. The biggest issue I had adding a seat cover was caused by the 4-point harness. It only has the single buckle on the lap belt, so to install both the harness and the cover I had to feed the harness through the cover before bolting it to the floor. To get the seat cover back off again I'd have to unbolt the harness, or cut the cover off. |
Page created 2/6/2024
Last updated 4/20/2024
Last updated 4/20/2024
